Events such as FarCon and PizzaDAO’s 100-city Global Pizza Party are implementing onchain ticketing today. In this guide, we’ll show you the basics of how to set up an onchain ticketing system for an event, from setup through launch through the physical check-in of attendees the day of the event itself.
This guide is organized into the following sections:
- Onchain ticketing setup
- Creating a landing page for your event
- Approving RSVPs
- Distributing tickets
- Selling tickets on your website
- Collecting attendee information
- Listing your attendees
- Attendee check-in at the event
- Other NFT ticketing capabilities
Onchain ticketing setup
To begin, you’ll need to set up the smart contract for your tickets. This smart contract will mint the tickets for your attendees, handle payments, and is the blockchain mission-control center for your event. EVENTS by Unlock Labs provides the easiest interface to deploy your NFT ticketing smart contract, or “lock.” But before we do that, let’s get the things we need all in place.
Gathering all your event details
There are a few considerations in setting up your smart contract (which we call a “lock”). They are:
- What’s the name of your event?
- How many tickets do you want to make available? For example, if this is for a physical event, what’s the maximum capacity of the venue?
- If you’re selling tickets, at what price, and in which currency? Note: You can make them free, too.
- Do you want your tickets to be transferrable after they are minted, or do you want them to be non-transferrable (e.g. “soulbound”)?
- Last but not least, is your ticket visual? That is, does your ticket have artwork or a design that you want attendees to see? If so, have that artwork file available.
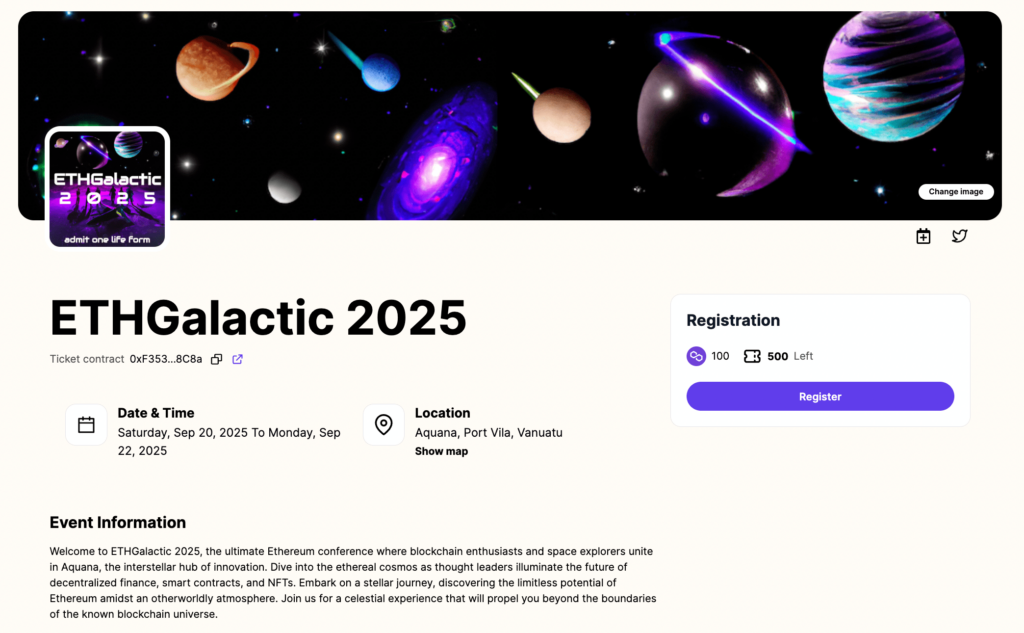
For this example, we’re going to set up NFT ticketing for an upcoming conference. Looking at the checklist above, here’s what we will be setting up.
- Name of the event: ETHGalactic 2025
- How many tickets will be available: 500
- Ticket price: 100 MATIC
- Are they transferrable? Yes
Great! We also have some sweet art for the ticket as well.

That’s some sweet art.
Setting up the event
We have those items answered! Now, let’s walk through the setup of a smart contract and onchain ticketing experience for the event.
Sometimes a video is worth a thousand words. Here it is. In about two minutes, we’ll set up the smart contract for the ticket for this event.
And with that, you’ve set up the smart contract for your tickets! Now, folks need to be able to mint and purchase them.
Creating a landing page for your event
When you set up ticketing for a conference, meetup, or side event using EVENTS by Unlock Labs, a landing page for your event is automatically set up for you. The landing page includes the event details, location, timing, and a registration link for registration.
If the automatically-generated landing page meets your needs, congrats! You are done. You can share that landing page link with your prospective attendees and on your social channels, and start getting signups!
Approving RSVPs
For free events with a high demand (for example, a popular free, sponsored side event at a major conference), you may wish to “approve” attendance, since you know that demand for the ticket will be greater than the supply of tickets available.
This feature is supported by the EVENTS app.
When creating your event, toggle the “attendee screening” option.
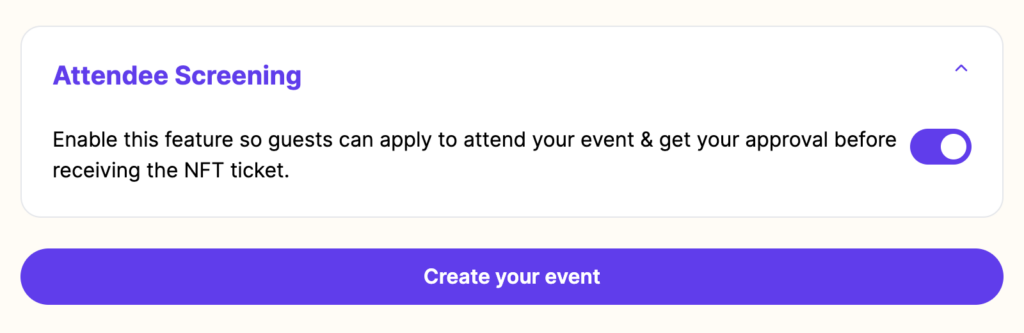
Under the hood, EVENTS is deploying a new smart contract, for which tickets can only be distributed by the event organizer. (Technically, there is a supply of “0” for “self-serve” minting.) This means that you alone can create and “airdrop” NFT tickets to the attendees your approve — attendees are not able to mint their own tickets without your approval.
When going to your event’s page, attendees will see the following message:
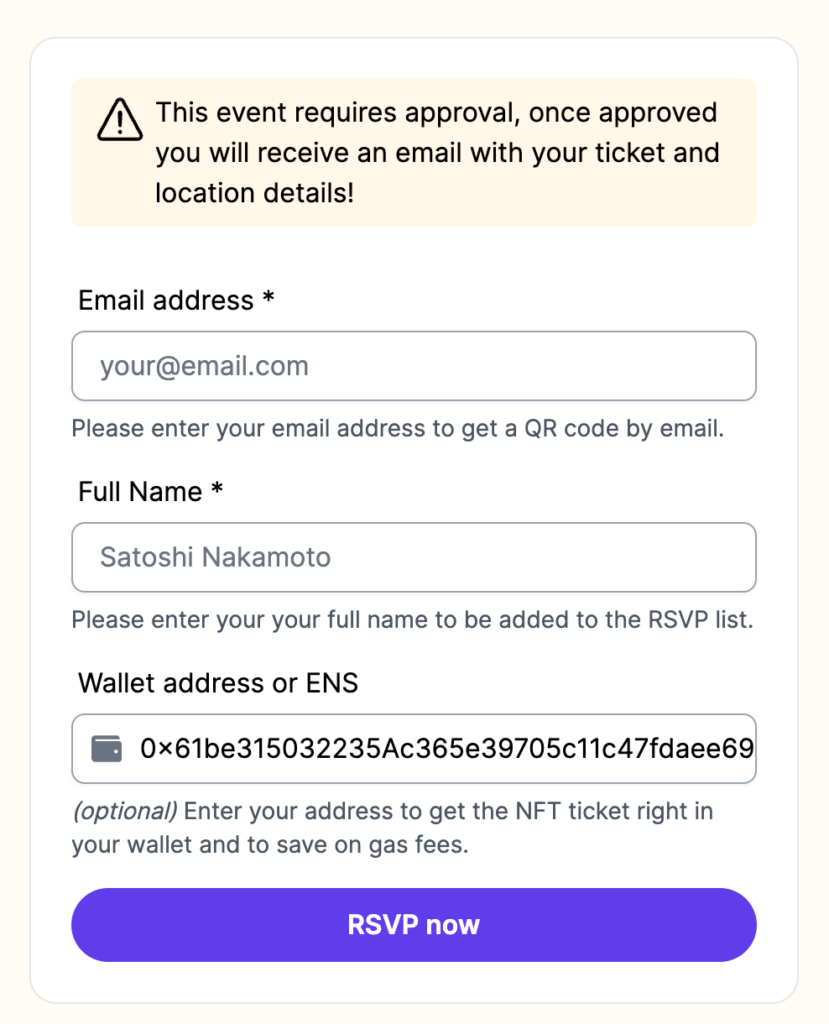
(You can also customize the fields displayed here.)
At that point, attendees can “apply” by submitting their email address, full name and, if they want, their wallet addresses. When they RSVP, they receive an email to confirm that they are on the list and will hear back from the organizers if they are approved.
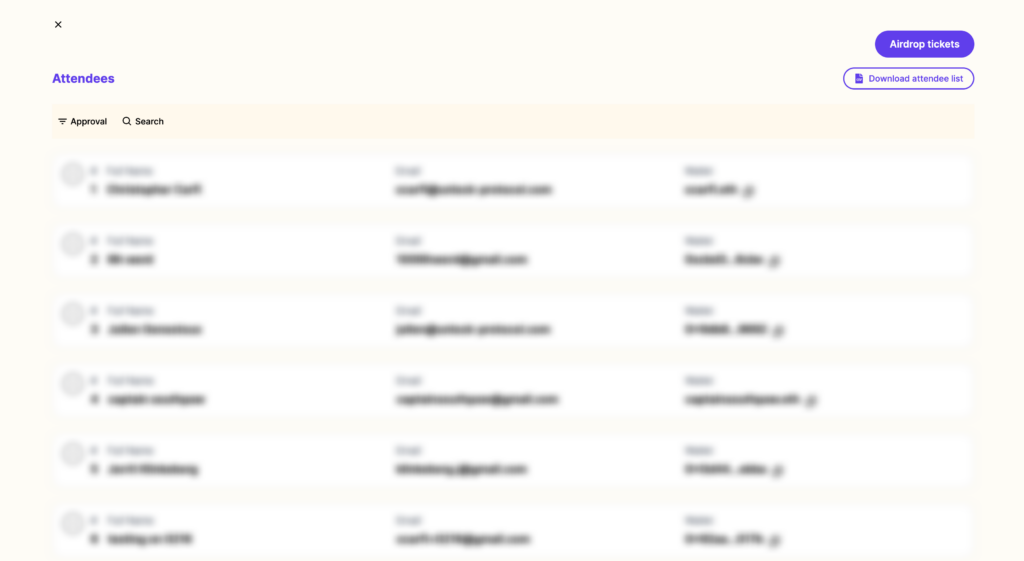
As an organizer, you can then view the list of attendees, as well as the list of people who have applied to attend. You will need to click on the word “Approval” to expand the buttons if they are are hidden.

For each of these individuals who have filled out the RSVP form, you can approve or deny them. When you approve an attendee, they will receive an email with a QR code ticket attached and the event’s details.
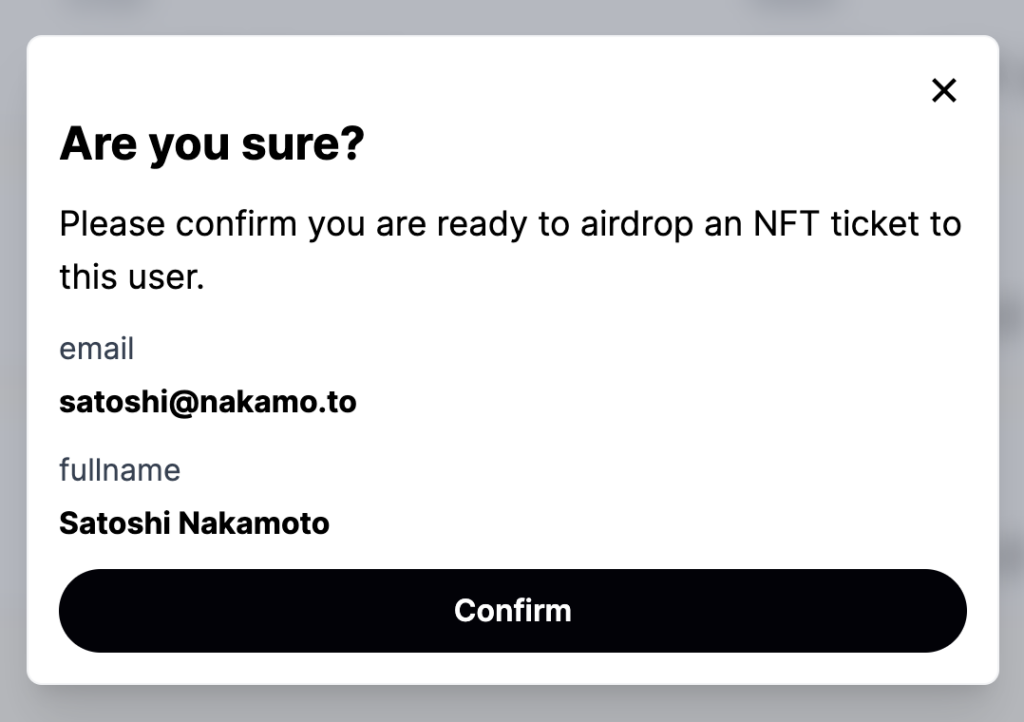
Denied users can still be approved later as well.

The RSVP feature is only available for free events.
Distributing tickets
In addition to sharing the landing page link where attendees can acquire a ticket to an event, an event organizer additionally may wish to give away (or “airdrop”) tickets for free to certain individuals. This can be done directly from your event’s landing page.
Tickets can be sent (airdropped) to a single individual, or to a larger group of recipients. You can learn more about airdrops with Unlock in the “Unlock Protocol Airdrop Guide.”
To airdrop tickets, click on the “Attendees” button when you are connected to your event page as an organizer, then click the Airdrop button.

From the Airdrop screen, you’ll be able to add either an email address or a wallet address to receive the airdrop of the ticket. Add the recipient’s information, follow the prompts, and they’ll receive a ticket.

Selling tickets on your website
Some event organizers have their own dedicated website for their event, and want to be able to collect registrations or sell tickets for their event from their own domain.
The most straightforward way to add a checkout experience where folks can purchase or claim the tickets for your event is with Unlock’s Checkout Builder.
You can copy the URL from the Checkout Builder from your lock, and attach it as the link on a button on your website.
Collecting attendee information
Most events will need to gather some attendee information (name, email address or tee-shirt size for example). For this, you can add some configuration metadata to your checkout. The Checkout Builder above helps you do that as well. Please refer to the metadata configurator for more details.
Listing all attendees
As an event organizer, you may want to list the attendees coming to your event. When logged into your event landing page as an organizer, there is an “Attendees” button in the upper right. Click it to list all your attendees.
You can also download a CSV file with all of your attendee information from this page as well.
Attendee QR code tickets
Behind the scenes, attendees receive a non-fungible token that verifies authenticity when they purchase or acquire a ticket. (Technically, this NFT is their ticket!)
To easily display their ticket at the door of the event for admission, they can show the ticket’s associated QR code.
Whenever someone receives a ticket via email, they will receive a QR code as an attachment in that email.
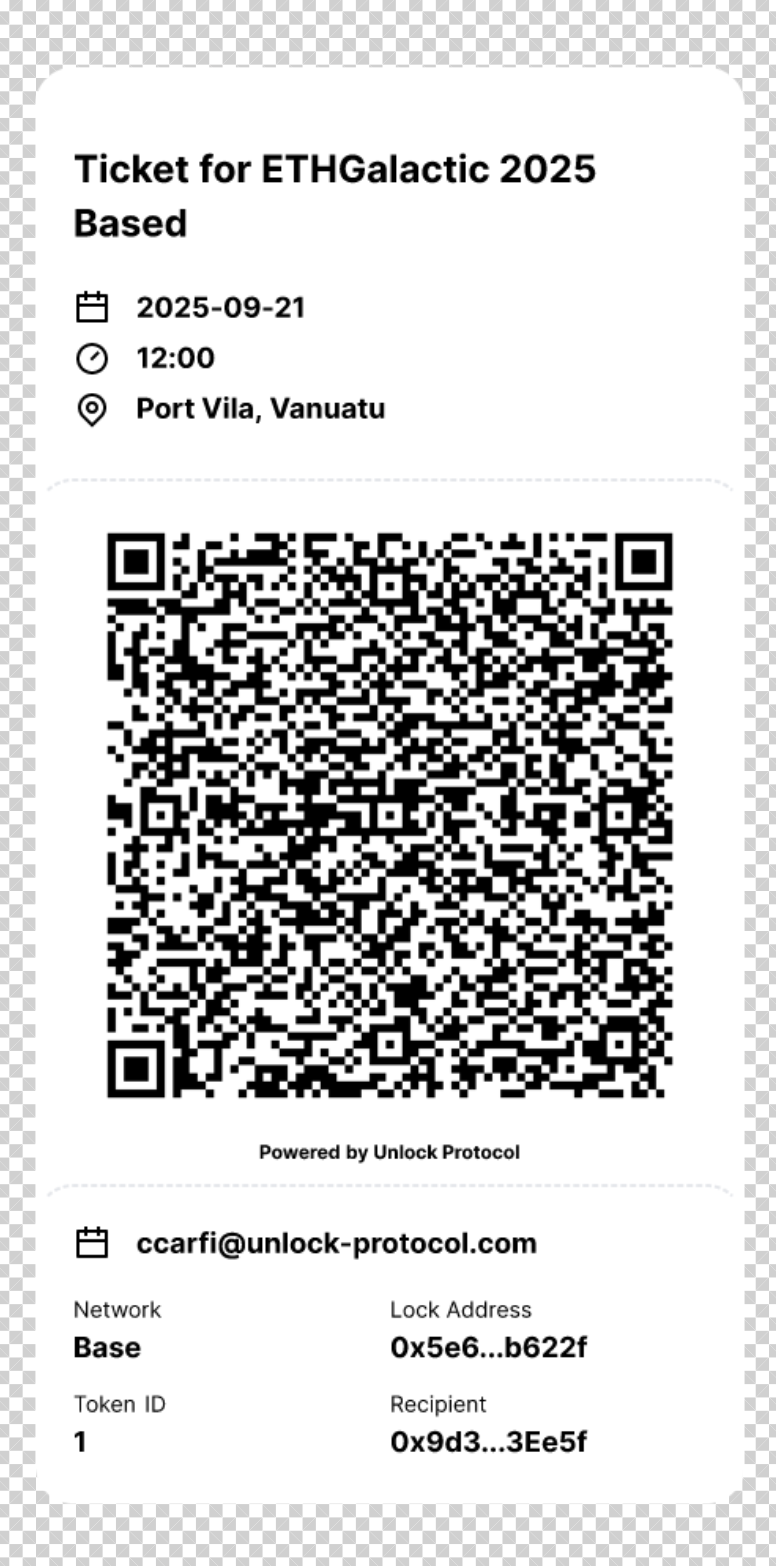
The QR code cannot be forged, which means that anyone checking tickets at the admission to the event can instantly make sure that the ticket is valid.
Attendee check-in at the event
Congratulations! You’ve made it to the day of the event. On the day of your event, you can ask attendees to show you their QR codes, per the section above.
There are two levels of verification you can do with onchain tickets: a basic verification that shows that an attendee has a valid onchain ticket, and a more sophisticated level of verification that not only checks the ticket, but also a “check-in” that performs the digital equivalent of “tearing the ticket in half” to ensure that it can’t be reused by someone else.
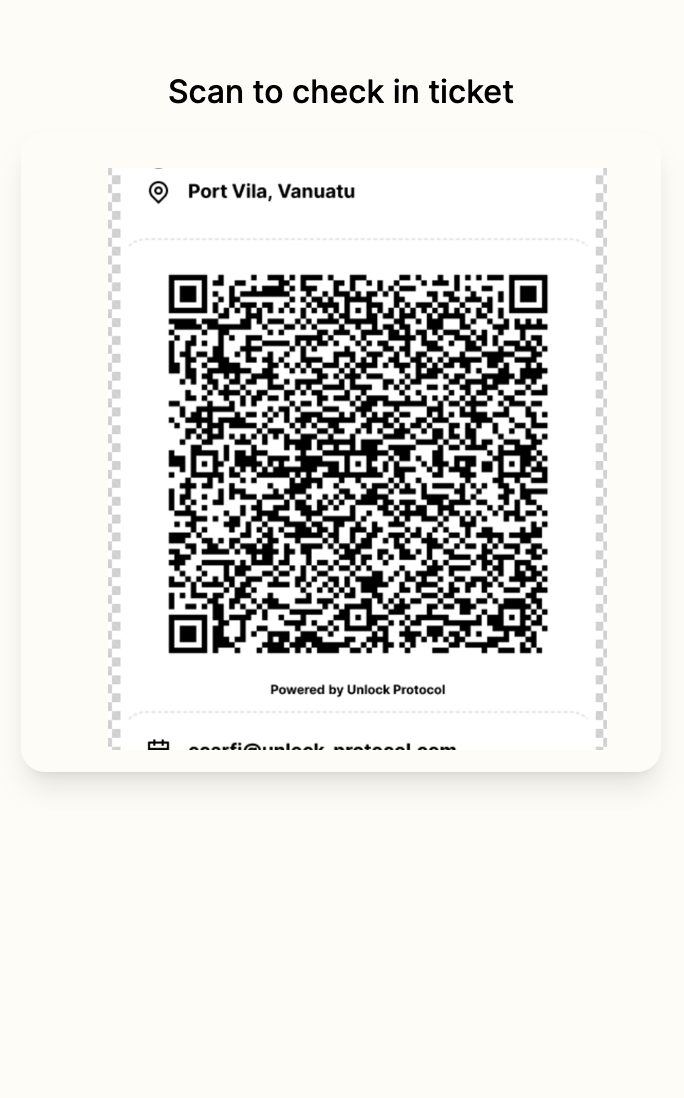
For a basic verification, all that’s needed is to aim any mobile phone camera at the QR code for the ticket. When the ticket QR code is scanned with a mobile phone, anyone can ensure that the ticket is valid. Simply aim a mobile phone camera at the QR code, and the phone will open a web browser to verify the ticket status. This does not require anyone to connect a wallet, or perform any complex sign-in activities.
Anyone can scan a ticket with the phone they have in their pocket today with no additional software or setup needed.
Go ahead and try it yourself right now! You can scan this ticket from your phone right now, even from the screen here.
Advanced verification available from events pages
For more sophisticated verification, an approved individual (a “verifier”) can scan tickets and check them in using a smart phone camera and the Unlock Labs verifier feature. The Unlock Labs verifier feature is integrated directly into the Unlock Labs EVENTS app.
Any individual who has been added as a verifier (i.e. a “ticket taker” who stands at the entrance to the IRL event) will see the verification button when their wallet is connected to the EVENTS app and they visit the event page from their smart phone.
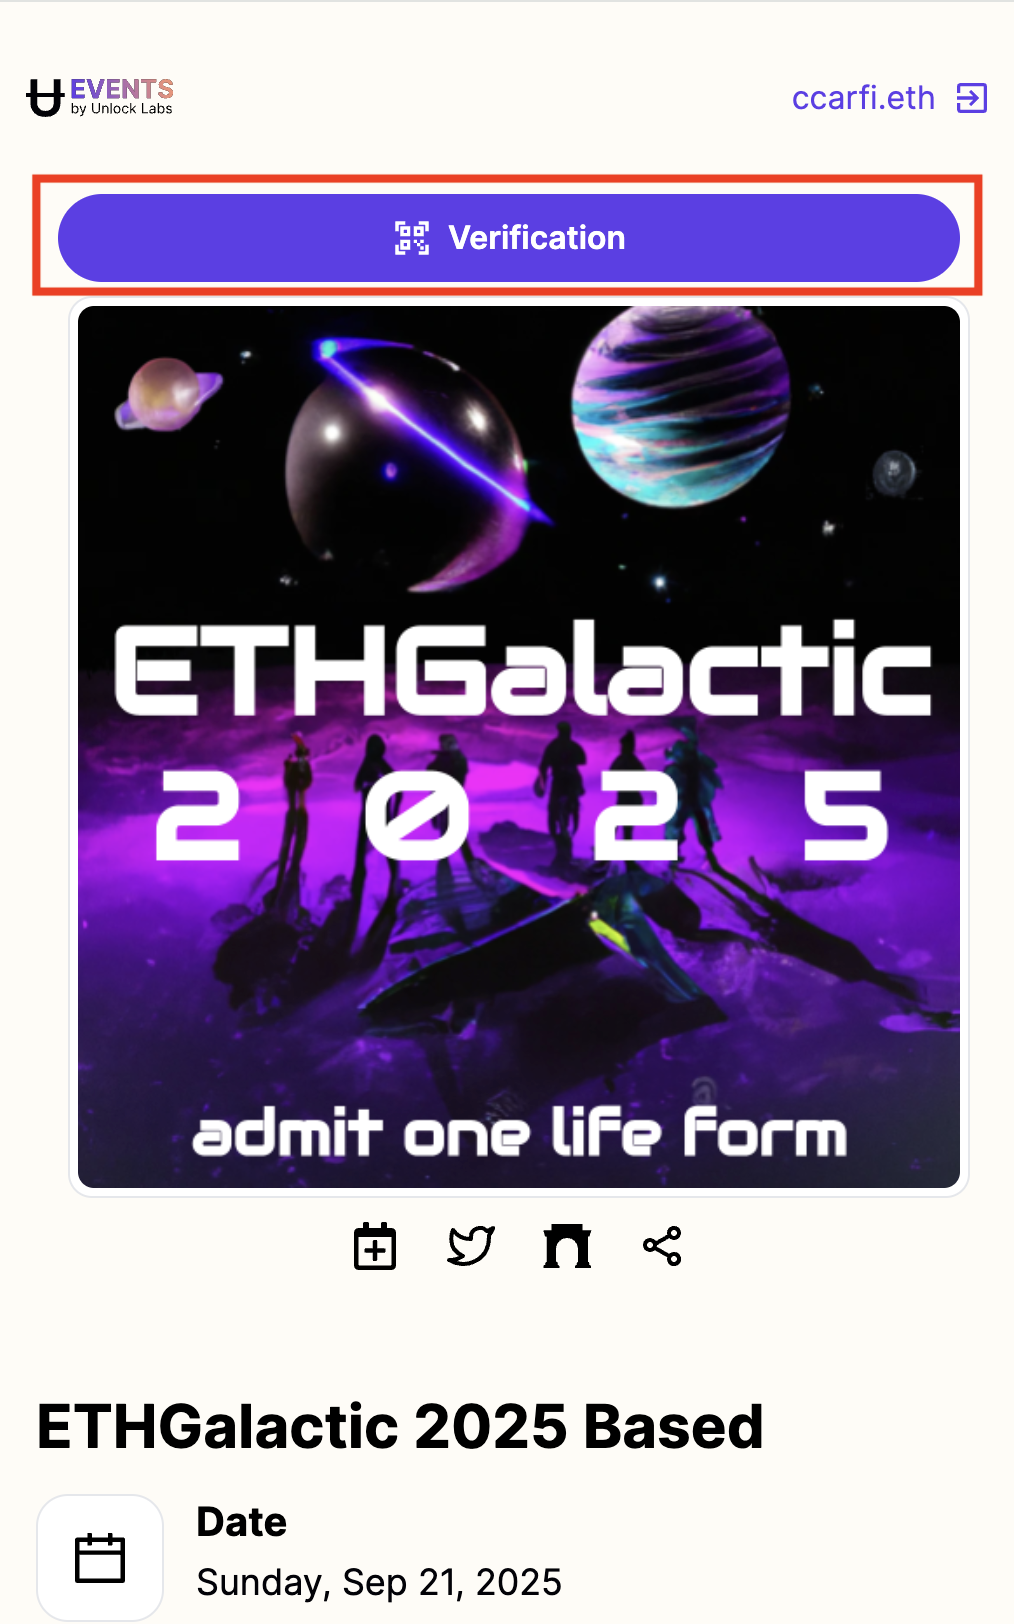
Clicking on the verification button will open up the verifier, which activates the smart phone camera for ticket scanning. Scanning a ticket from the verifier confirms its authenticity.
After scanning, the verifier app will show the status of the QR code ticket.
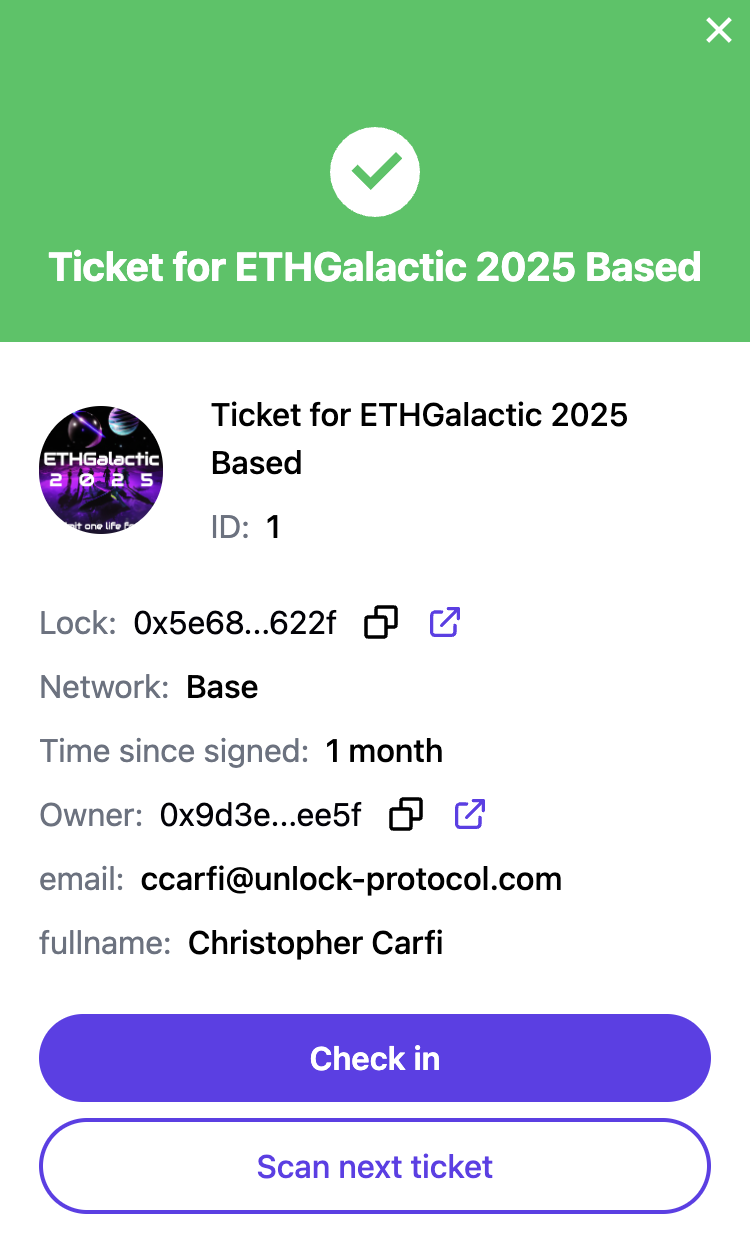
At this point, the verifier can “check in” the ticket, effectively “ripping it in half” so it can’t be used again by someone else.
The Unlock EVENTS app for every event has these features for ticket check-in available directly from the event landing page.
Other features and capabilities for NFT tickets
How to handle multiple types of tickets
You can deploy one or more ticket levels. If you have different tiers of attendees (e.g. general admission, VIP, staff, sponsor, etc.), you’ll want to create a unique smart contract per class of tickets.
You will also want to create different smart contracts if you have multiple types of tickets, for example a limited number of “early bird” tickets, or tickets which provide multiple admissions (day 1 workshops and day 2 conference, etc.).
Making tickets non-transferable
The contract for any ticket can be set so that the tickets issued by that lock are non-transferrable to prevent secondary market sales or transfers. You can learn more about this capability in the document “How to make keys non-transferrable.”
Cancelling a ticket
In certain instances, an event organizer may want to cancel a ticket due to changes in circumstances, an attendee running afoul of terms of service, or another reason. In this situation, an event organizer can cancel a ticket, and optionally offer a refund of the ticket price.
Advanced ticket verification
As shown above, ticket authenticity can be confirmed by scanning any Unlock-powered onchain ticket with any mobile phone camera without any additional requirements. However, in some cases, event organizers may want to “check in” a ticket to ensure it can’t be reused, or to verify the attendance of individuals. In this case, event organizers can use the Unlock Labs verifier as noted above, or a verifier like tokenproof.