
Unlock Unveils No-Code Membership NFT Checkout Builder
Unlock launches a checkout builder to easily customize your checkout experience — no programming expertise needed.
Creating a compelling checkout flow for online purchases is a thorny problem. Every creator who is offering memberships, ticketing, or other experiences to their community has a wide variety of options to consider on exactly what required information may be needed from each purchaser. When you add the new experiences of web3 into the mix, checkout flows for creating or minting can get very sophisticated, very quickly, and can be very difficult to configure.
To help improve the experience of creators who are building checkout experiences in web3, Unlock has developed a Checkout Builder that provides a no-code way to build and customize a checkout experience.
The Checkout Builder greatly speeds and simplifies the process of creating checkout flows by applying no-code principles to a process that until now required technical configuration to develop checkout flows.
Let's go through step-by-step and look at the new capabilities Locksmiths have available to them to build checkout experiences for minting membership NFTs.
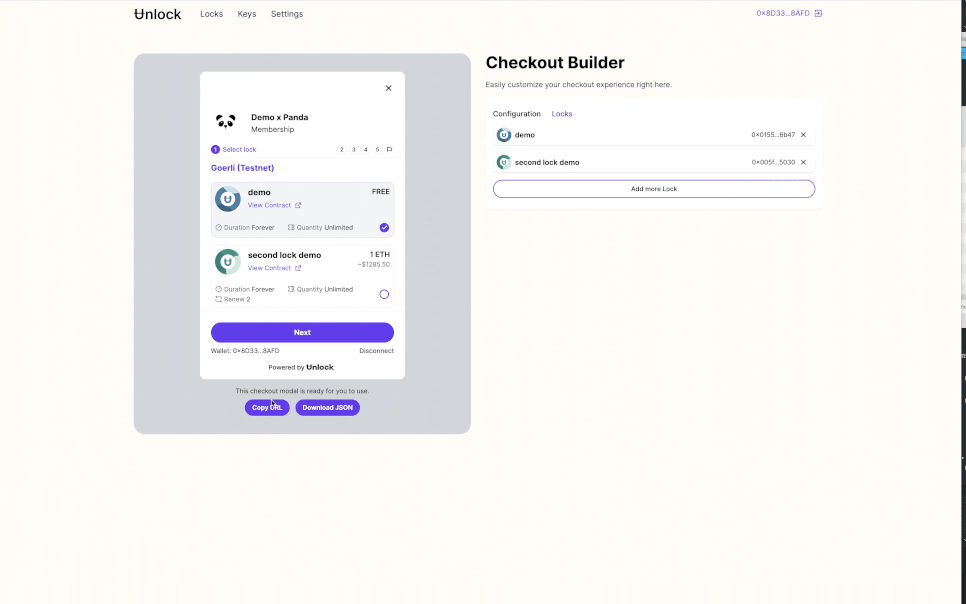
Checkout Builder overview
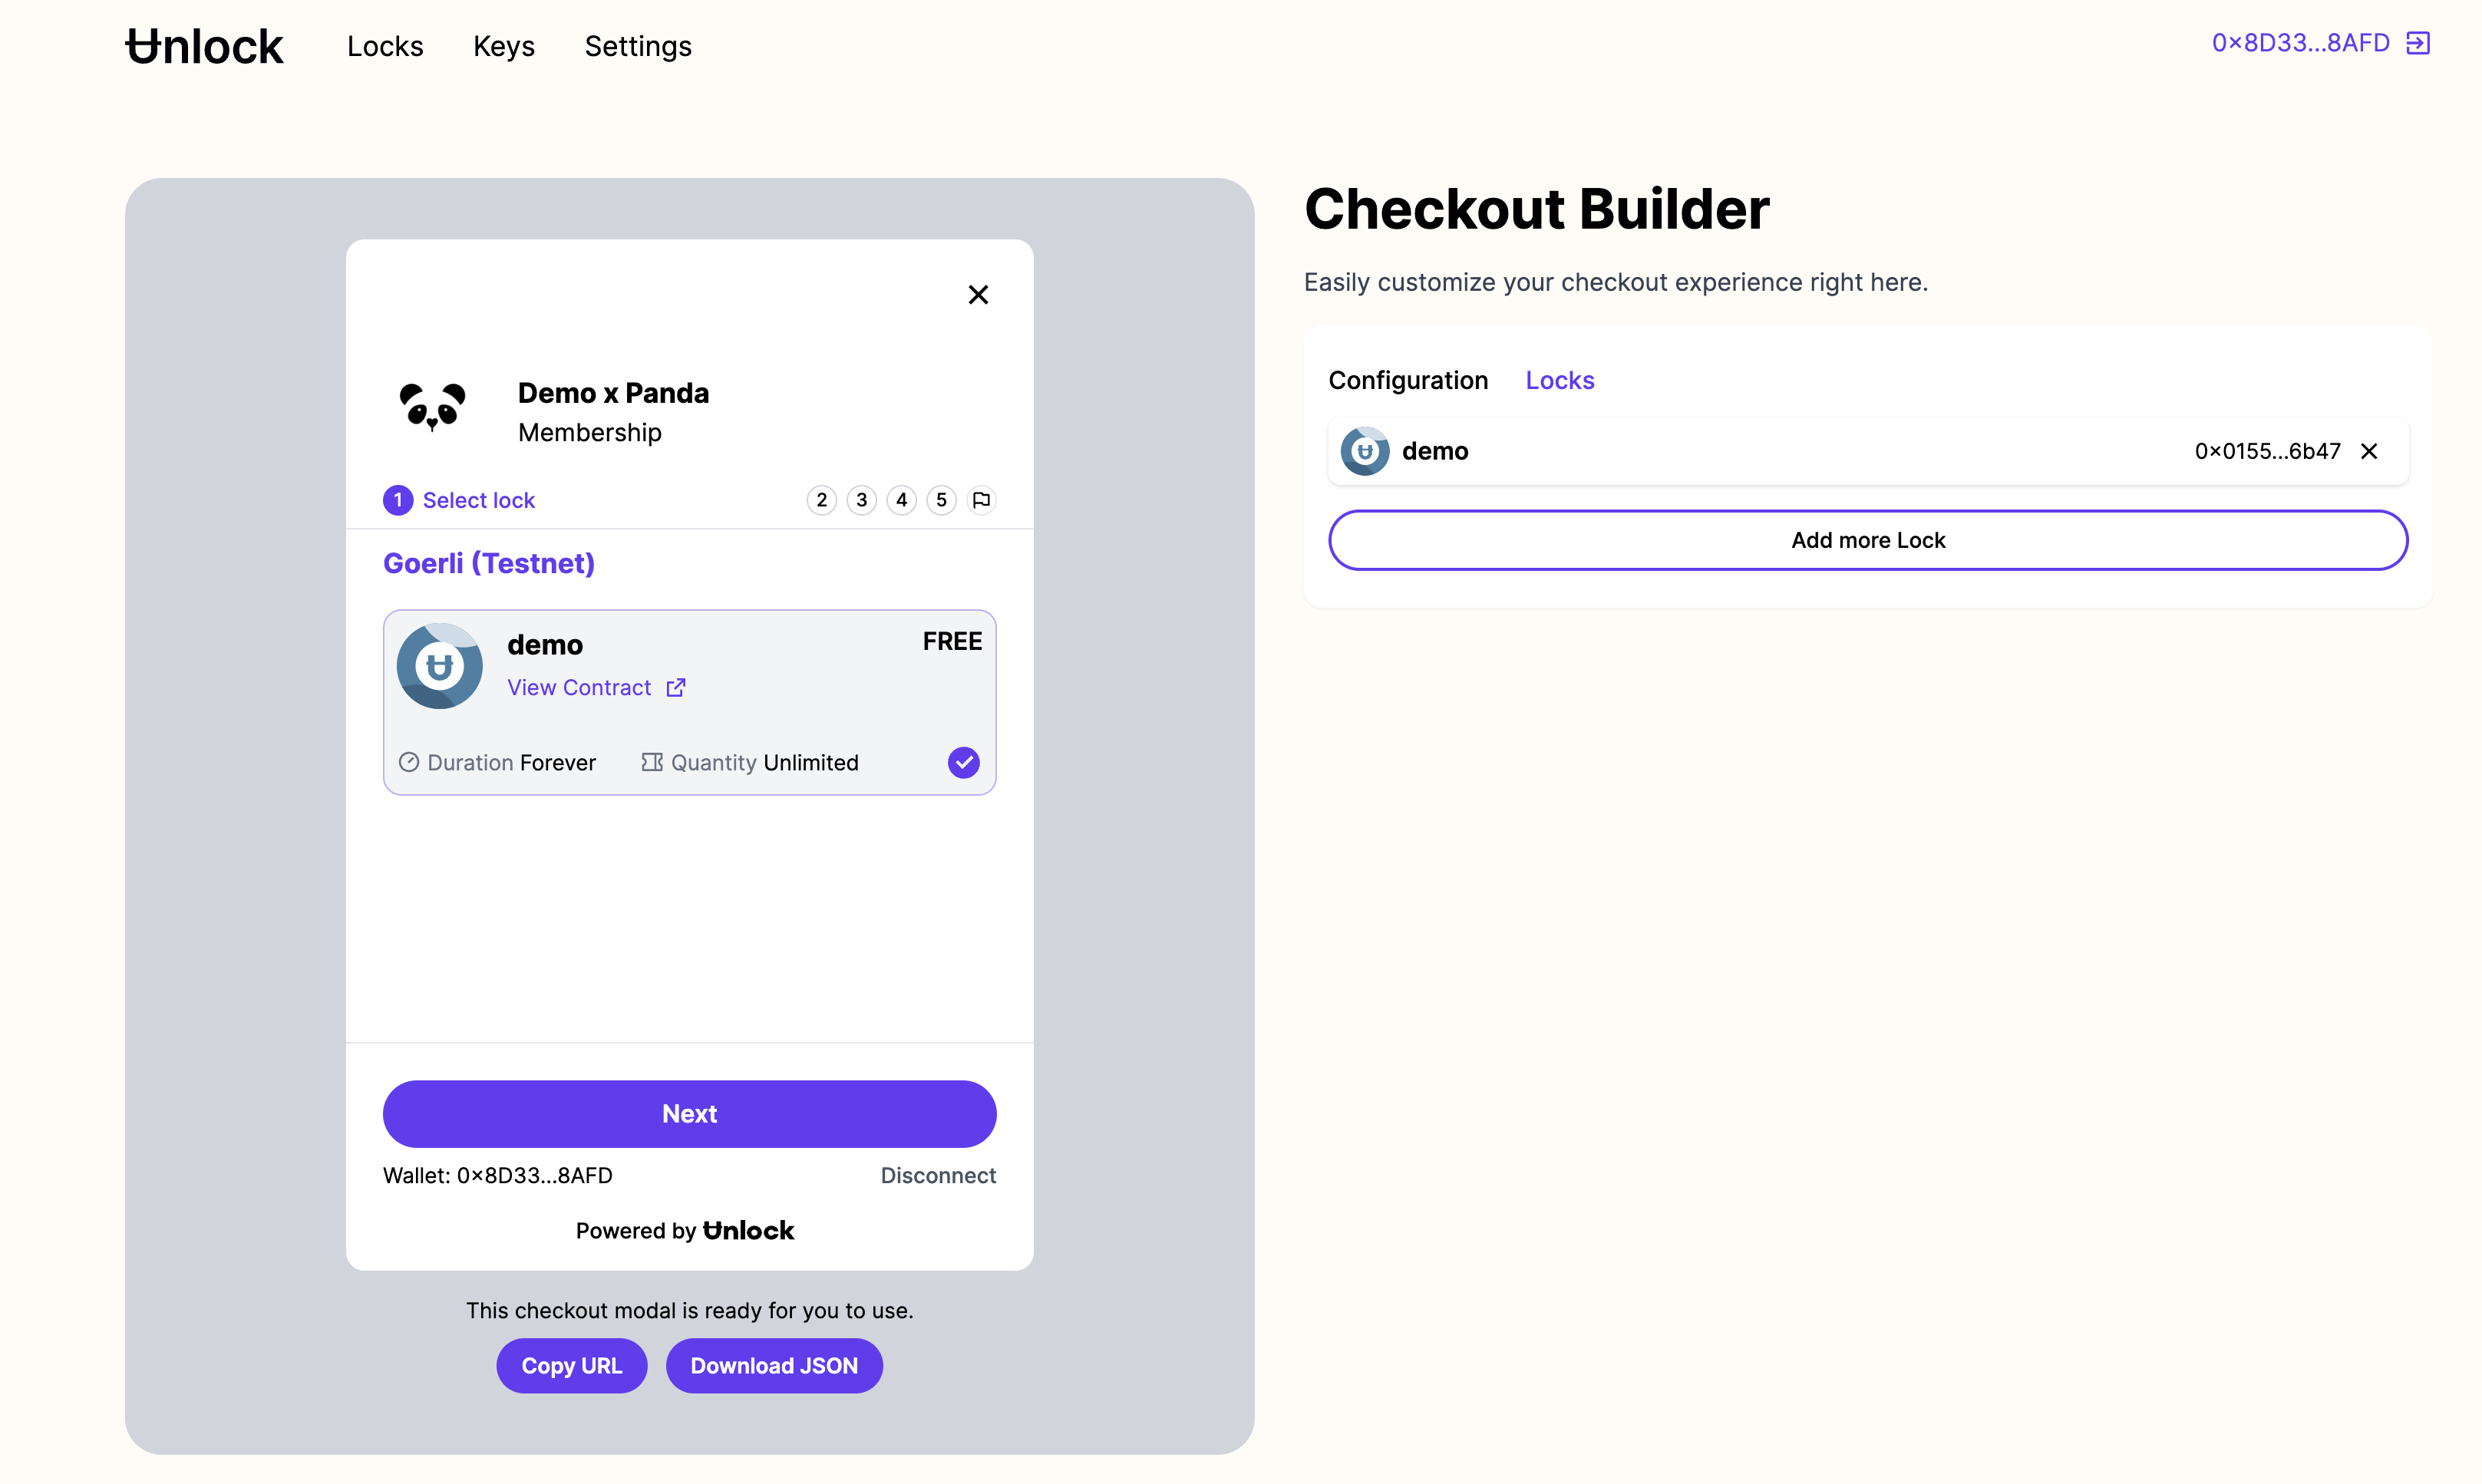
You can access the Checkout Builder page from your lock page by clicking the "Generate URL” button, or by going directly to this URL: https://app.unlock-protocol.com/locks/checkout-url.
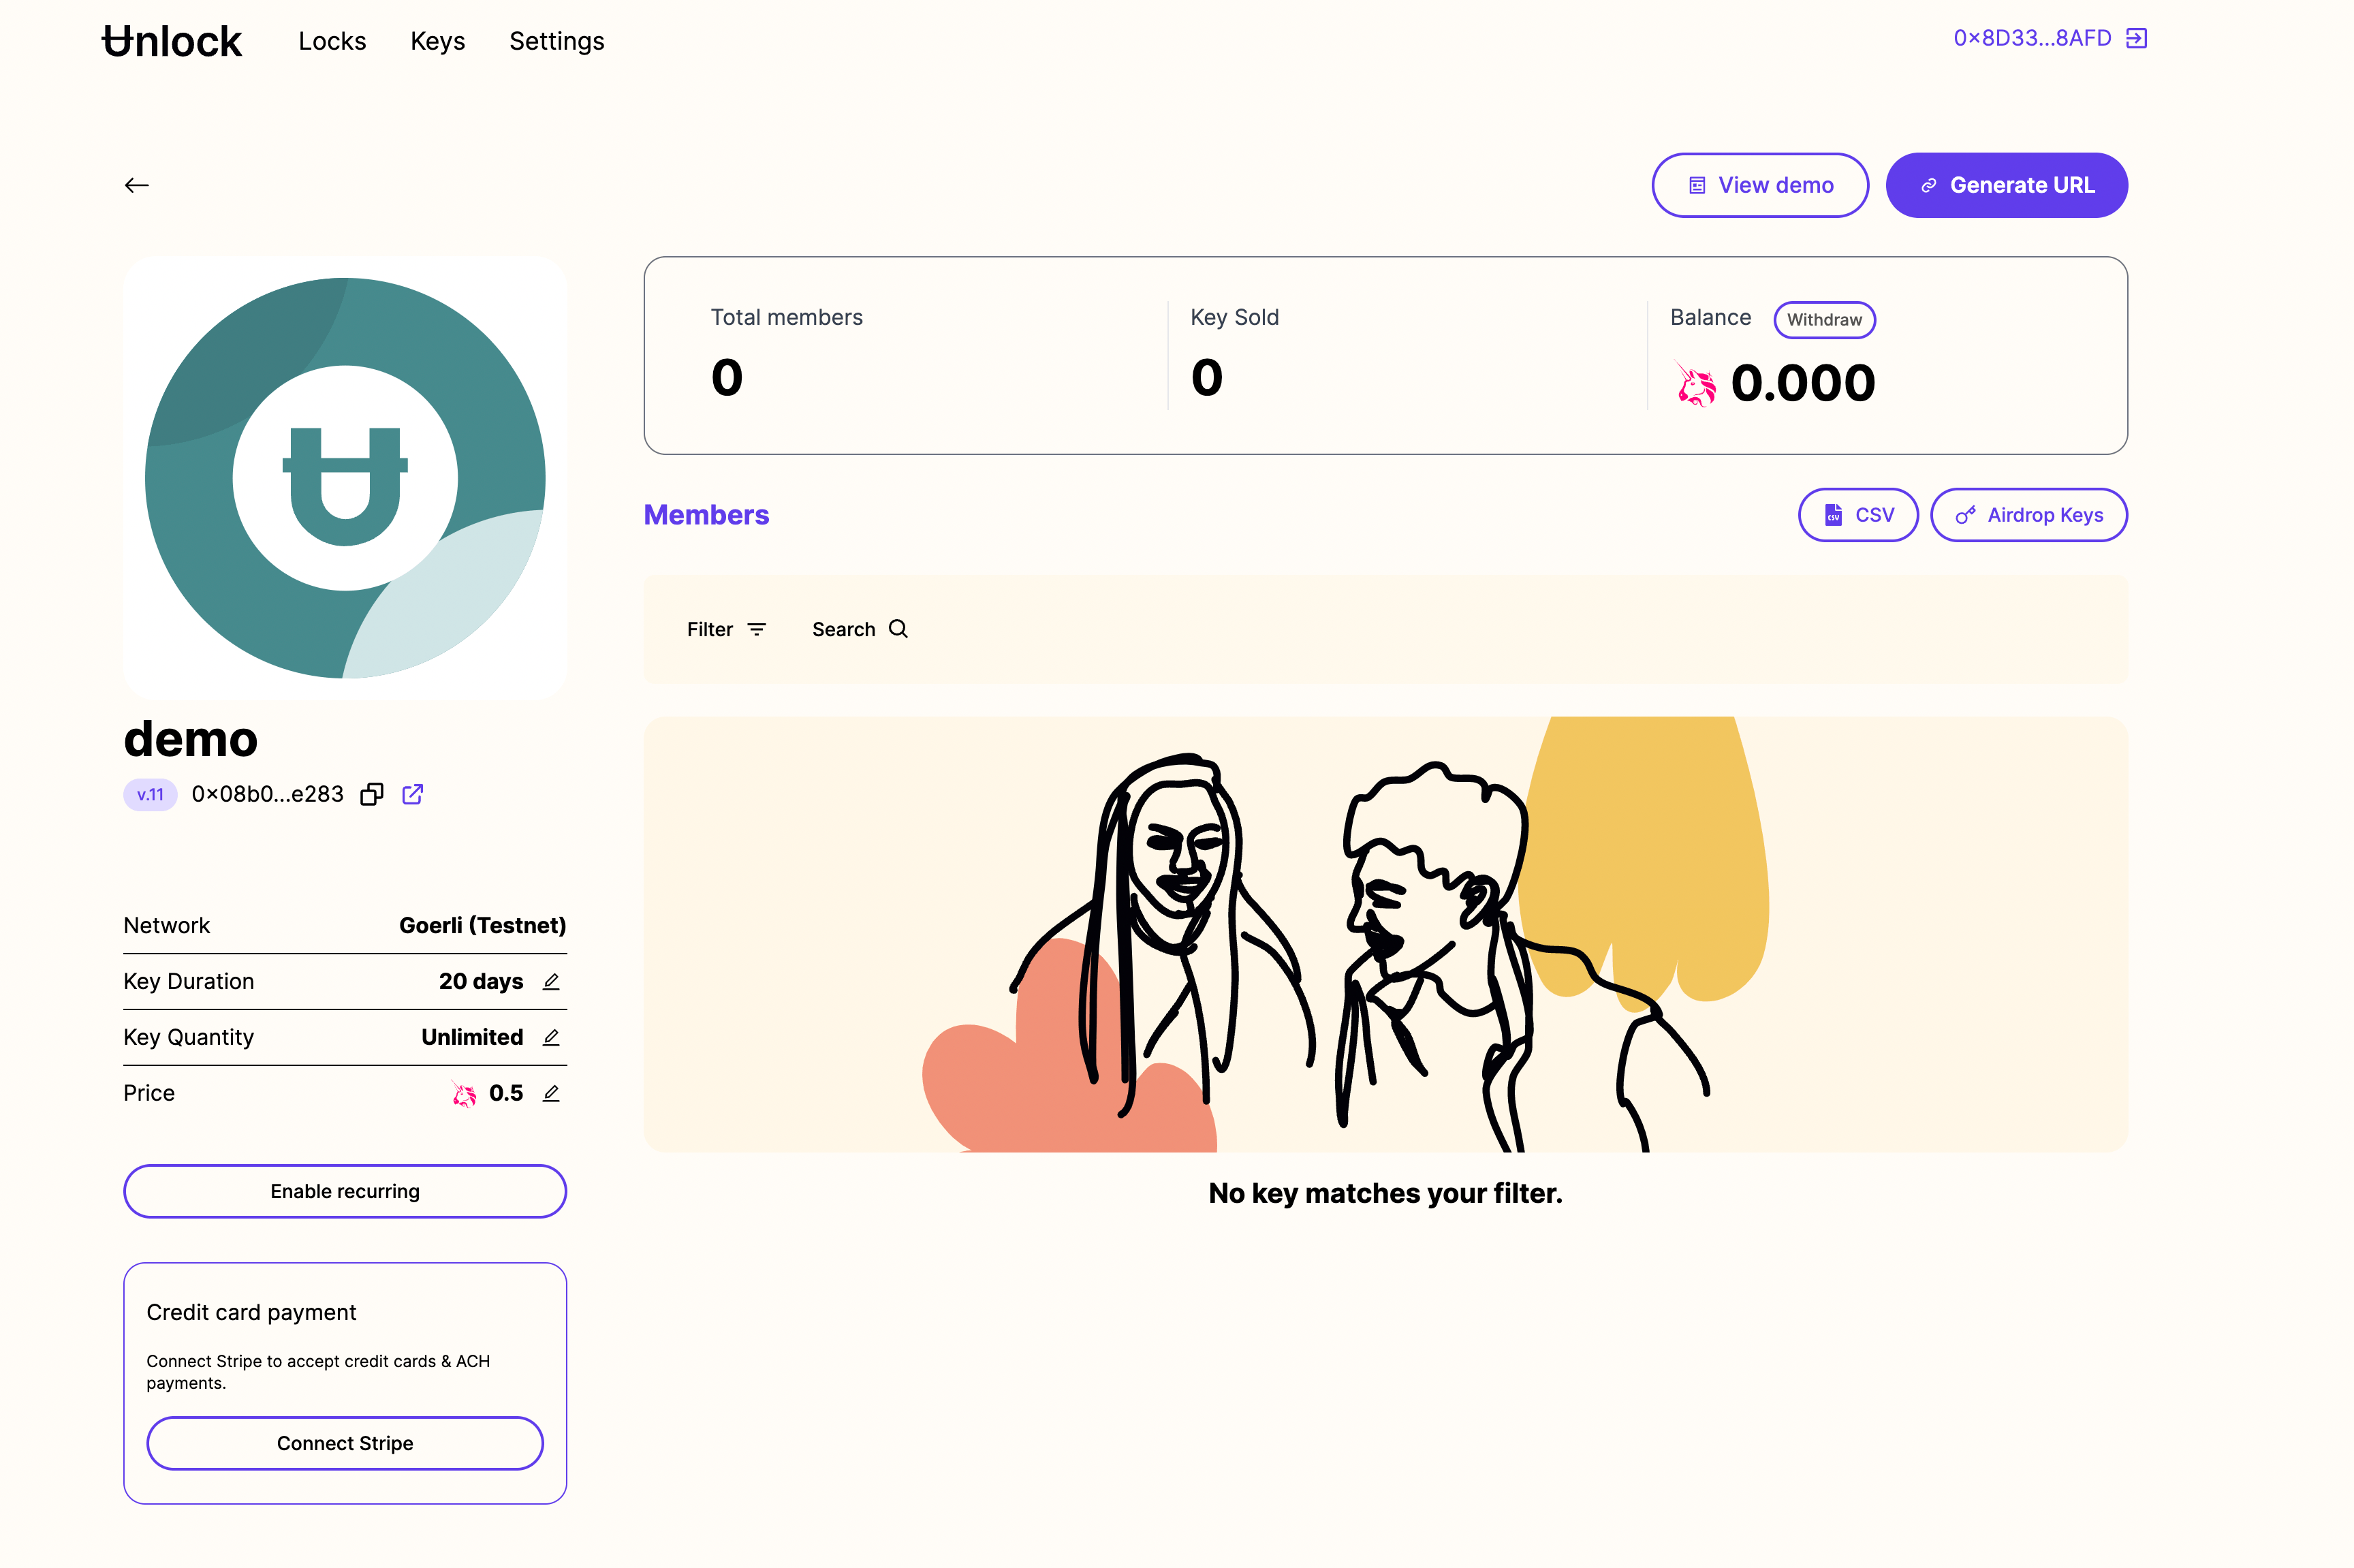
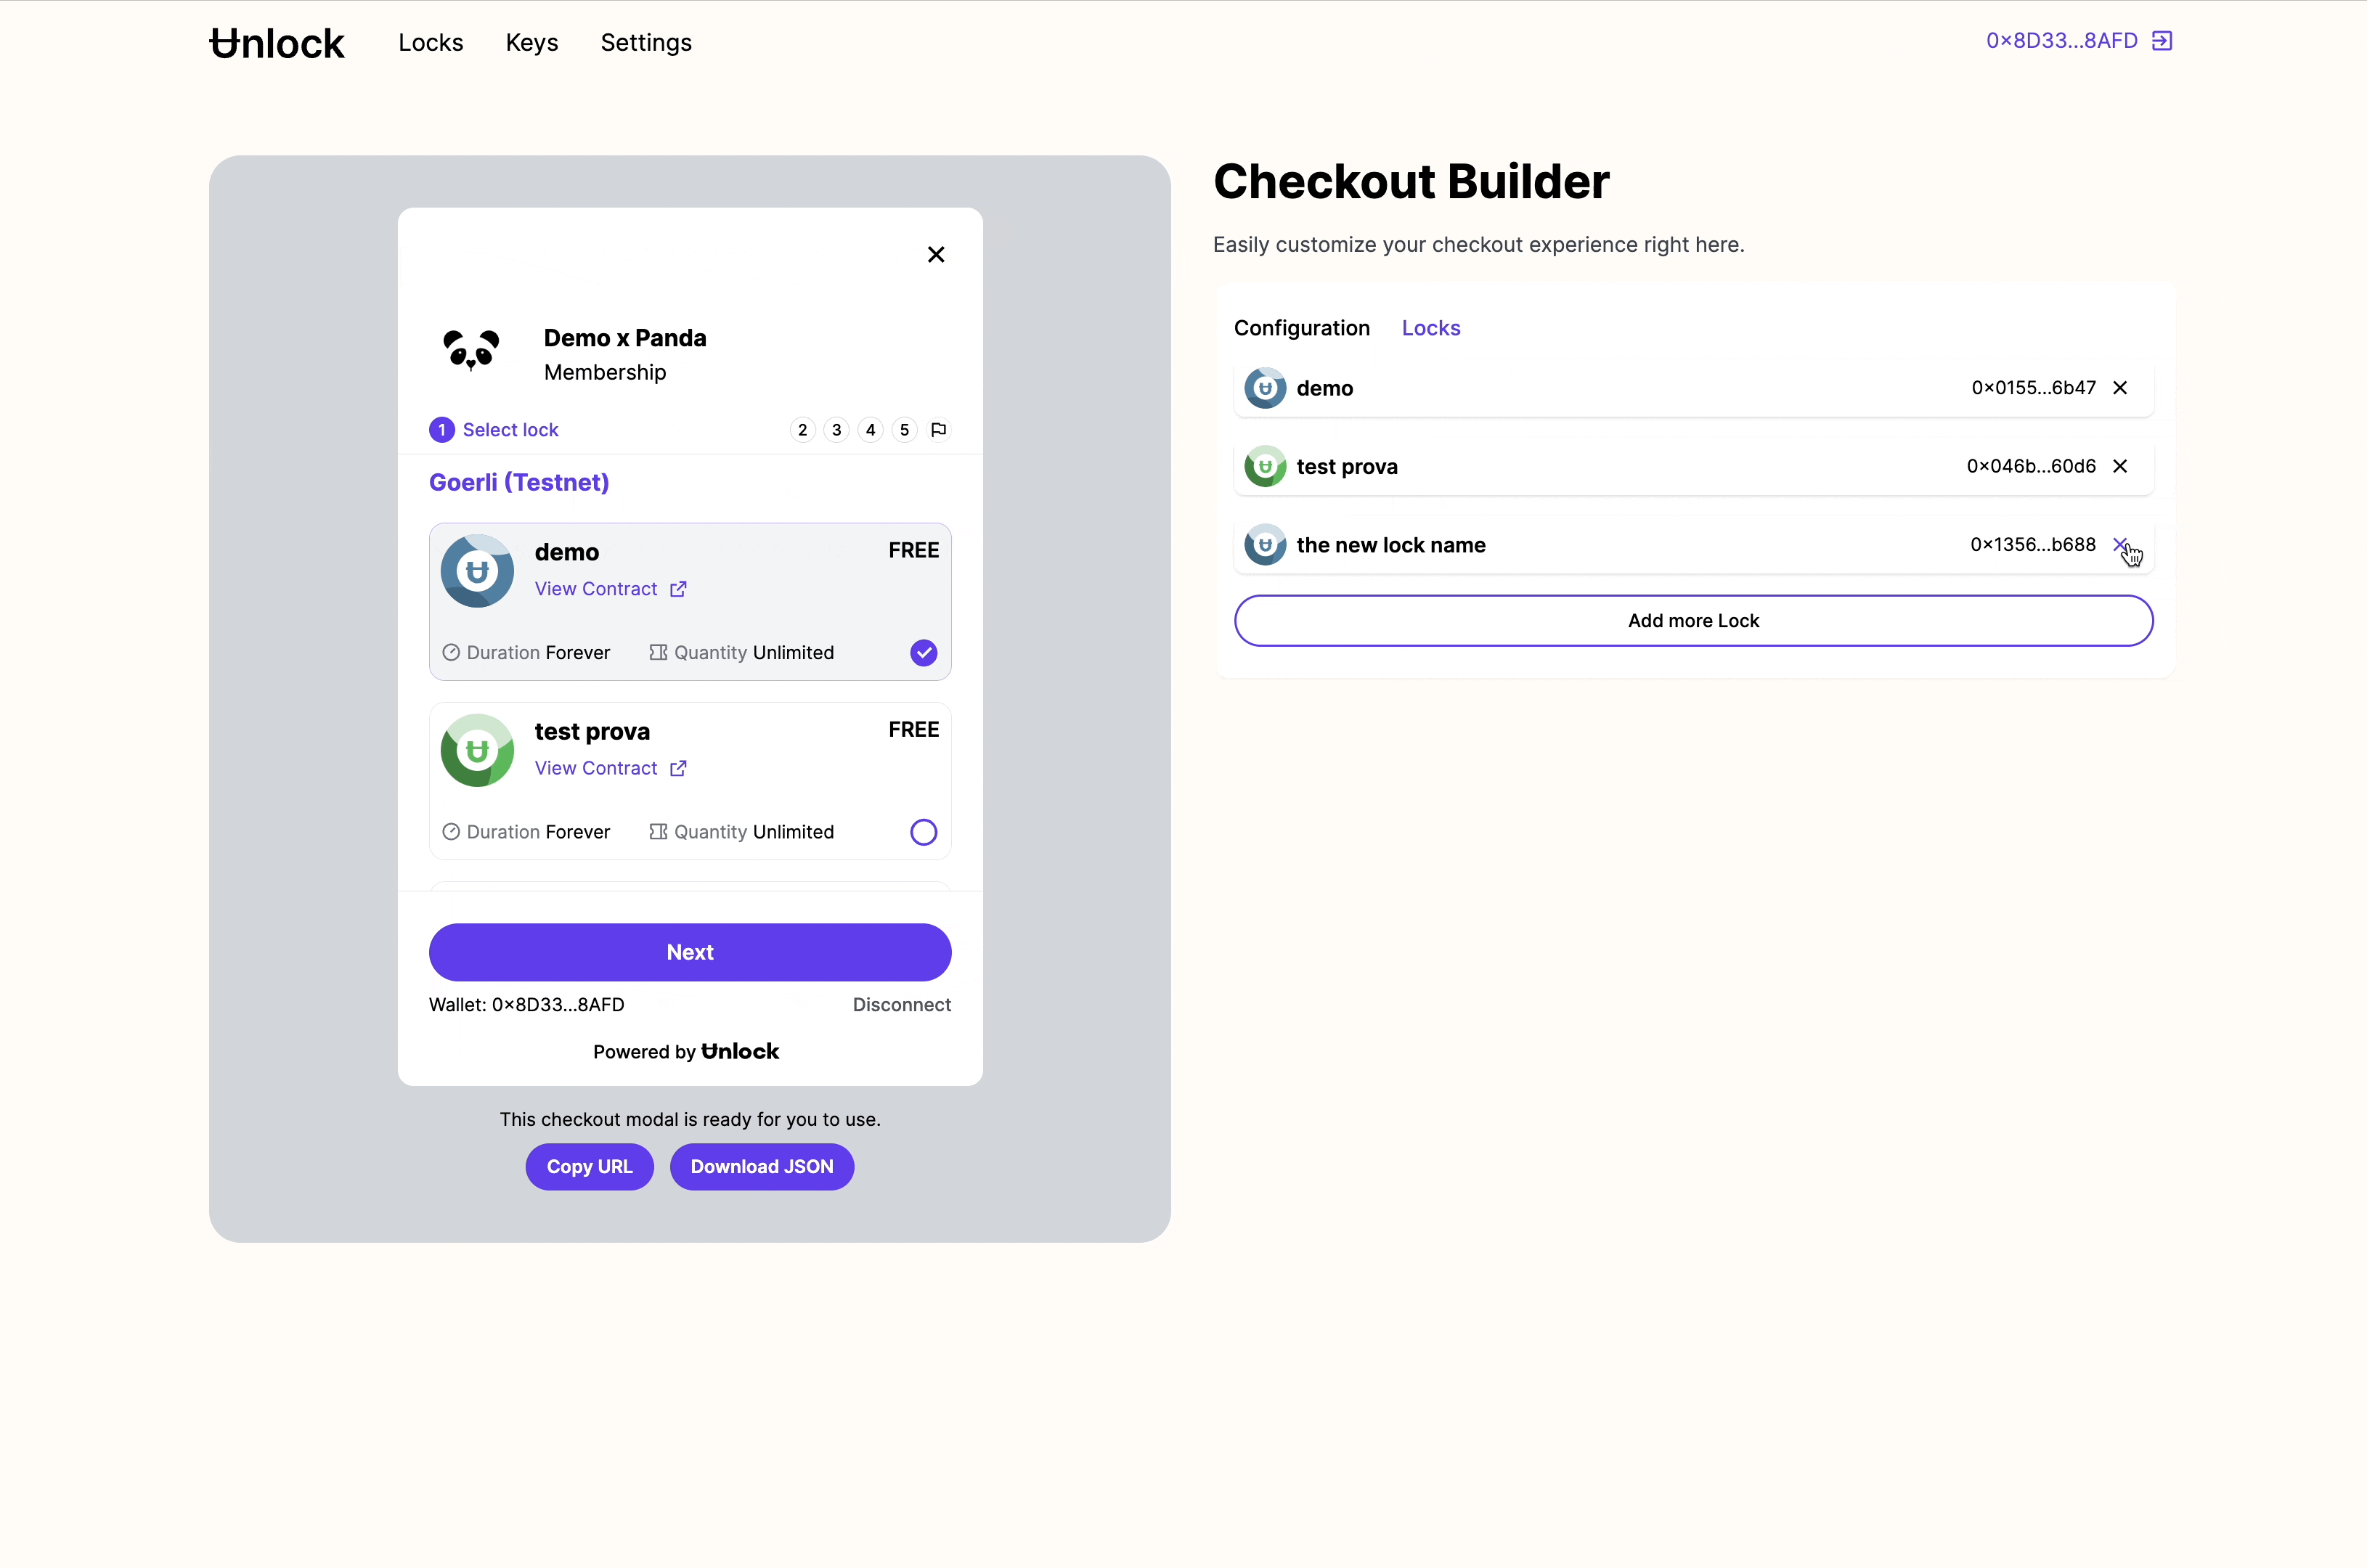
On the Checkout Builder page, we can see on the left side the preview of what your checkout experience will look like. On the right side of the page there is a form with the information you can edit to configure the experience.
Edits made on the right side of the page will automatically update the preview on the left and give you a real-time overview of the final result.
For every field, there is also a description that provides more context about the related field.
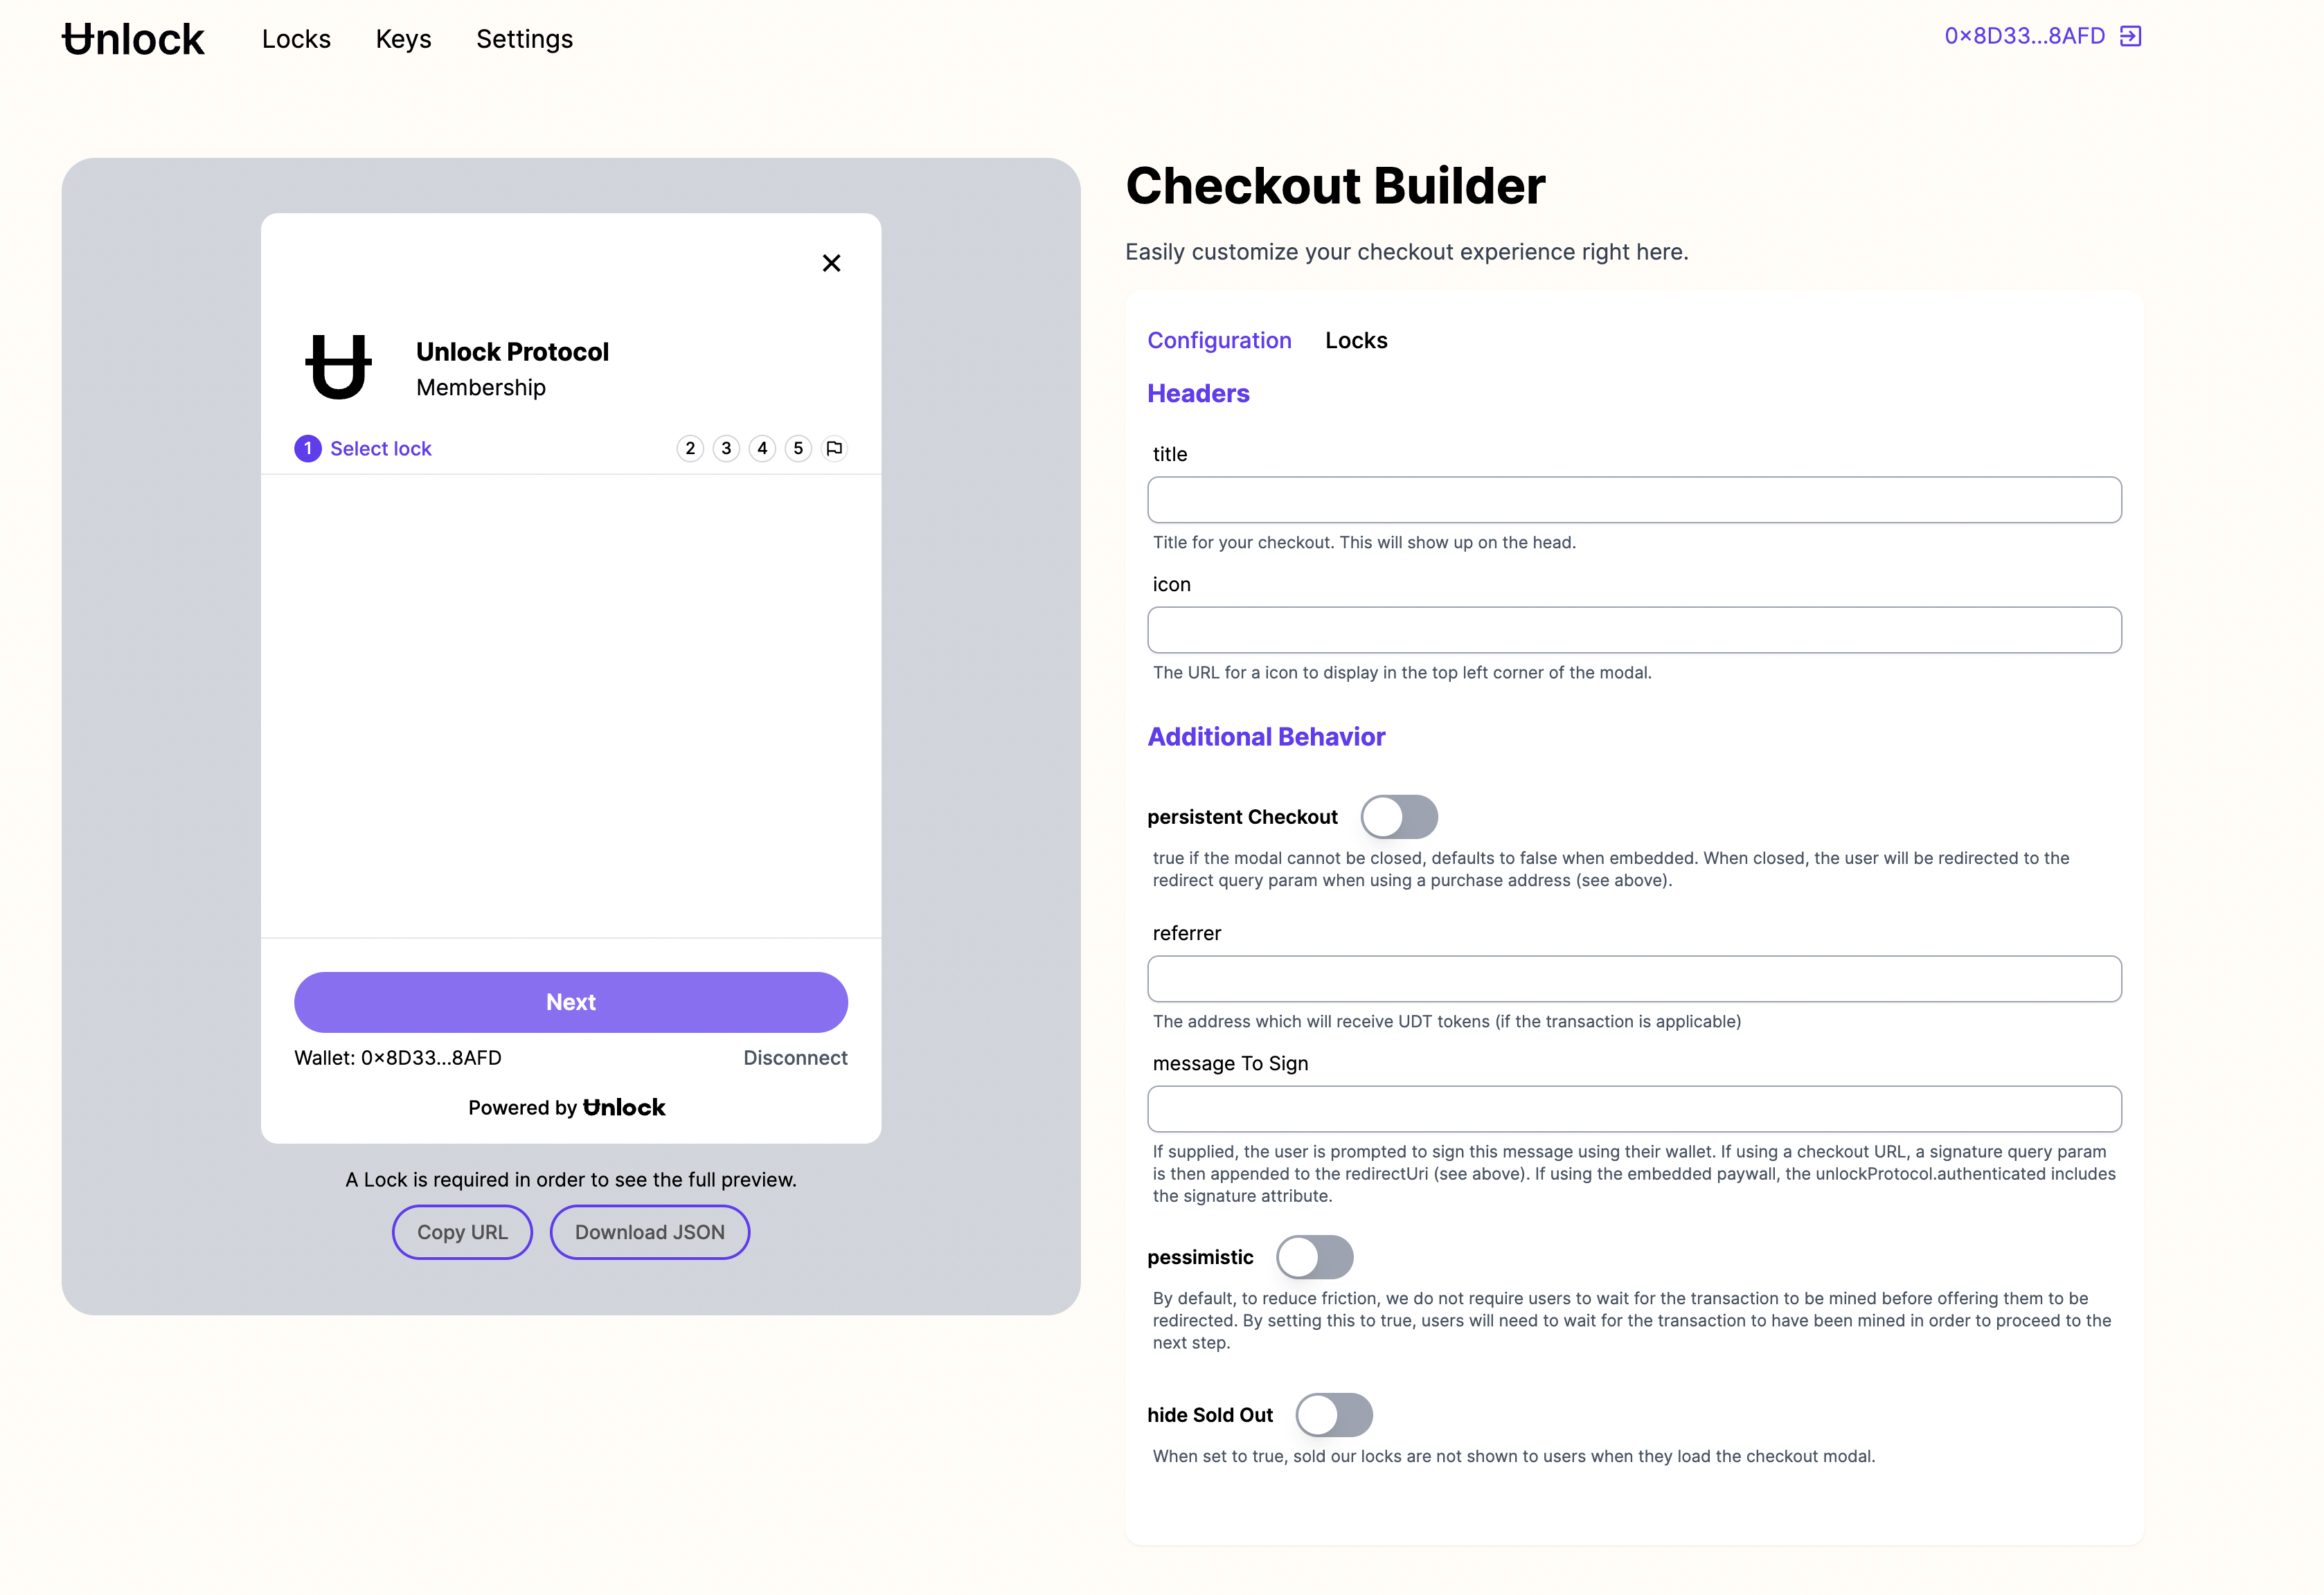
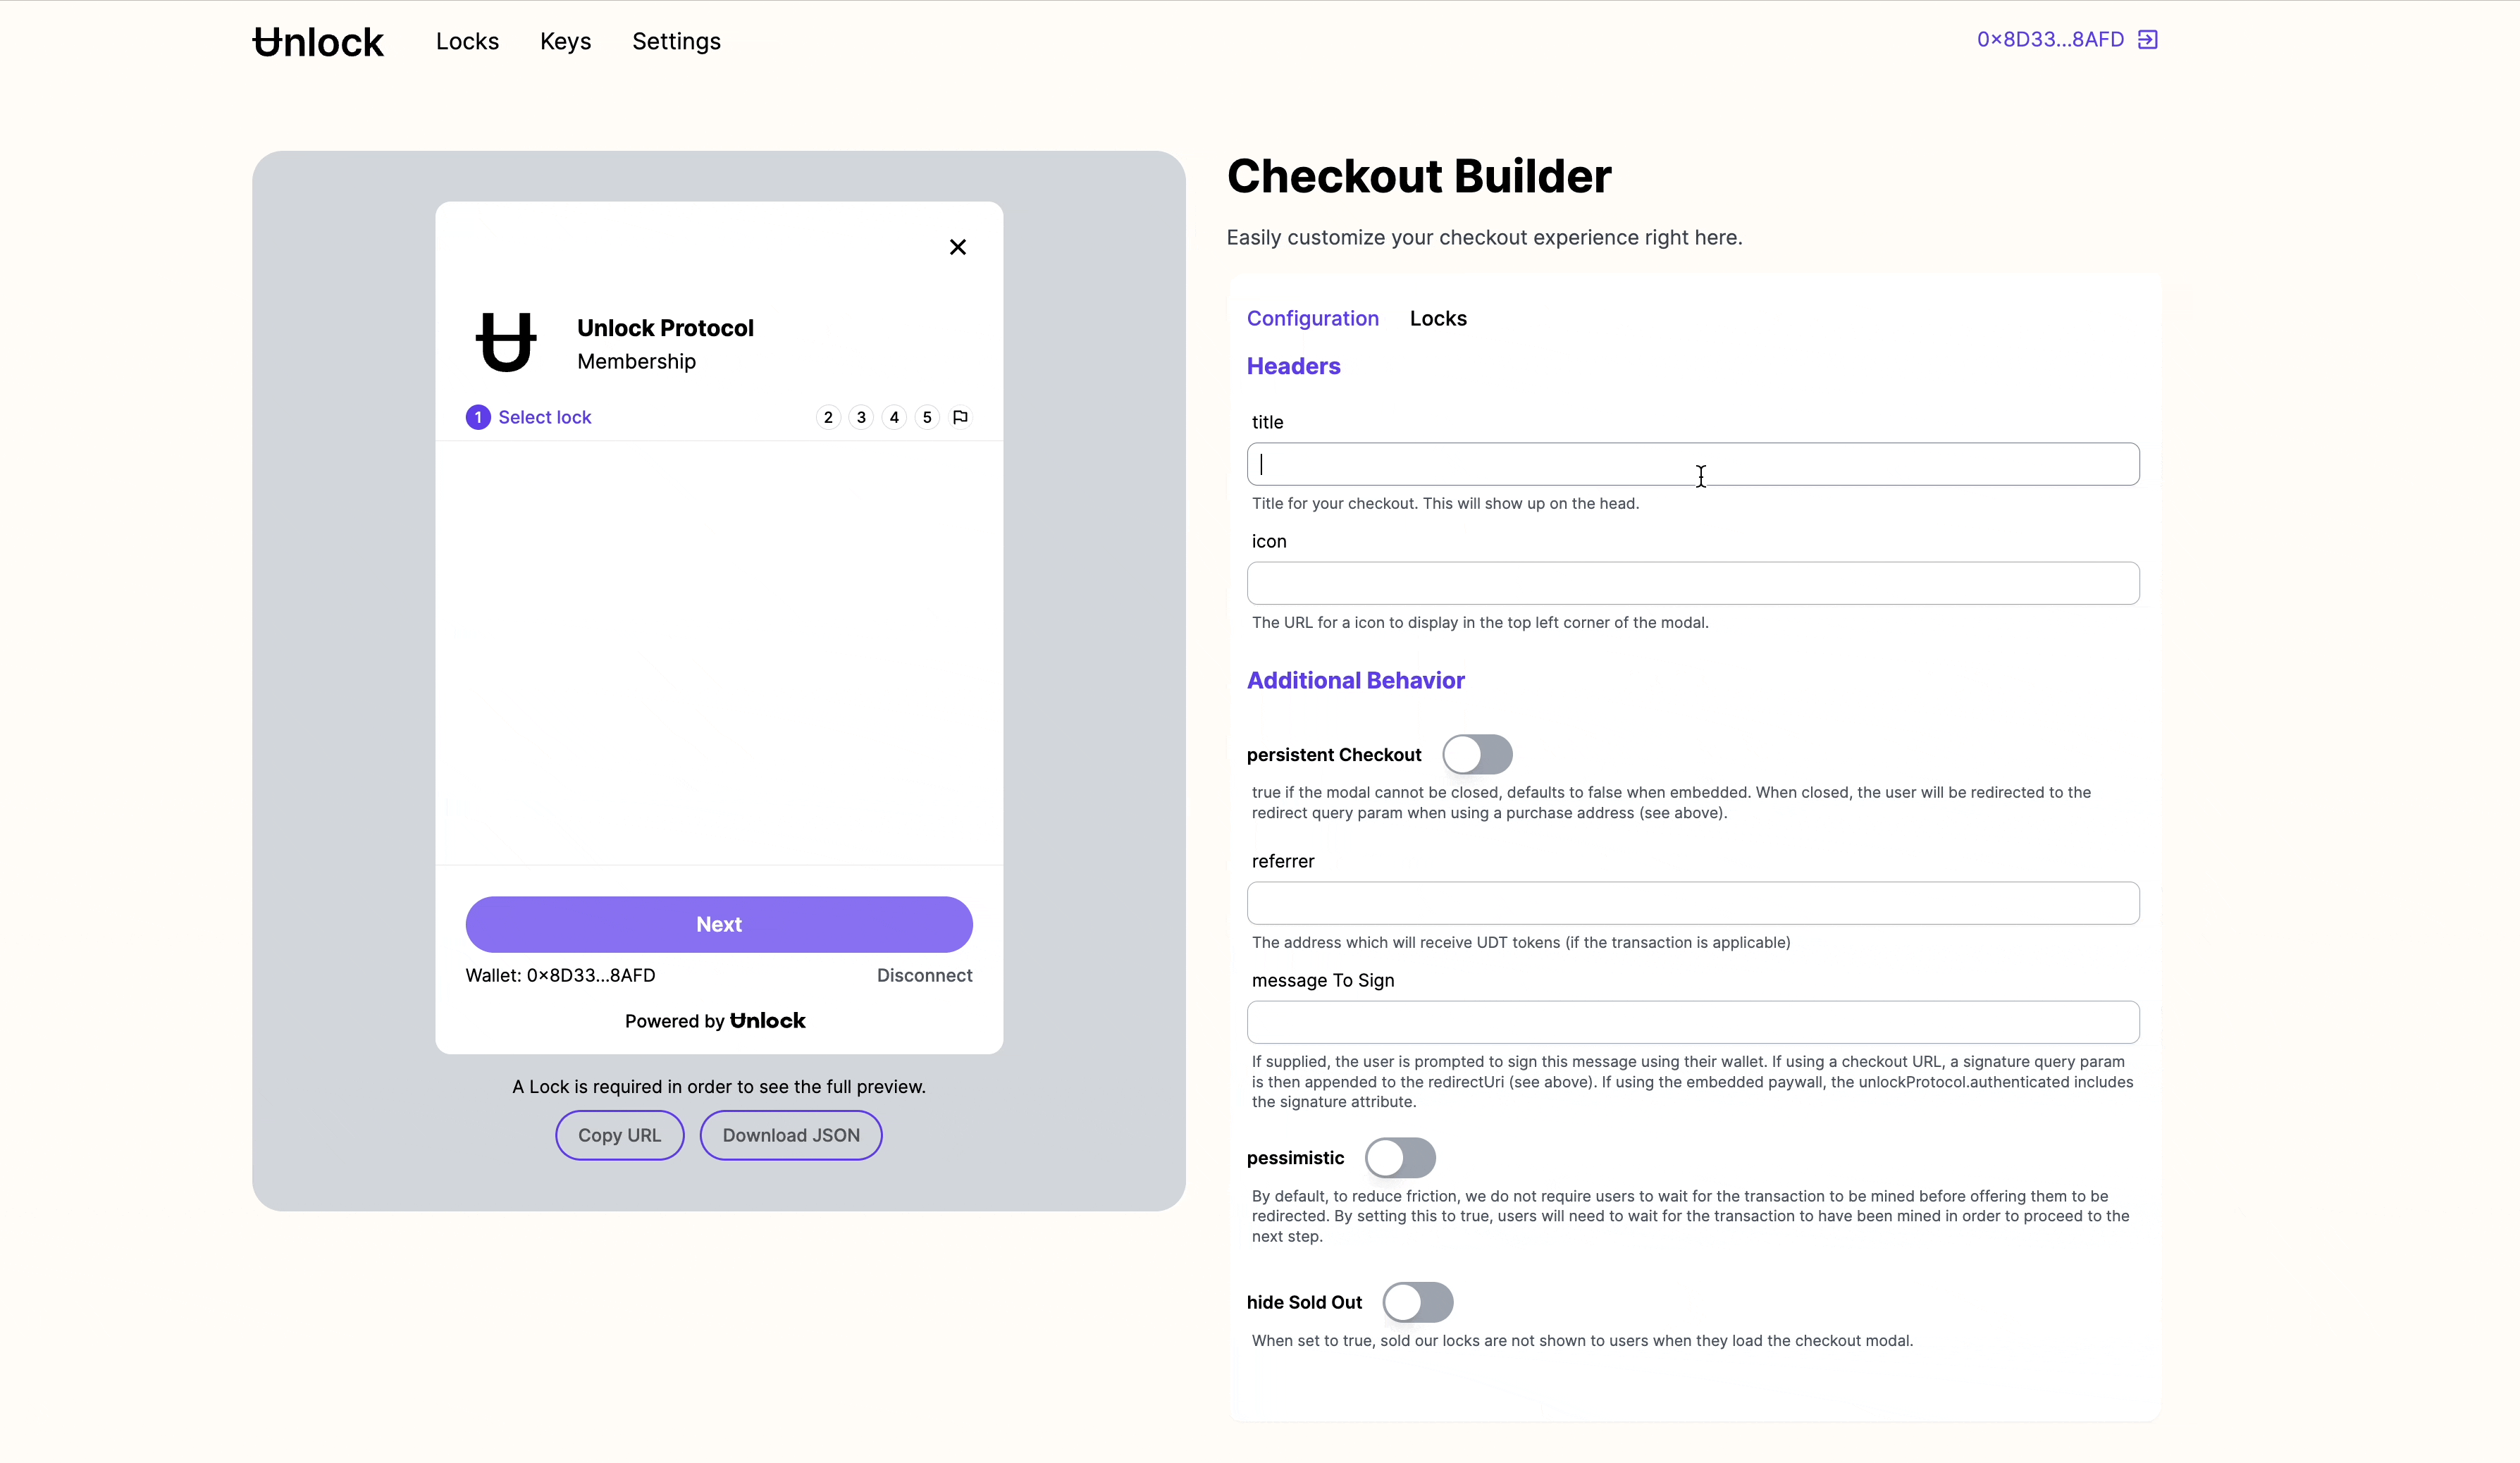
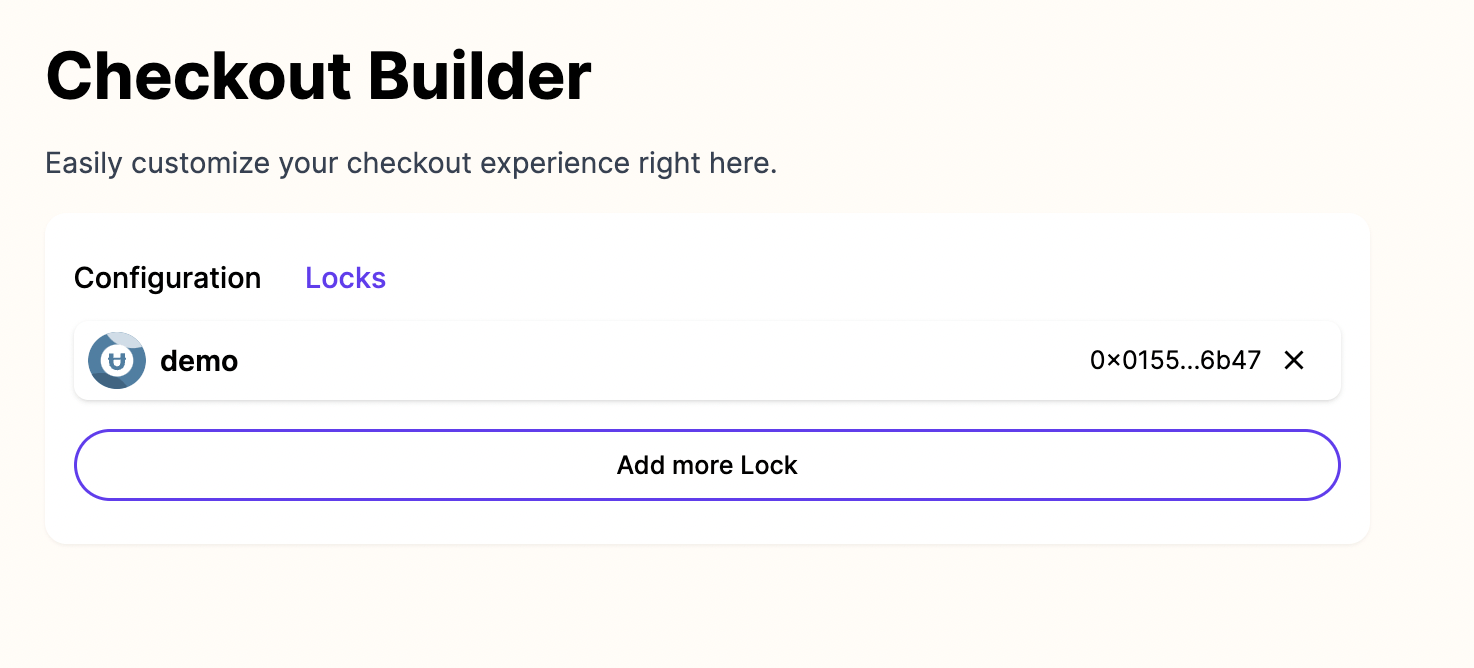
The form to customize the checkout has 2 sections, each on its own tab:
Configuration: Where we can find general configuration and setupLocks: Where we can add locks and customize them in more detail
Let’s create a customized checkout experience and generate a checkout URL that we can share!
Headers and additional behavior
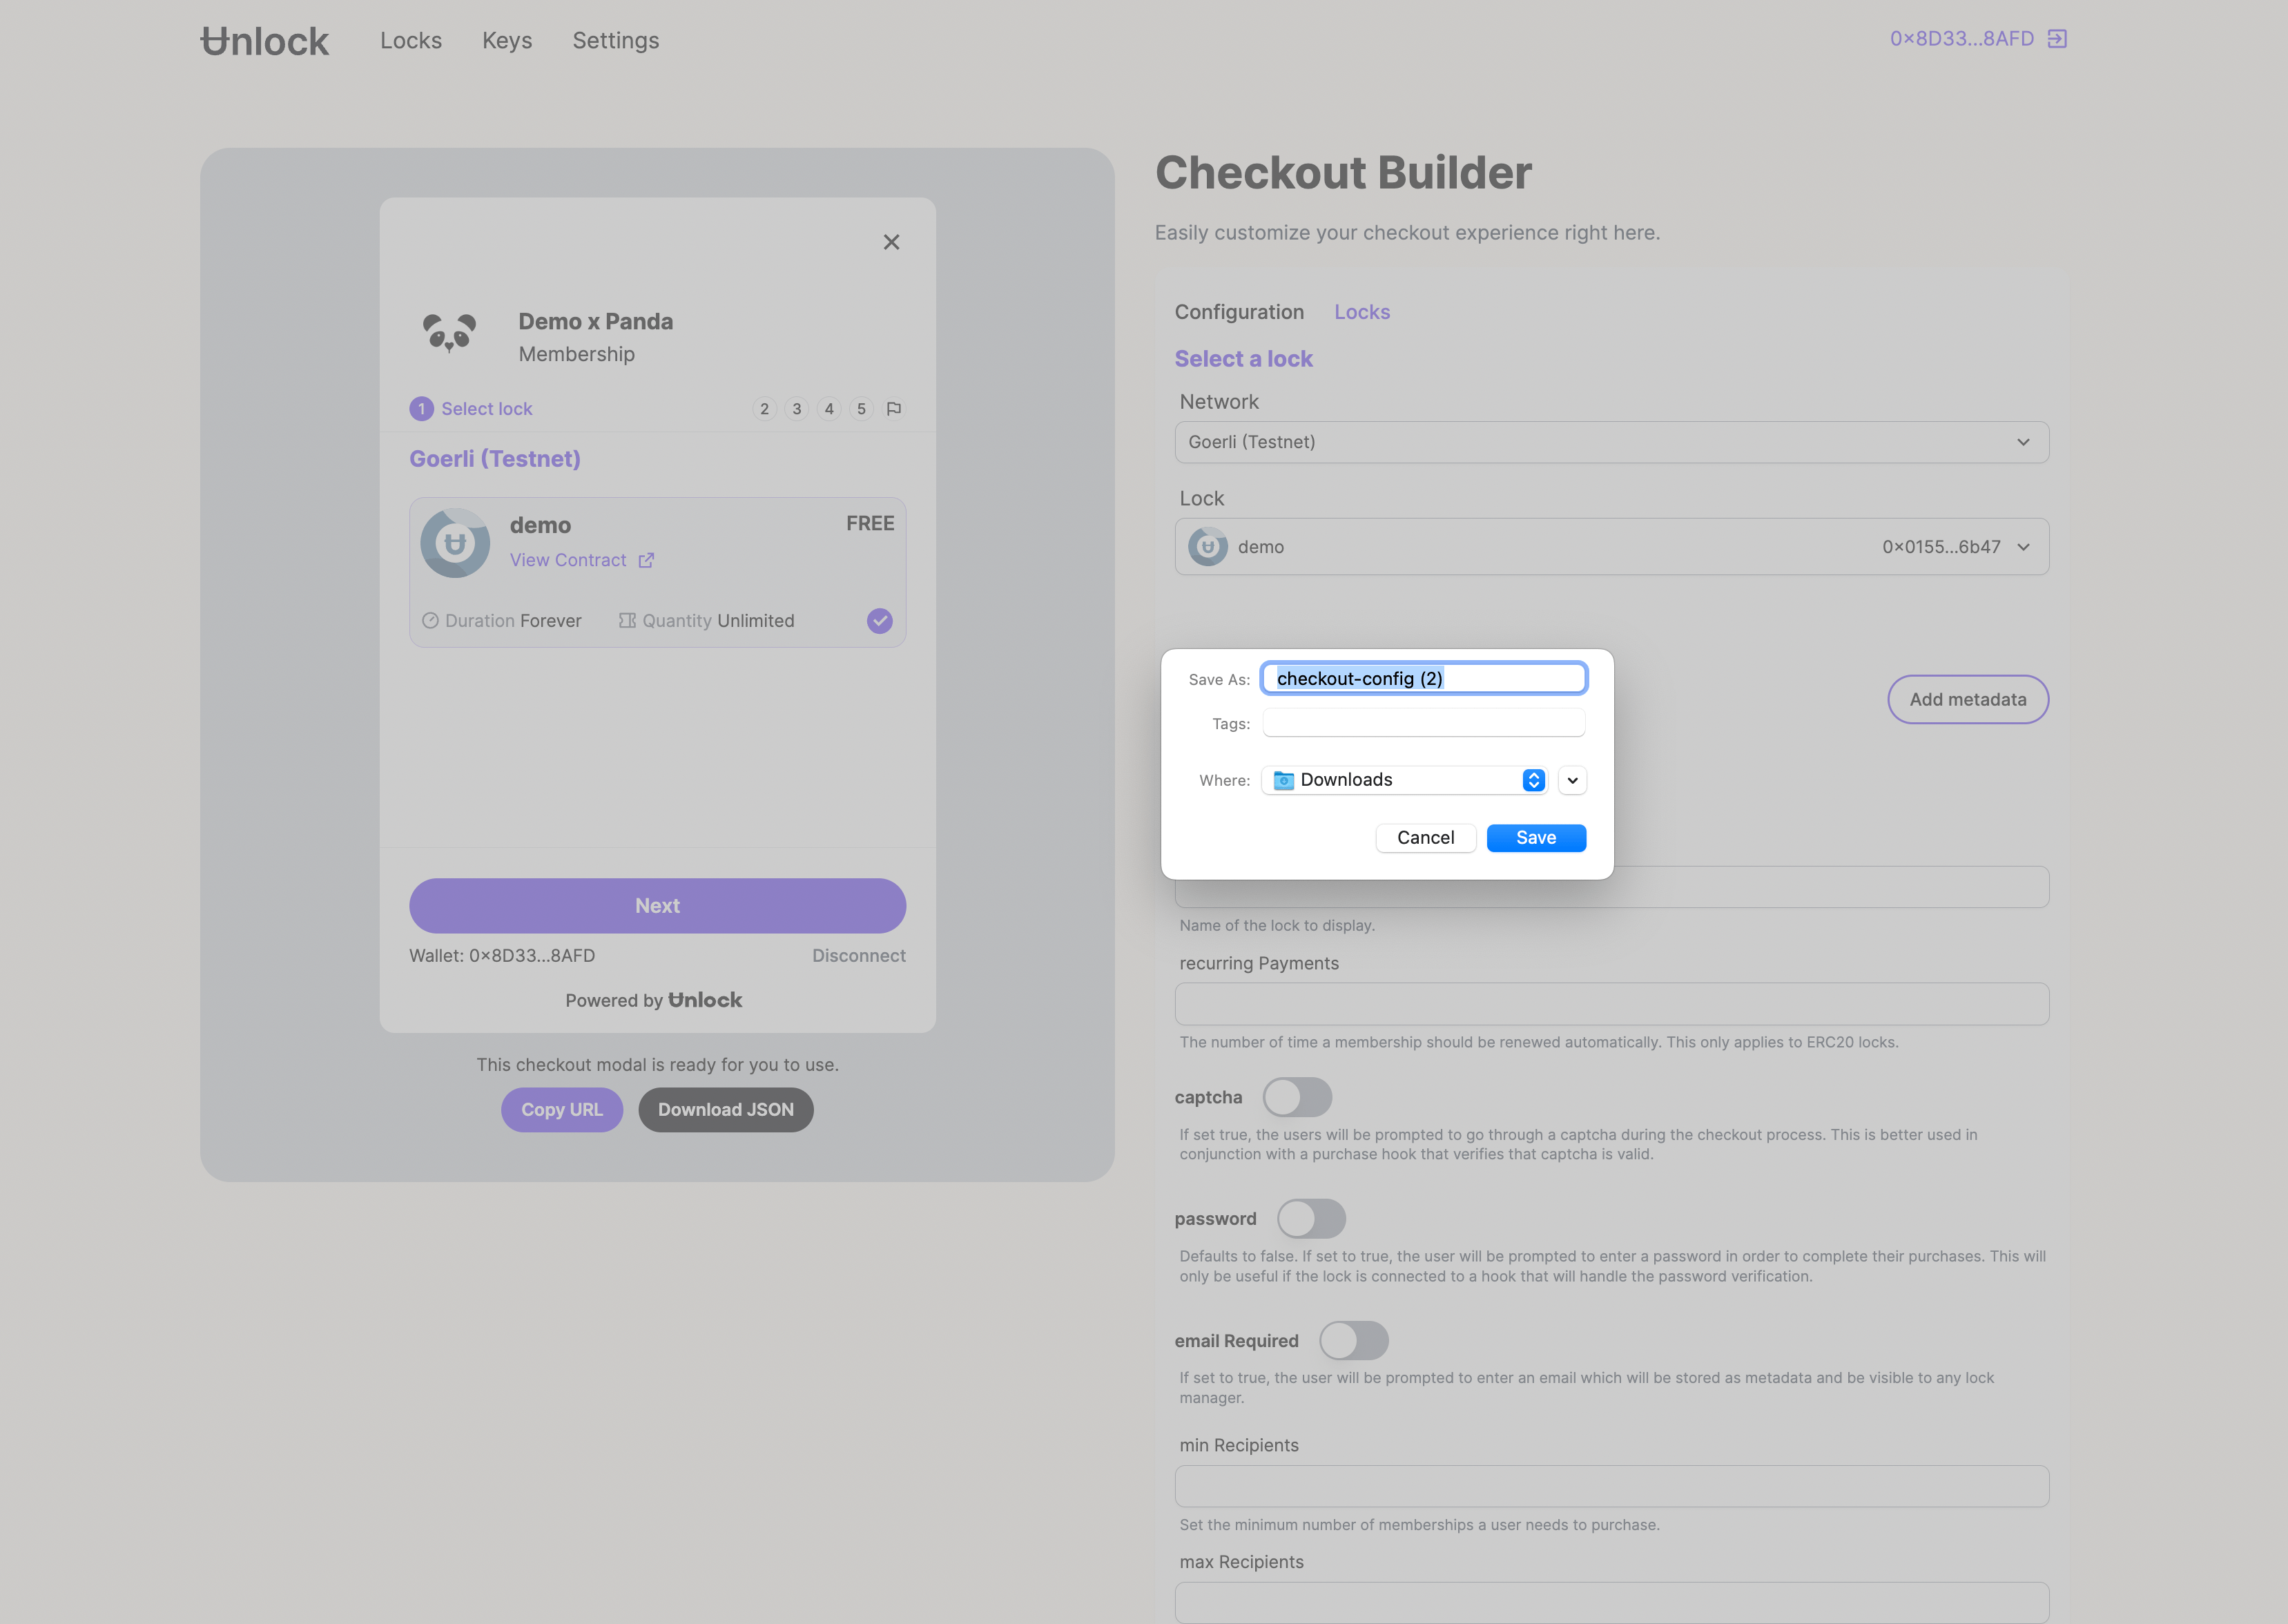
In the Configuration tab, we can set all the basic details about the lock. In the following example, we set the title to Demo x Panda and we can see it reflect on the preview. We can also set a custom icon.
In order to generate a checkout URL, we need to add one or more locks. To do this, we can switch to the Locks tab.
Add locks
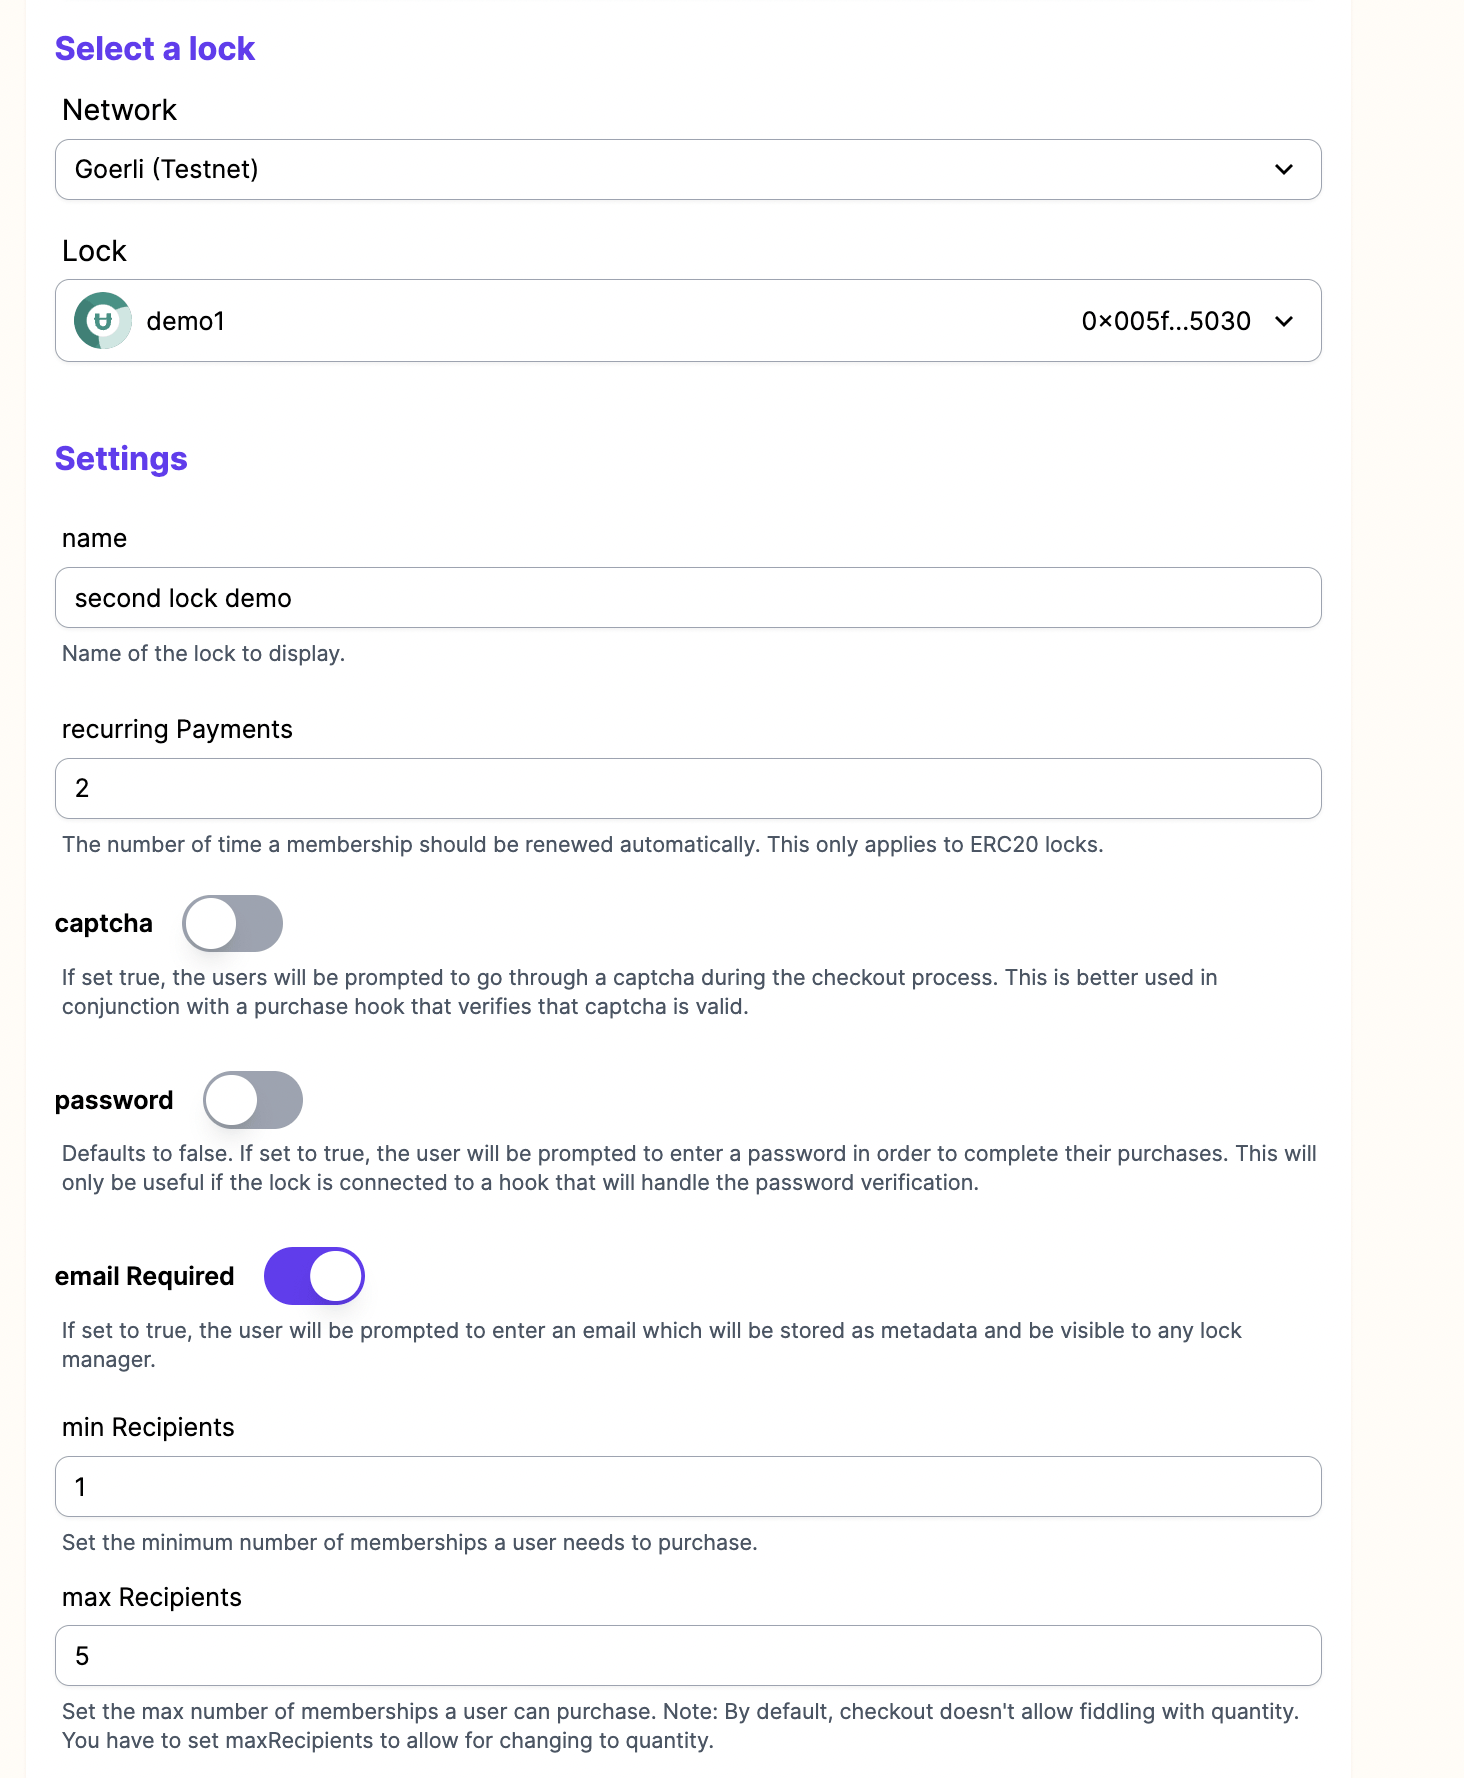
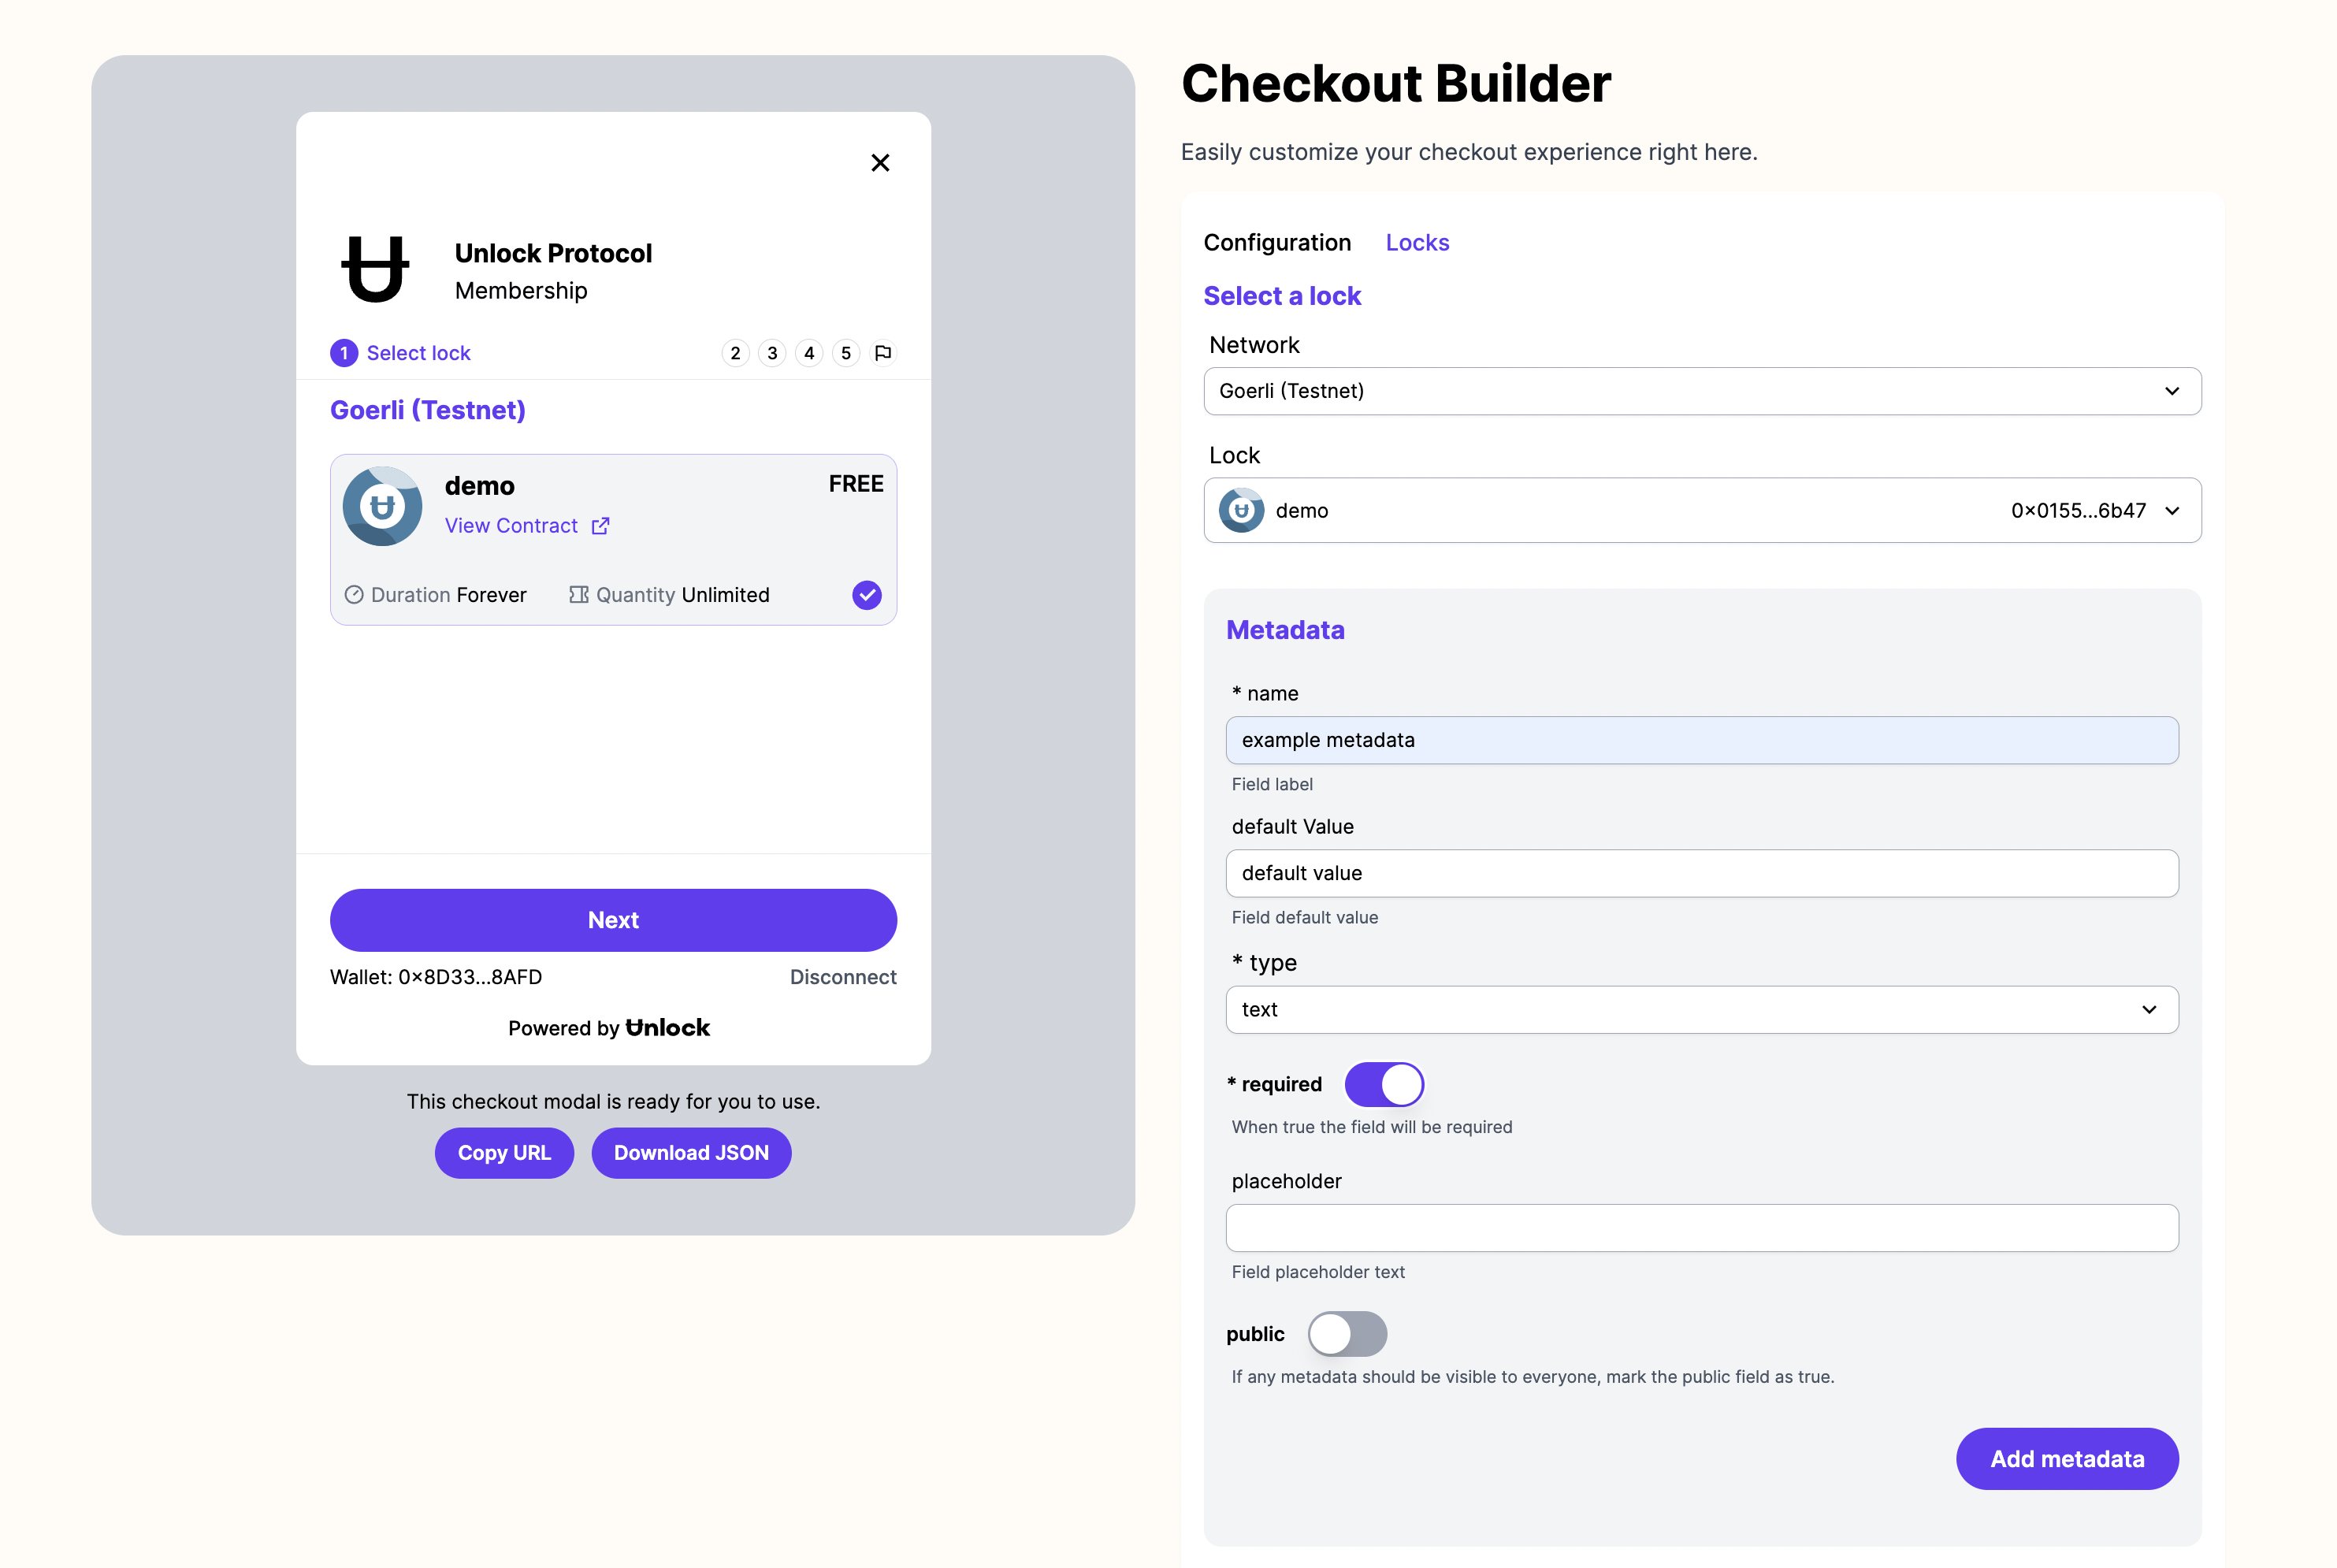
To add locks, the first thing we need to do is select a Network and the Lock we want to add.
The Lock dropdown will automatically show the list of our locks for every network.
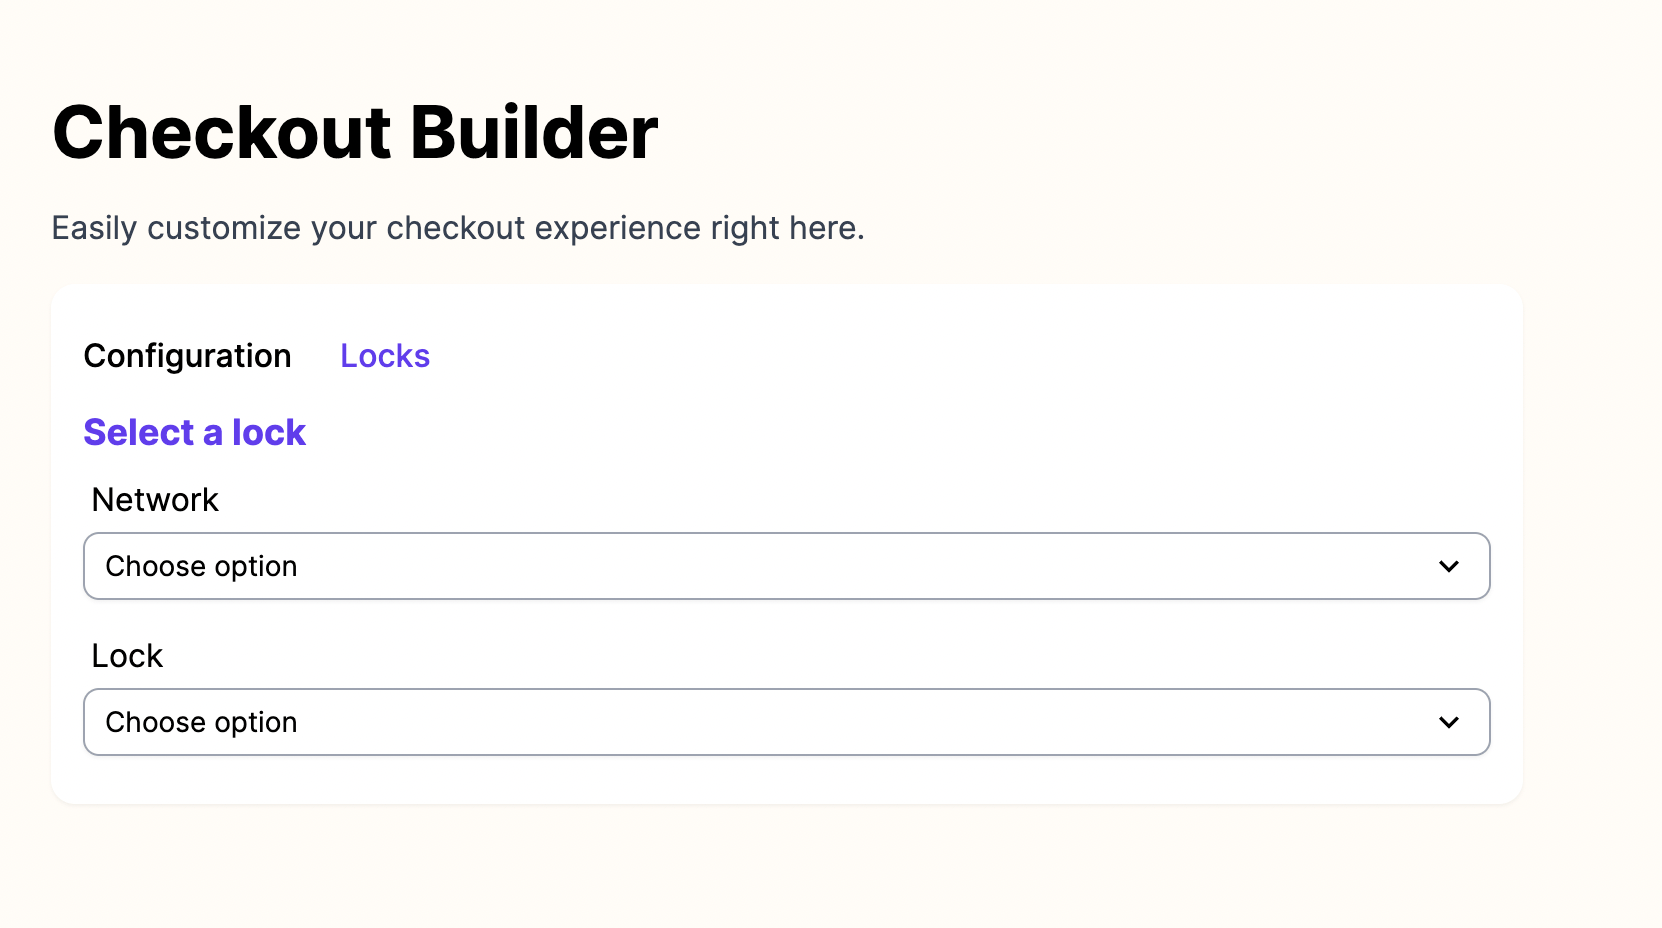
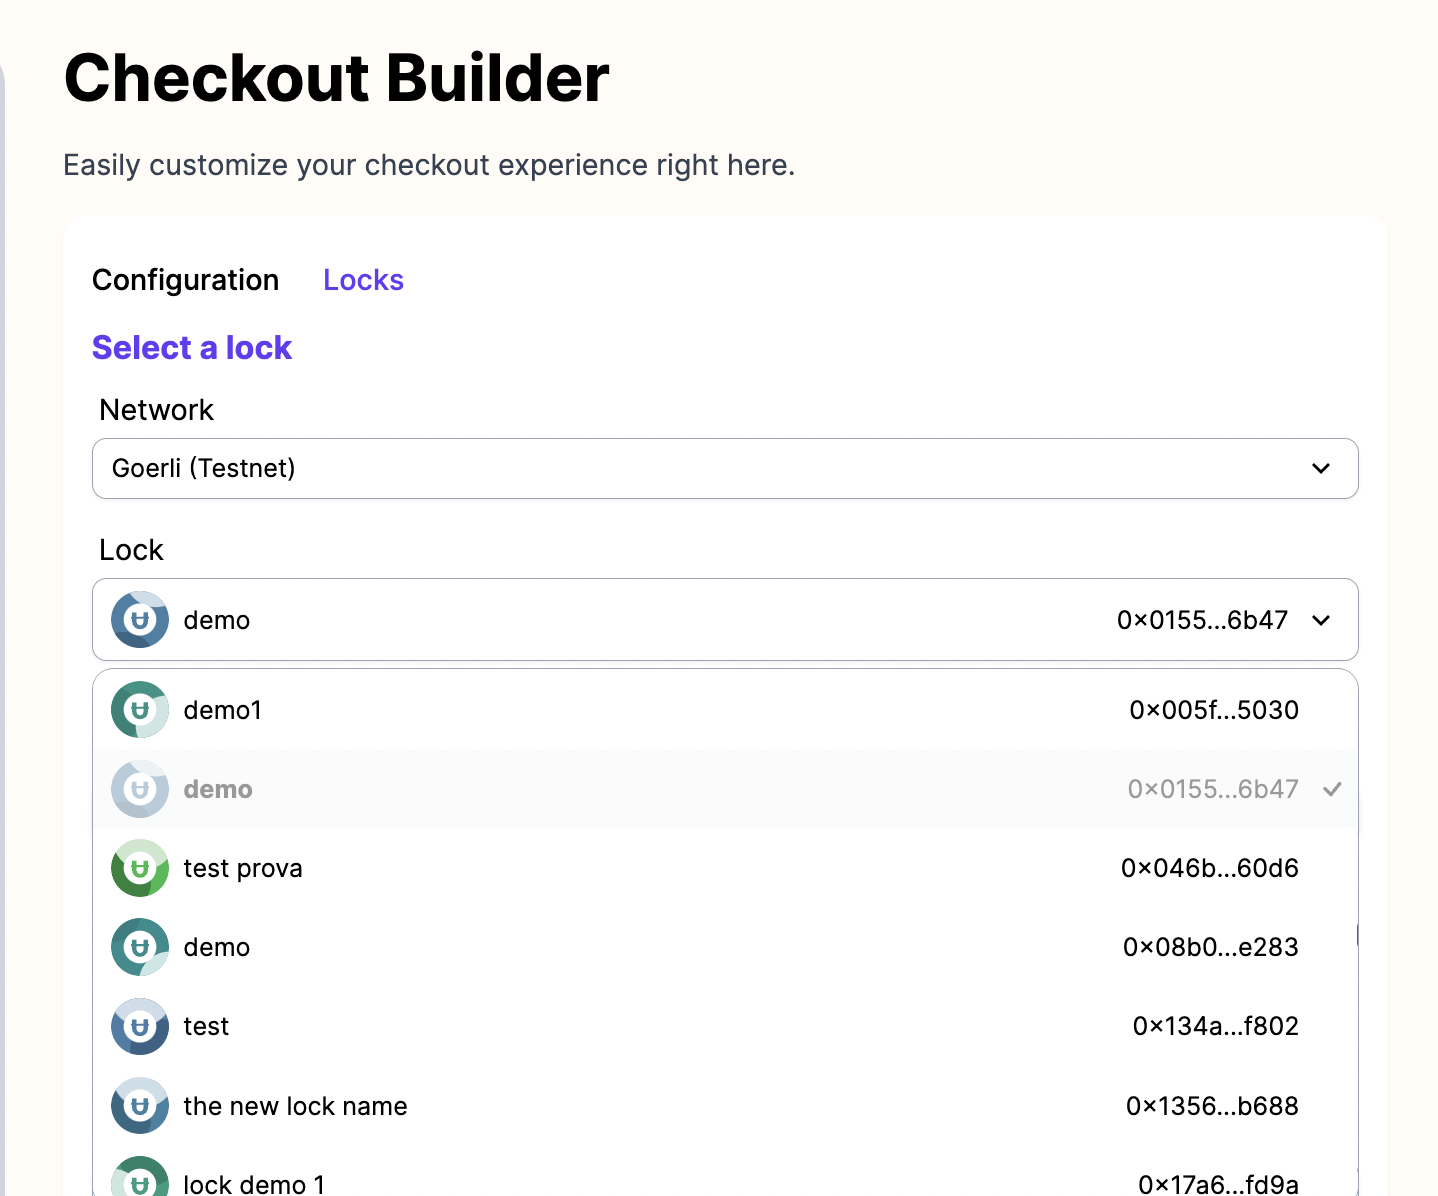
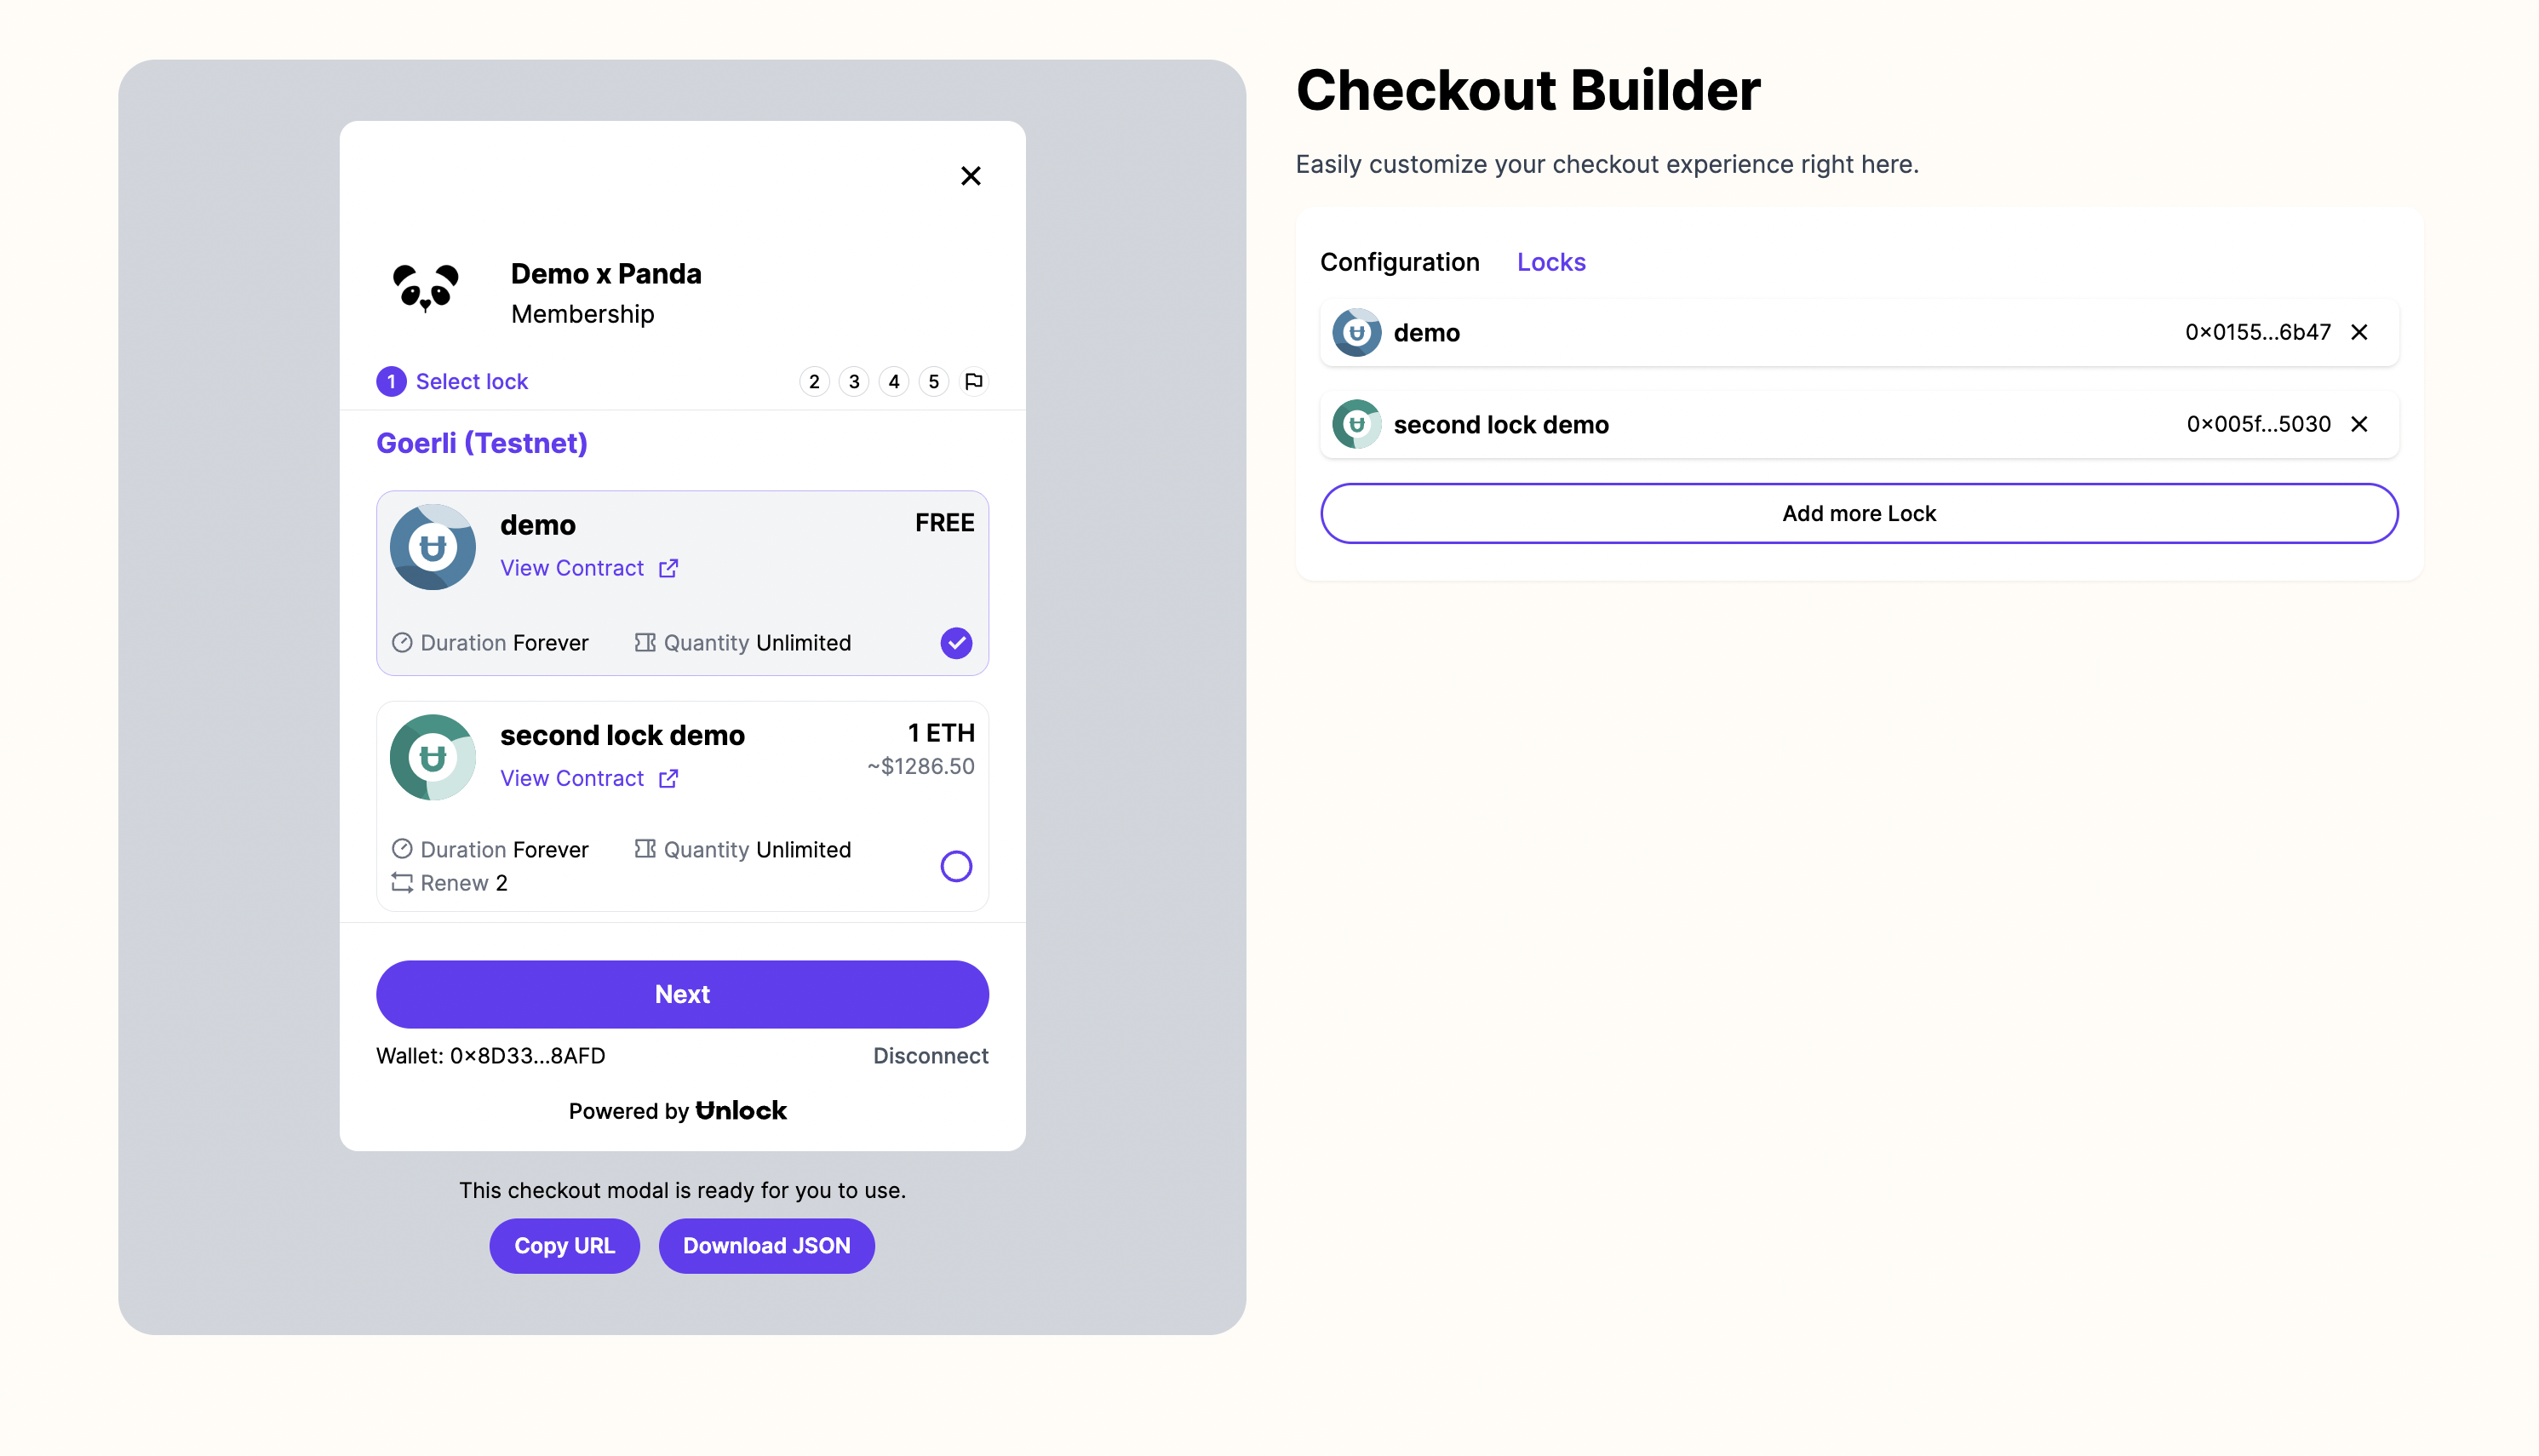
When the lock is selected, we can see it displayed in real-time on the preview.
As described in the previous step, we can follow the same process in order to add additional locks to our checkout page, if needed.
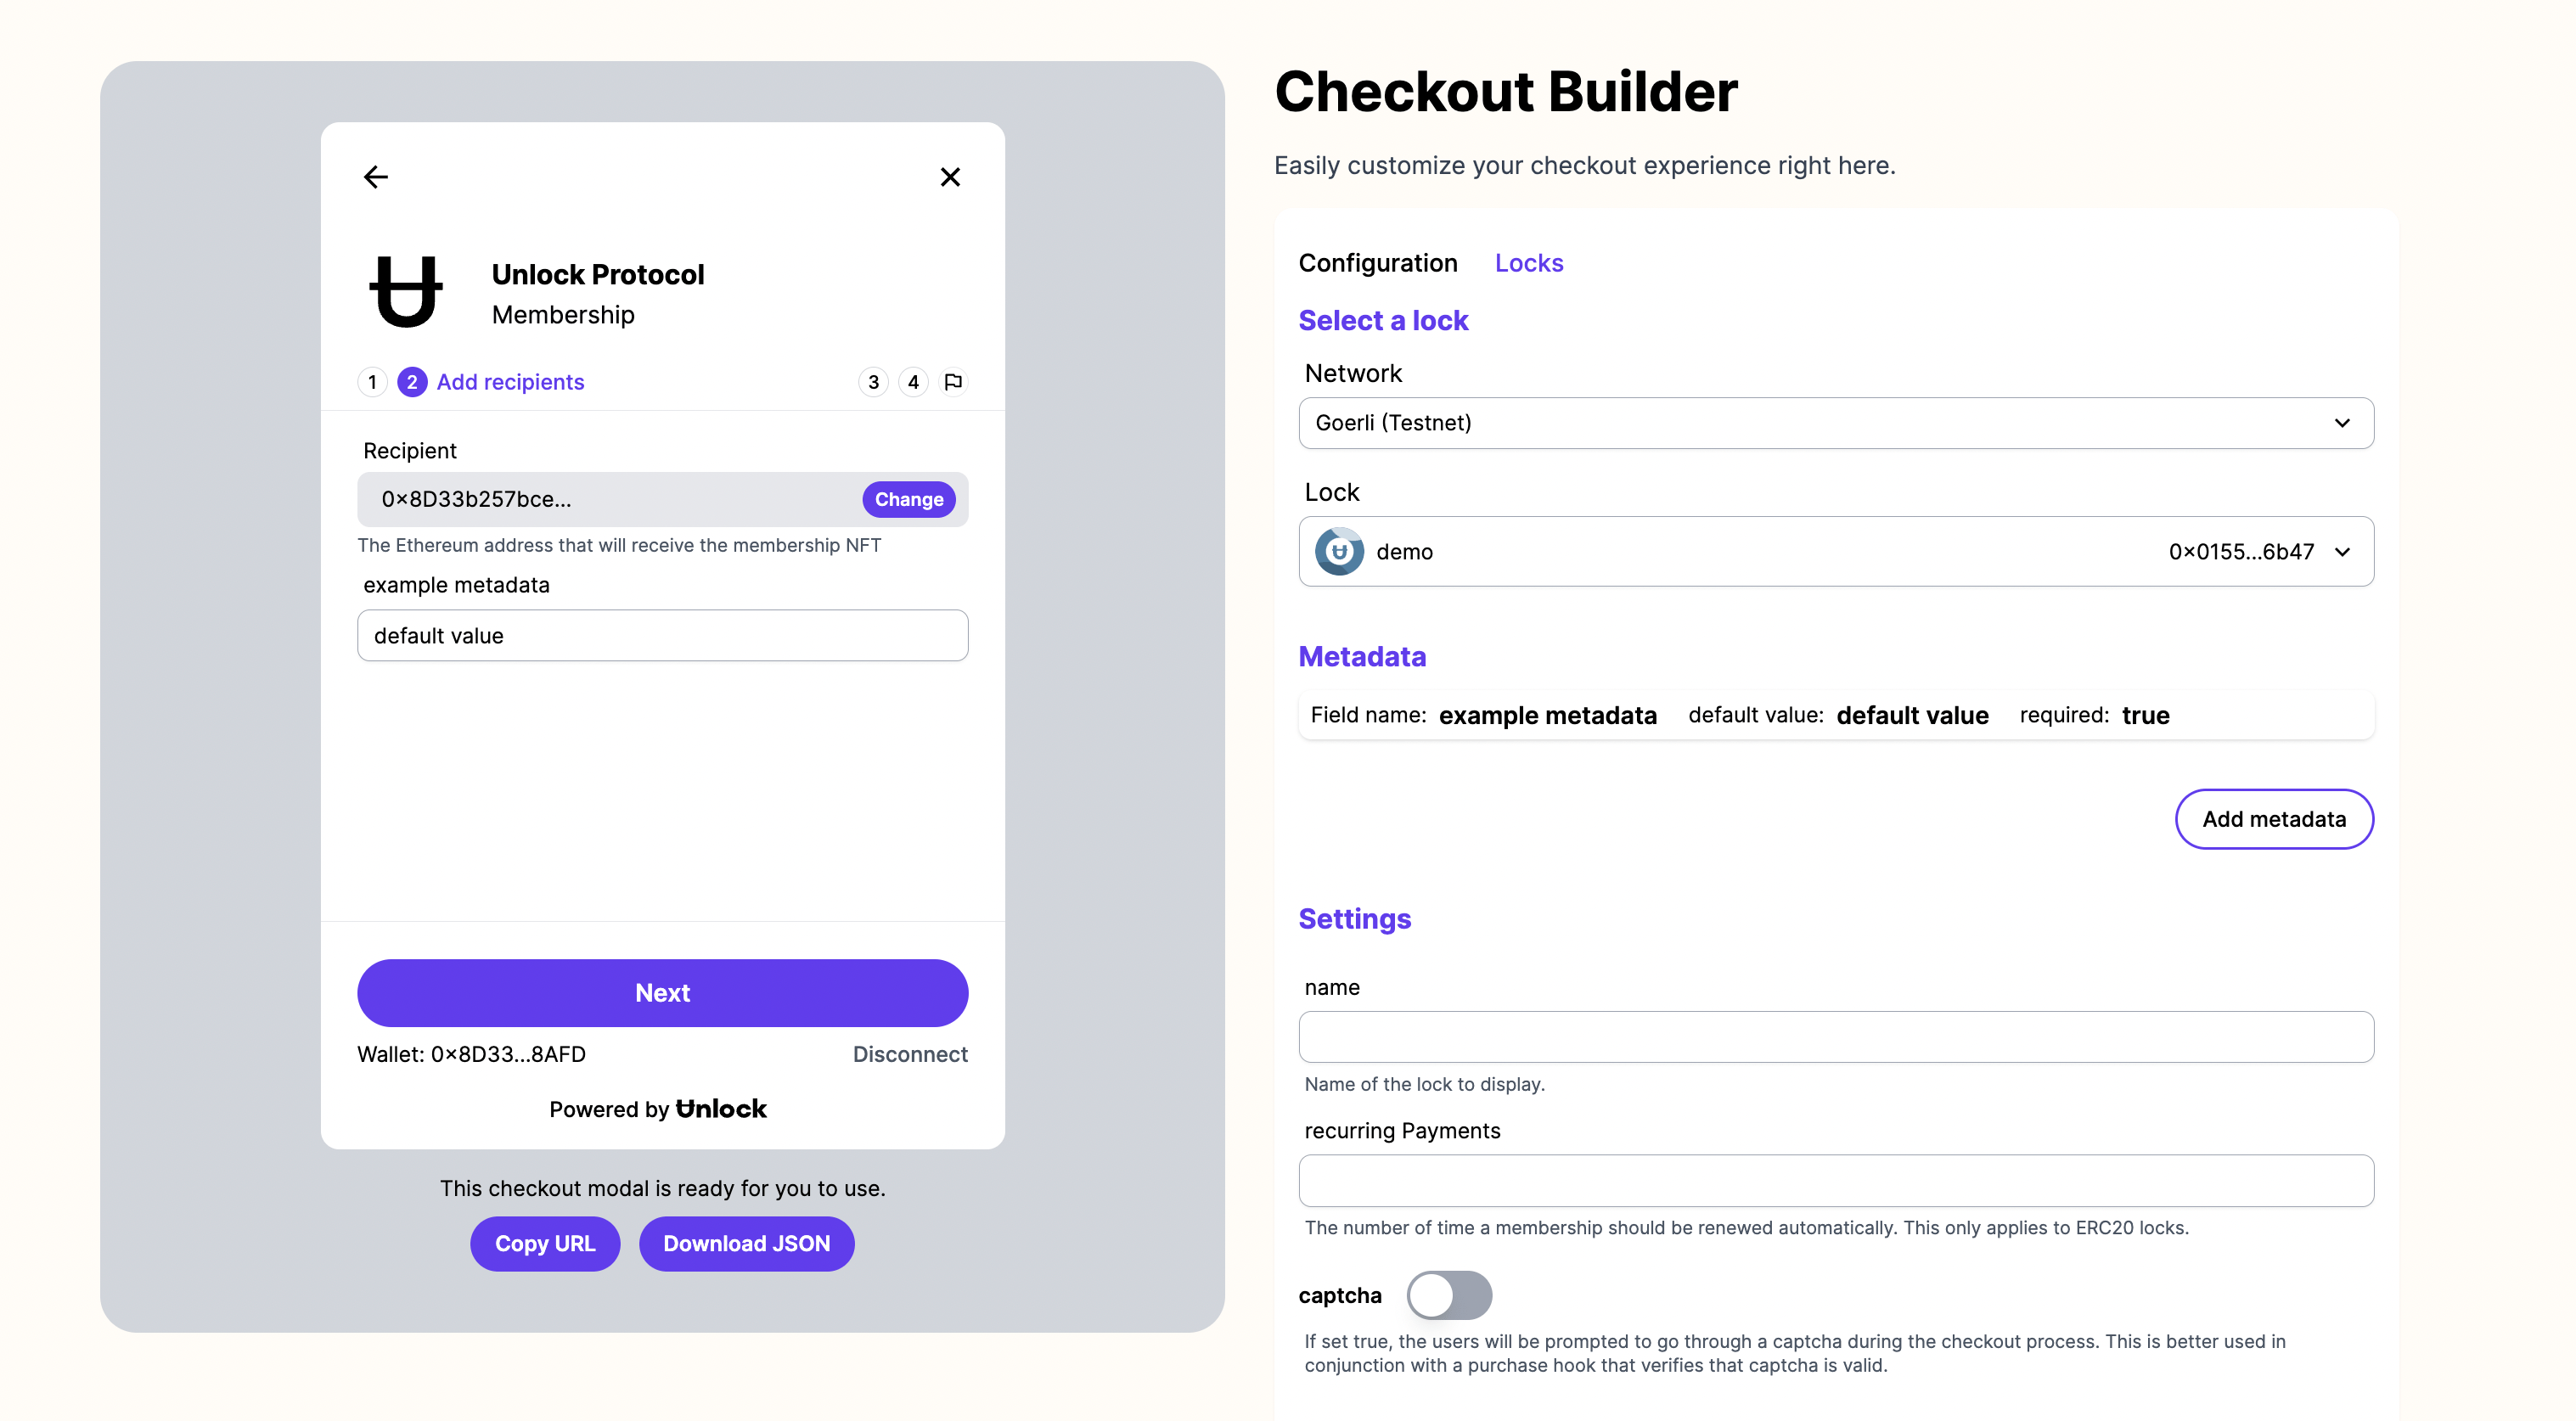
Detailed membership configuration
Our membership may have a number of traits that we’ll want to represent in the smart contract. Let’s take scenario:
"We need a Lock that sets our membership to renew 2 times, sets a maximum number of five memberships an individual user can purchase in a single wallet, and requires an email address so we can communicate with the member via email.”
The above items are configured in the Settings section of the Checkout Builder:
And finally, when the lock is added with the Settings, we can see second lock demo now contains all the details we added.
Removing a lock from the checkout
A lock can be removed from the checkout experience by clicking the cross icon on the lock list.
Collecting metadata
When setting up a membership experience, there is often information about your members (”metadata”) that is required to communicate with them (e.g. address), reward them (e.g. t-shirt size), and otherwise have a richer understanding of who a member is.
When collecting metadata during the checkout flow, you can set metadata items to collect at checkout time by clicking Add metadata in the Checkout Builder.
When Add metadata is enabled, a form where you can add detail for the metadata will be displayed. For each item of metadata, a number of fields are required.
name: the name of the field that's shown as a labeldefault value: default value of the fieldtype: type of the fieldrequired: specify if the field is required when trueplaceholder: the placeholder that's shown in the input typepublic: if this item of metadata should be visible to everyone
Add metadata
Metadata on preview
Copy and share!
That's all! You have now configured a checkout flow that can be shared with your prospective members. You can now copy the generated URL and share it to your community on your website, via social media, through email, or by any other method you like.
One more thing: Developers can download the JSON configuration for a checkout
While the above steps are especially helpful for creators who are creating memberships for their community, the Checkout Builder can be a huge time-saver for developers as well. If you are developing on top of Unlock Protocol and need to integrate a checkout configuration into your custom code, you can configure the checkout experience using the Checkout Builder and then download a fully-configured JSON file to configure the Paywall in your application.
What if I find an issue or bug in the new checkout builder?
Please open an issue on Github or tell us in Discord and we'll fix it ASAP.