The Unlock Protocol WordPress Plugin adds Web3 membership capabilities to WordPress. With it, website members can sign in with their Web3 wallet, and site administrators can set up content blocks on the membership site that are token-gated for members only. The Unlock Protocol WordPress plugin creates an Unlock Gutenberg block, and works out-of-the-box with current WordPress implementations.
Over ten million active websites use Elementor and other WordPress page builders. This guide is for creators and web pros who want to bring Web3 capabilities into those page builder websites. Let’s do it.
Note: If you are using a standard WordPress implementation with Gutenberg and you are not using a page builder such as Elementor, Divi, Beaver Builder, Brizly, or the like, please refer to the original guide on how to use the Unlock Protocol WordPress Plugin. The shortcode-oriented steps in this guide are not required if you are using a standard, Gutenberg-based WordPress site. The original guide linked above contains the information on how to use the plugin with a standard Gutenberg implementation.
How to add the Unlock Gutenberg block as a shortcode
1) Set up your WordPress site with Elementor or another page builder, like you’ve (probably) already done.
2) Add the Unlock Protocol WordPress plugin to the site. You can get the plugin from the WordPress Plugin Repository here: Unlock WordPress Plugin
3) Set up a lock in the Unlock dashboard. Here’s how to set up a lock. Copy down the smart contract address for the lock. The contract address will be directly under the lock name after you have created the lock. You’ll need that contract address in a later step.

4) This is the big step. You’ll need to install the Reusable Blocks Extended plugin from the WordPress plugin repository. This is a third-party plugin that will create the shortcode you need to drop into your page builder. Install the Reusable Blocks Extended plugin.
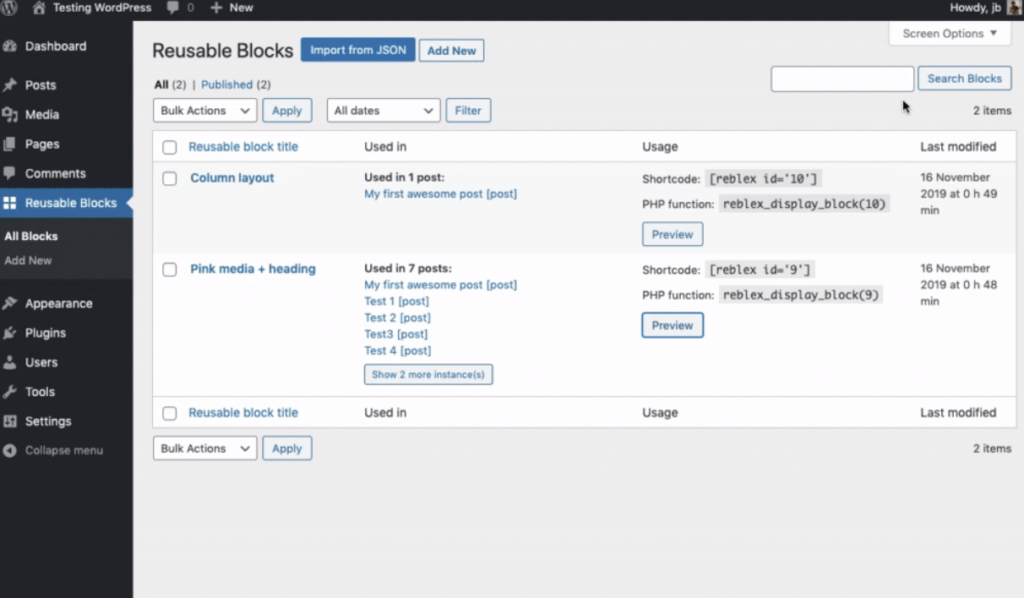
5) Activate the Reusable Blocks plugin. This will add a Reusable Blocks menu item to the WordPress admin sidebar. (In some WordPress installs, this may be inside the Blocks menu on the sidebar.)
6) Set up a page on the site using the Gutenberg editor (not in Elementor or your other page builder, but in the “regular” WordPress Gutenberg editor). Drag and drop the Unlock Protocol Gutenberg block into the page. Configure the Unlock block with the lock address and network you copied down in Step 3 above.
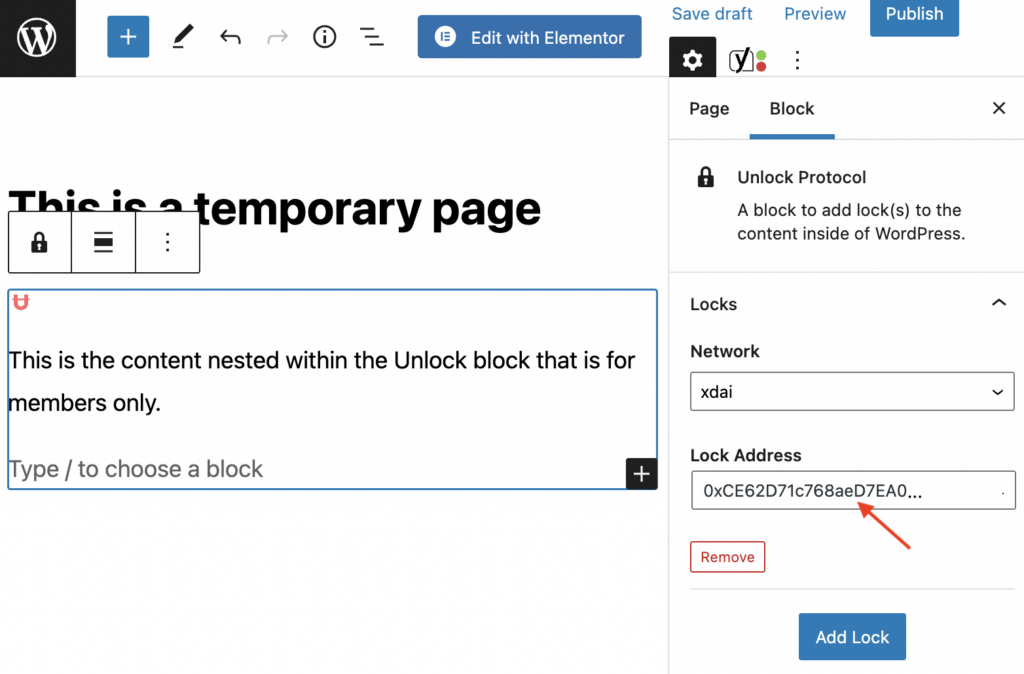
7) Put the content you want to be for “members only” inside the Unlock block. Unlock blocks are nested Gutenberg blocks, so you can put any kind of content inside of them, including text, video, images, and more. It’s important you put your “members only” content into the Unlock block before you go on to the next step.
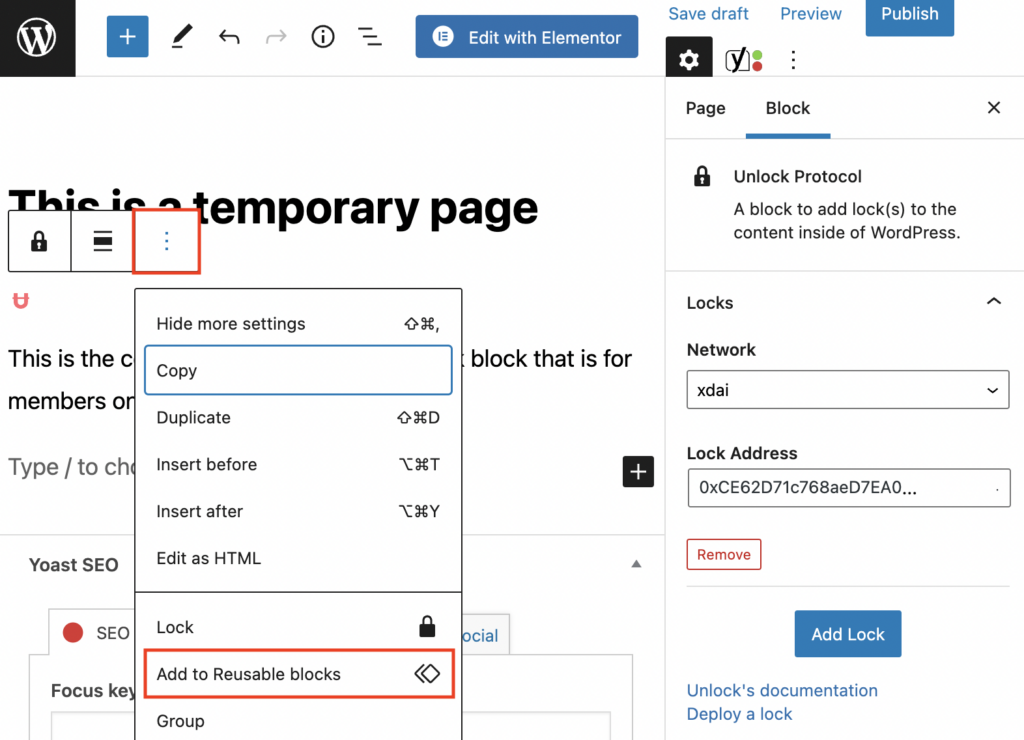
8) Save the Unlock Protocol block as a Reusable Block. To do this, select the outer Unlock block by clicking on the Ʉ, click the three dots menu, and click Add to Reusable Blocks. (At any point after this step, it’s fine to delete the page you just created. That page was only needed in order to have a place to drop the Unlock block in order to create the Reusable Block.)
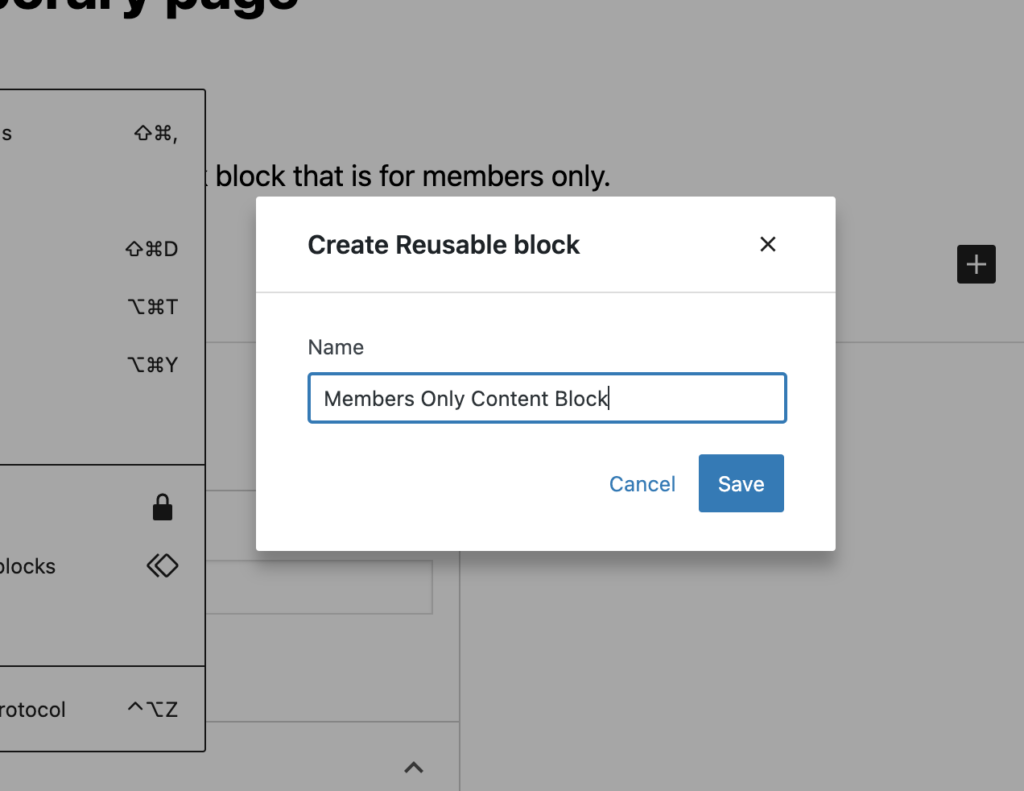
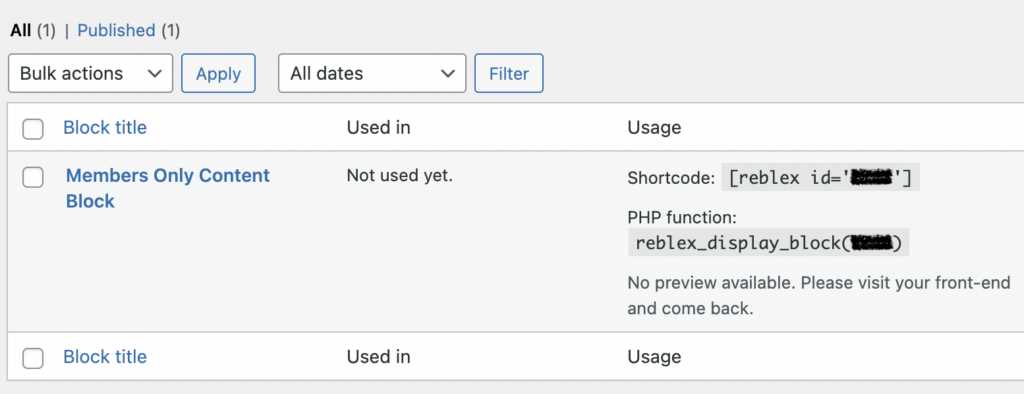
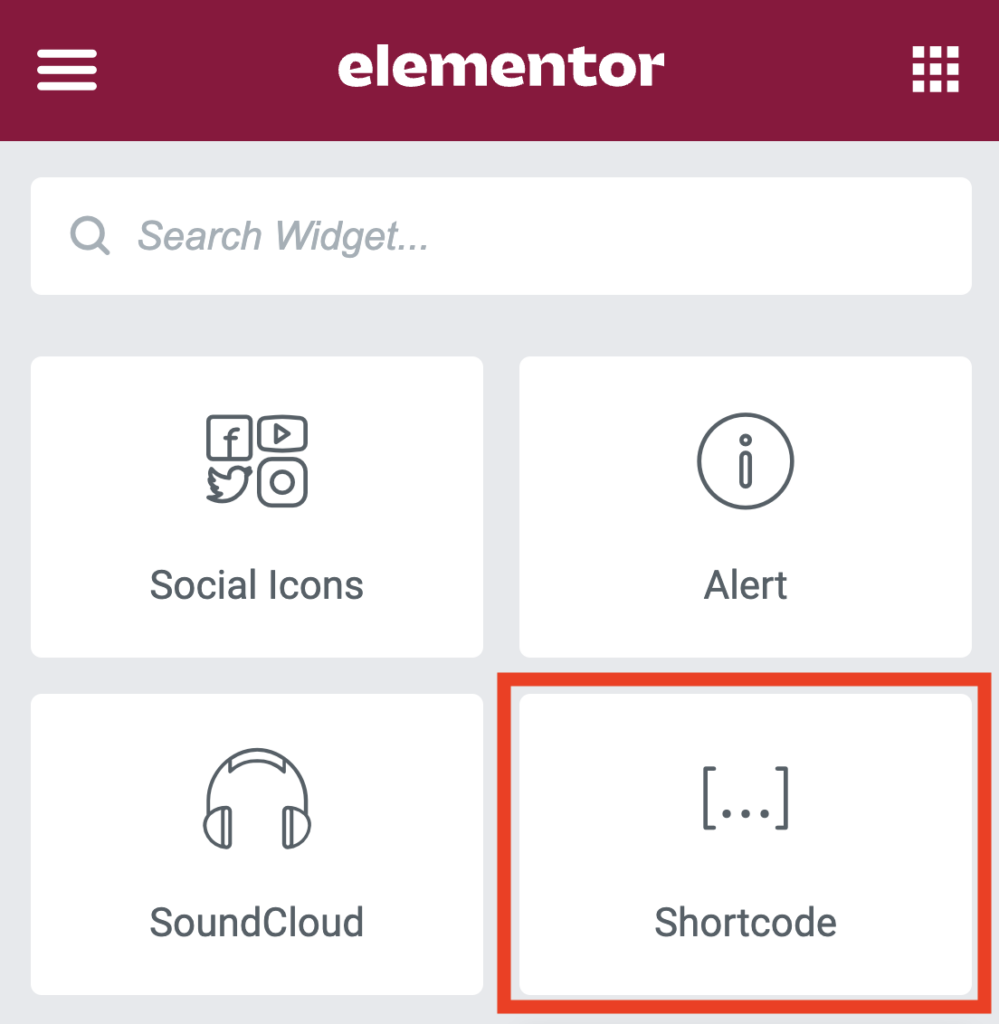
9) At this point, the Reusable Blocks plugin will have created a shortcode for you that you can use anywhere. You can drop that shortcode into Elementor or your other page builder wherever you want to have members-only content using the shortcode block that is included in your page builder.
End-to-end, this should take probably 60 minutes or so the first time due to some level of learning curve, and less than 10min for any future cases once it’s been done once and all the pieces make sense.
Happy building!


