Welcome to the Event Registration Guide! Especially with free events and meetups, organizers often want to vet their potential attendees, and only share tickets with those whom they have approved.
This guide provides a step-by-step walkthrough on how to create and share a customized approval form that you will use for organizing and reviewing the applications of folks who are interested in attending your event. You’ll be able to approve selected attendees and then send those approved attendees onchain tickets with just a few clicks.
Ready? Let’s go!
Set up your attendee approval template
The team at Unlock Labs has set up a simple spreadsheet-powered template and form you can use to collect the names and email addresses of prospective attendees.
To access it, go to
https://docs.google.com/spreadsheets/d/1sJ6_nDnN_mh9tPoElk-ttF-LxWK6Lpa3KYT1XKLwTQE/edit?usp=sharing
The spreadsheet template at the link above should be View Only.
Click File > Make a copy (you’ll need to be signed into your own Google account to make a copy)
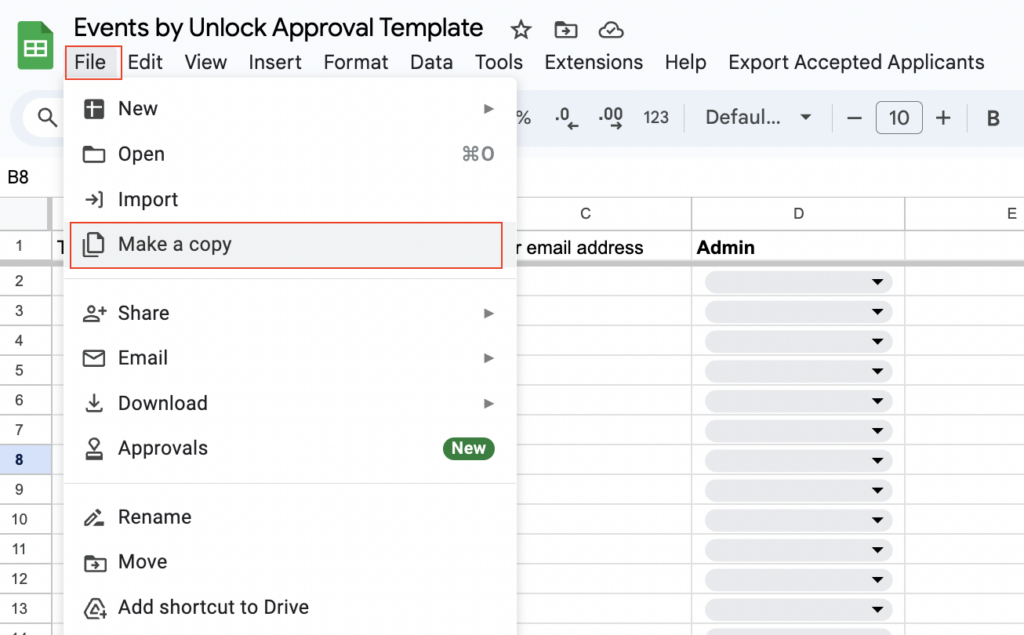
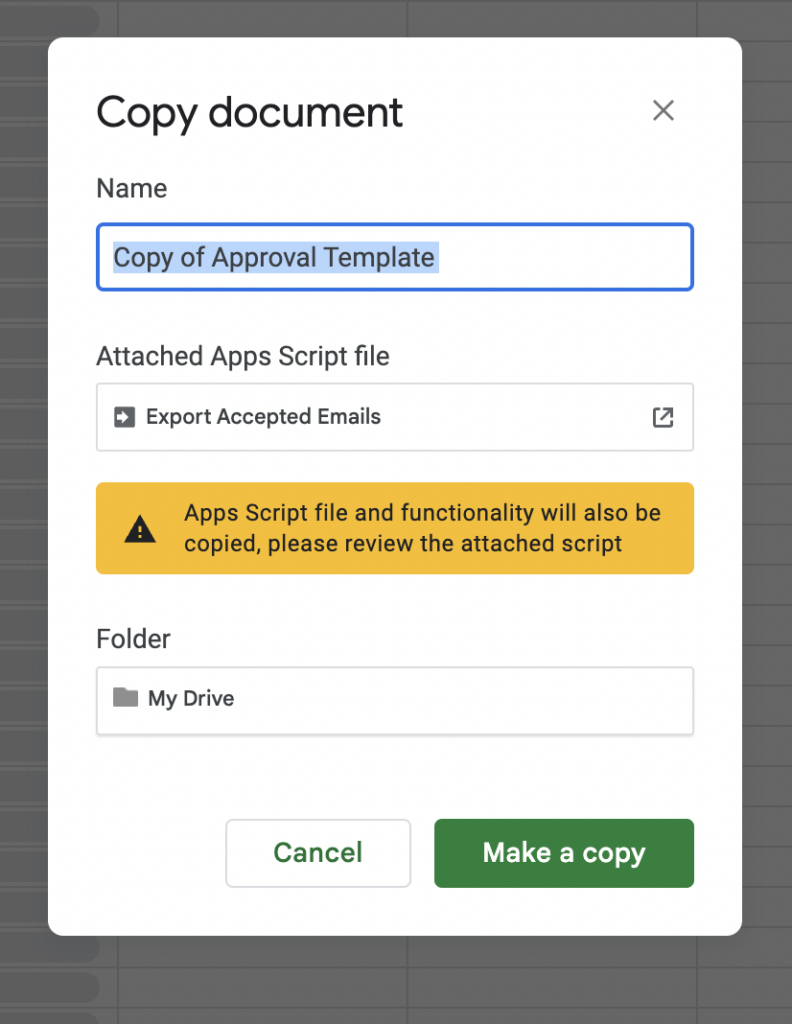
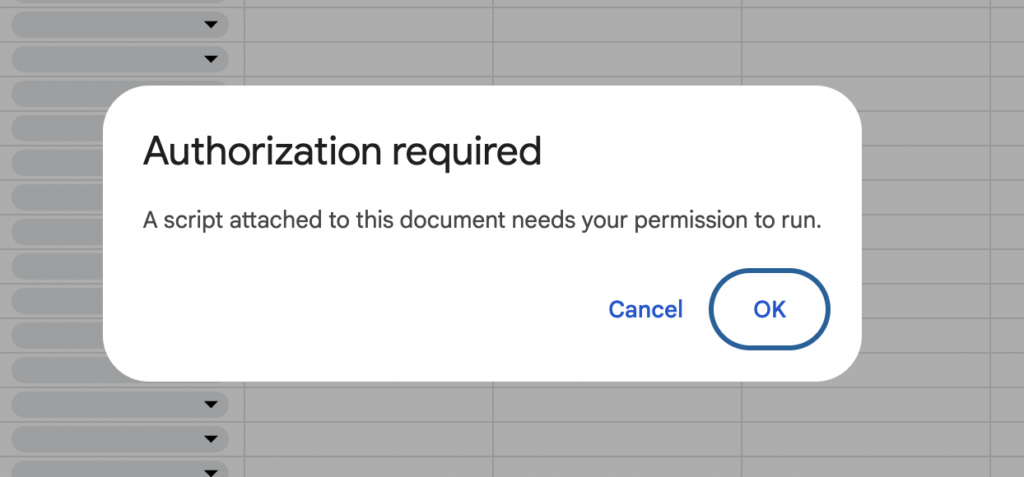
Google will notify you that the spreadsheet contains a script. This script will be used later in this Guide to export the Accepted applicants for your event.
After you click “Make a copy,” you now should have a copy of this form in your own Google account.
Edit the form for your event
Go to your Google account and open your copy of the spreadsheet.
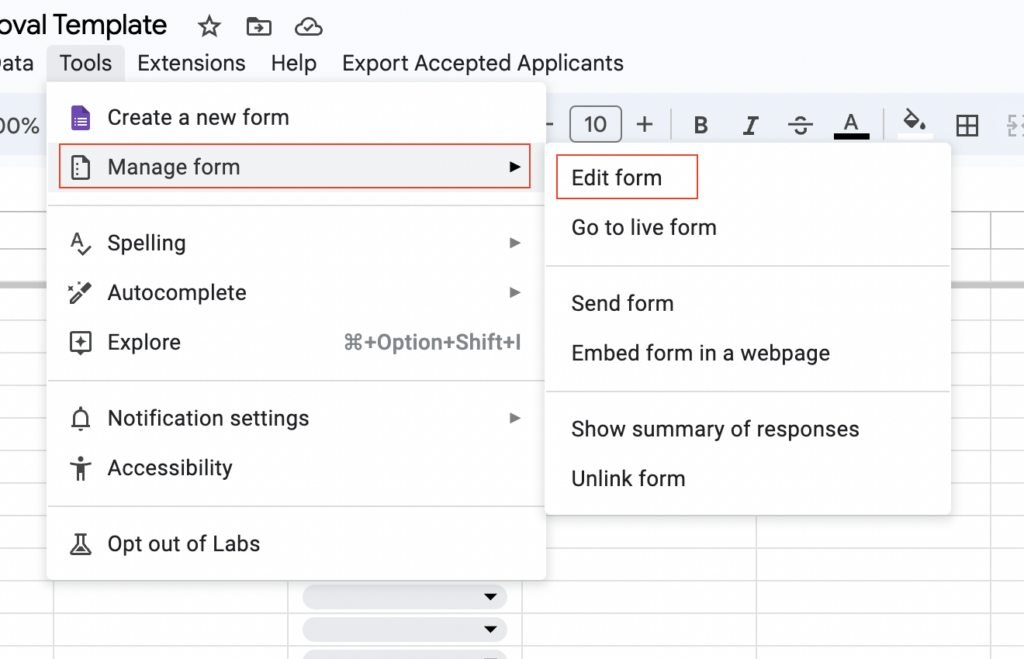
In your copy of the spreadsheet, go to Tools > Manage Form > Edit form
Go to your form.
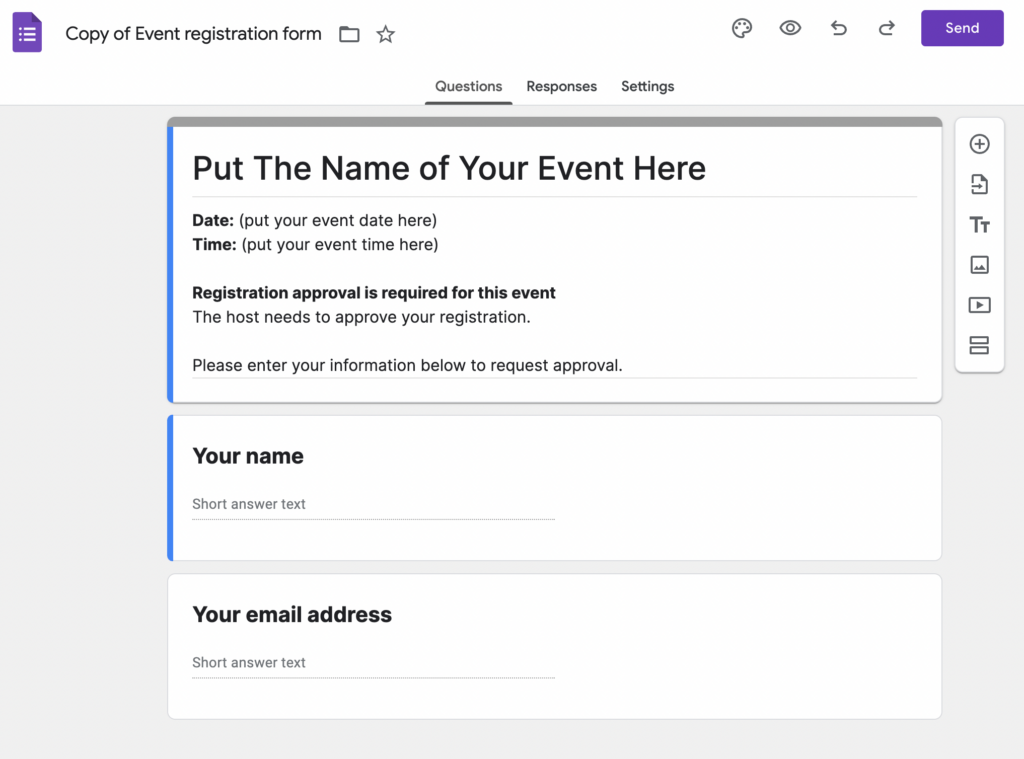
You can rename and change the name of your form if you choose.
Update the Event Name in the header.
Update the date and time in the header. You can also add other information about your event in the header as well, if you so choose.
Note: Only edit the existing fields, don’t add or change any other fields in the form.
Note: In the Form settings, make sure “Collect email addresses” is set to “Do not collect” (if this is set to a value other than “Do not collect,” this will force people to verify with their Google accounts before registering, which may not be what you want).

Once you’ve put in the name, date, and time of your event, your form is now ready to start accepting applicants for your event!
At this point, you can share the link to the form in your community, on social, on your website, or anywhere else you would like and start accepting applications for your event. As applicants fill out the form, their names and emails will automatically show up in the spreadsheet. Share your form using the “Send” link in the upper corner to share via email or to find the share URL link.
Go back to your spreadsheet.
Accept or Reject the applicants
After folks have applied via the form, you’re ready to accept (or maybe reject 🙂 ) applicants!
For each applicant, choose either “Accept” or “Reject” in the spreadsheet.
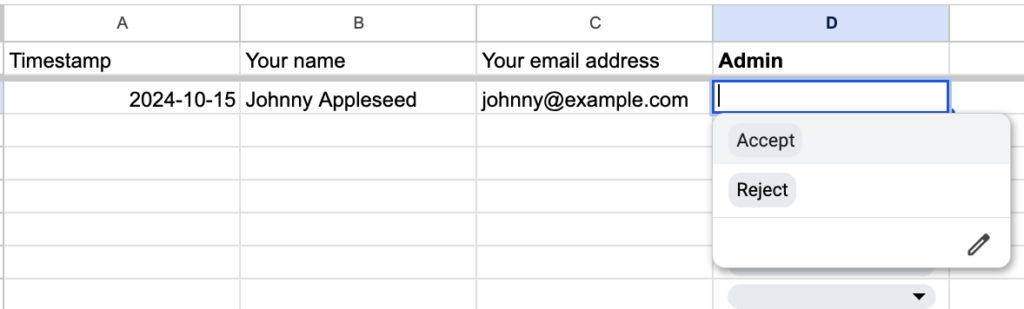
Go through all of your applicants and accept the ones who you would like to send tickets to.
Enable a formatted export from the spreadsheet
You’ll notice a menu at the top of the spreadsheet next to the Help menu that is called “Export Accepted Applicants.” This is a script that will export all of the Accepted applicants to a file that you can use to send all the accepted applicants a ticket using Unlock.
(If you’re a technical user, this spreadsheet function uses Apps Script to automate the process for you. You can view the source code in the Extensions > Apps Script at any time.)
Google will make sure you know this, and will pop up a few notices when you click on the Export Accepted Applicants menu item.
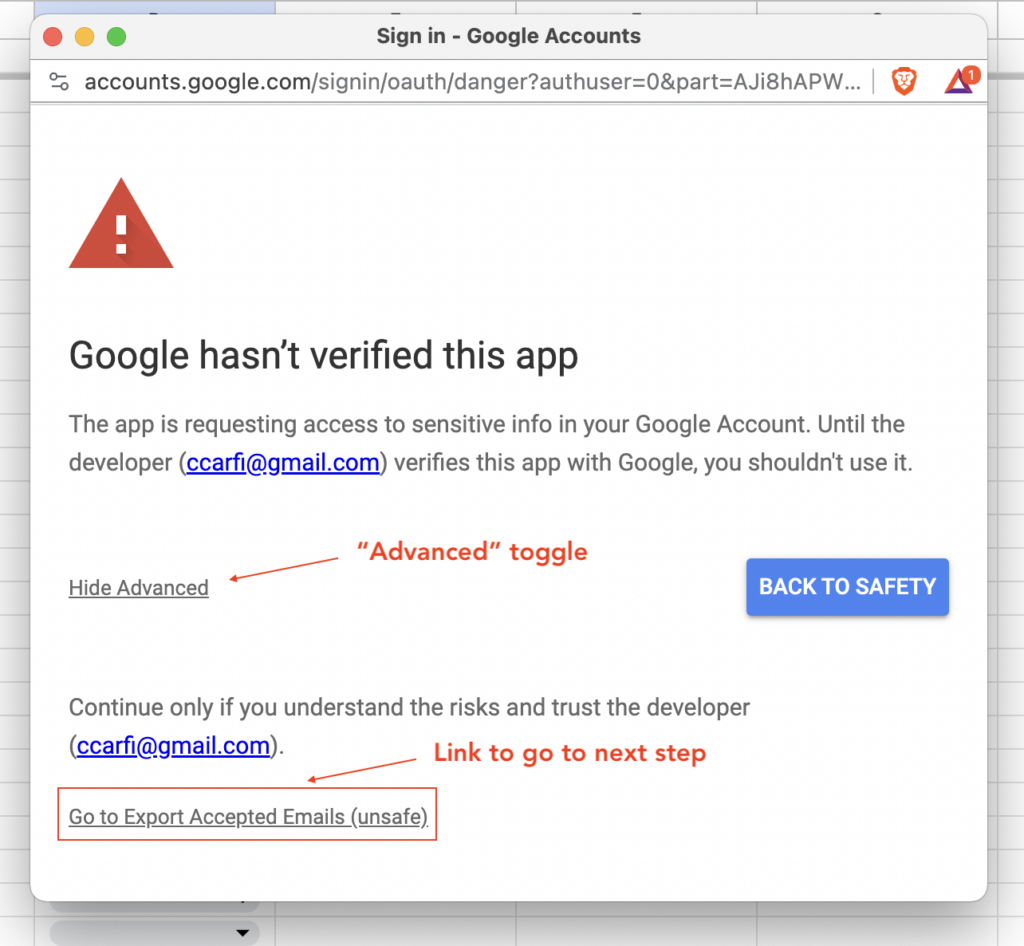
Show the “Advanced” option by clicking the Advanced toggle and proceed.
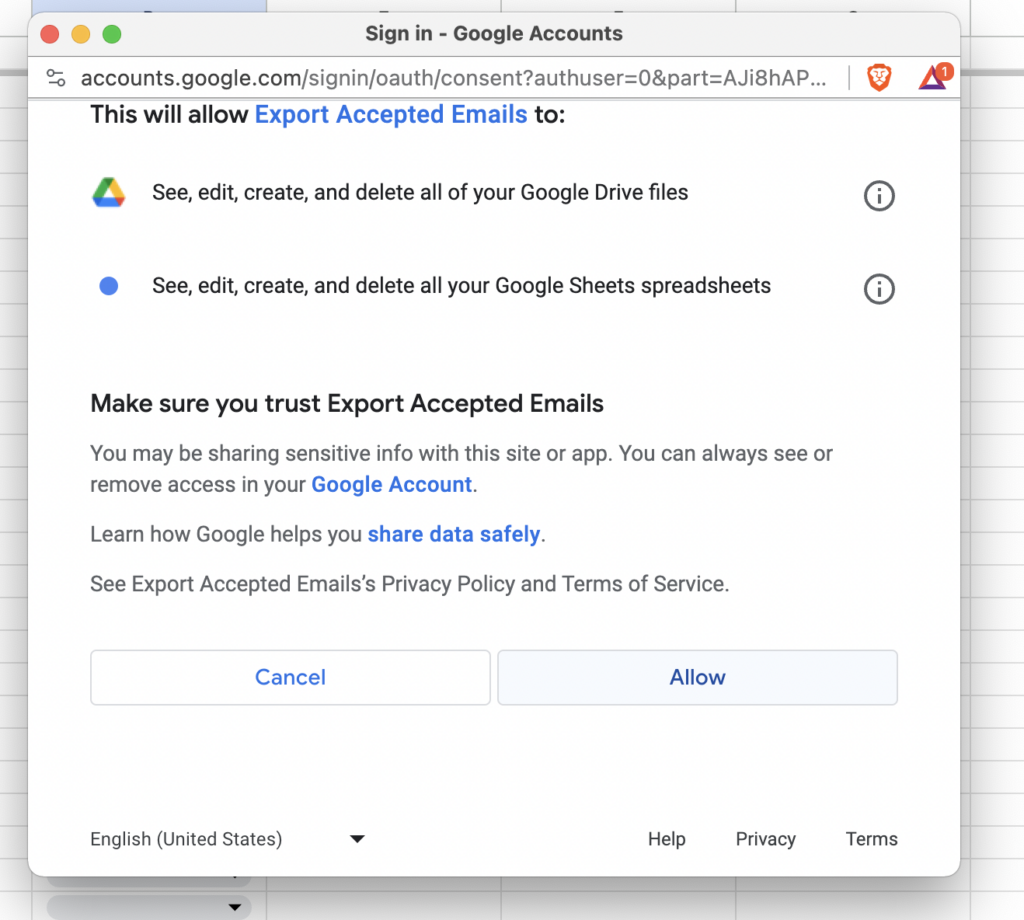
And Allow.
Ok! We are ready to go!
Gathering and approving applicants
If you haven’t done so already, share the form and start collecting applications. Share the form with folks. Each time someone fills out the form, a new row will be added to the spreadsheet. As suggested above, you can share the link to the form in your community, on social, on your website, or anywhere else you would like and start accepting applications for your event.
As applicants fill out the form, their names and emails will automatically show up in the spreadsheet.
Either all at once, or on a regular basis during the days or weeks while you are accepting applicants, jump into the spreadsheet and approve or reject each applicant.
Exporting the approvals
When you are ready to invite all your Accepted applicants, open the “Export Accepted Applicants” menu in the spreadsheet and click “Export Accepted Applicants” in the dropdown it gives you.
This will create a file with all of the accepted applicants in a format that can be used by Unlock to send all of them tickets via email. You should see a message similar to this.
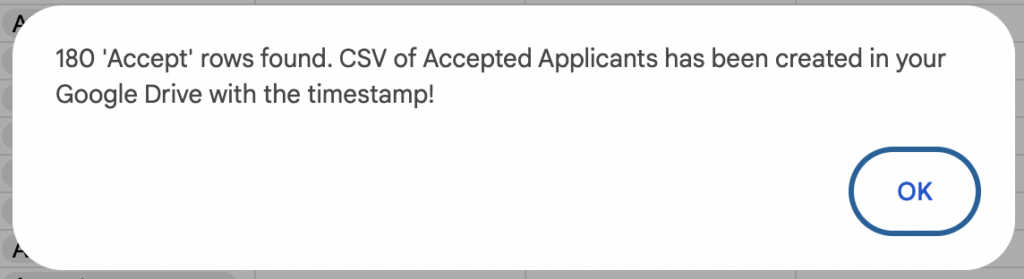
The export file has been saved in your Google Drive. The file will have a name something like “AcceptedApplicants 2024-10-15 19:14:55.csv”
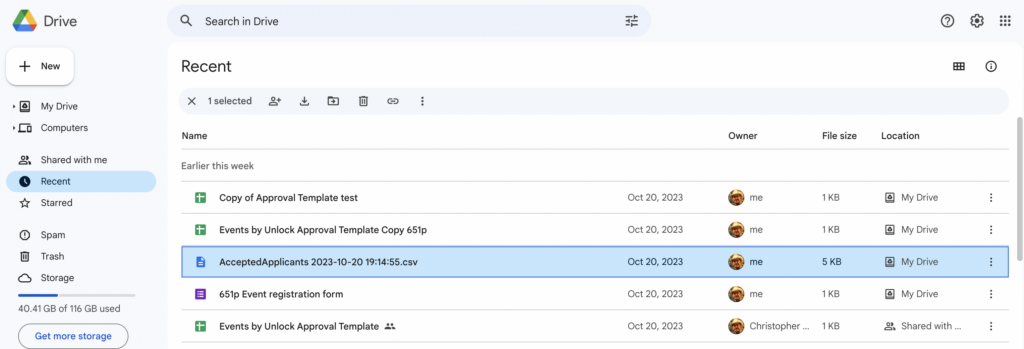
Download the export file CSV to your computer.
Airdropping the tickets to your attendees
On the off chance you haven’t set up your event itself using EVENTS by Unlock Labs yet, this is a great time to do it. Head over to https://events.unlock-protocol.com and follow the prompts.
Now that you have the export file on your computer, you can send tickets to all of your accepted attendees using Unlock Protocol’s walletless airdrop. You can find details on the airdrop process in this Guide: “How to Airdrop NFTs by Email”
Have a great event!