A member of the Unlock Protocol community, FutureMike, recently asked this question in the Unlock Discord:
“Hi, I have a quick question. I have a large collection of unique images that I want to be the keys for a lock, but I can’t figure out how to make each key have a different image.”
Thanks for the question, FutureMike — here’s how to do it!
Before we get into the steps, we need a little bit of background for context.
Smart contracts, metadata, and image storage
To enable every NFT in your membership collection to have a unique image, three interconnected things need to be present and configured:
A smart contract for your membership
The images themselves, stored in a persistent location
Metadata that the smart contract references to know which image is connected to which NFT token, and where to find that image file on the internet
The membership smart contract is created and managed using Unlock Protocol. In this example, we will use two additional services to handle the other tasks:
We will use Bueno, a set of NFT creator utilities, to set up and create the metadata — we will not be using Bueno’s smart contract, since we have an Unlock Protocol contract for membership management.
We will use Pinata, a service that allows users to host files on the IPFS network, to help set up the image file storage (IPFS is a decentralized file system and is the preferred way to host images in web3. Conceptually, you can think of IPFS as an open and decentralized version of Google Drive or the like.)
With that bit of context, we can begin.
Mise en place
Wikipedia defines mise en place as “Mise en place (French pronunciation: [mi zɑ̃ ˈplas]) is a French culinary phrase which means ‘putting in place’ or ‘gather’. It refers to the setup required before cooking, and is often used in professional kitchens to refer to organizing and arranging the ingredients that a cook will require for the menu items that are expected to be prepared.”
We are going to do the same thing here to prepare our tools for connecting unique images to each individual NFT in a membership collection. Do these things before continuing to the next section.
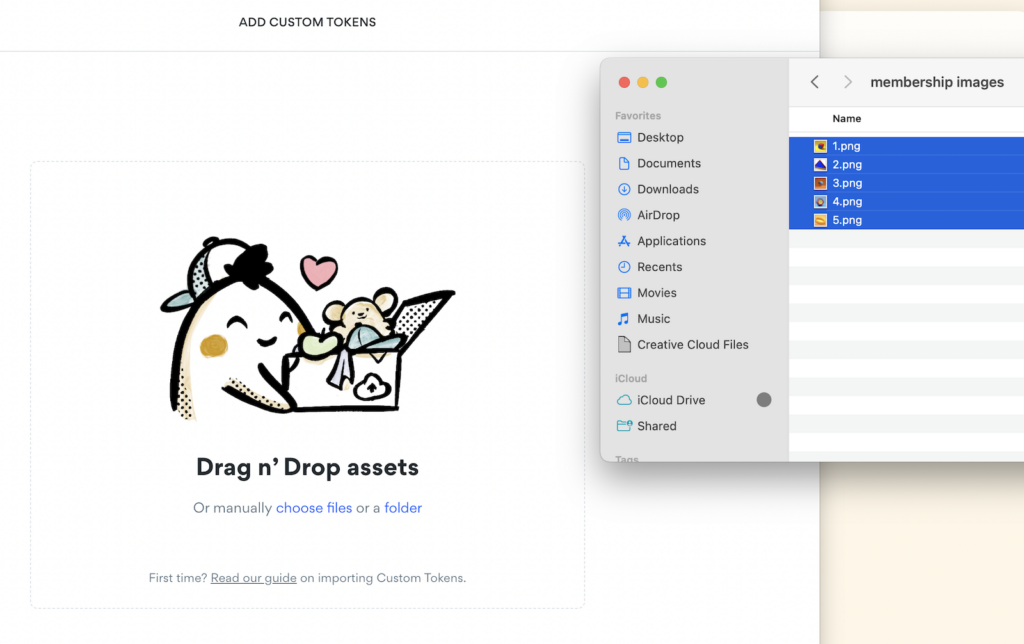
Have all your images on your computer in a directory. It’s helpful to name them things like `1.png`, `2.png`, etc. until you’ve named every image in the collection. You’ll upload the images from your computer in a later step, but get them ready and easily accessible.
Connect your wallet on Bueno, which we’ll use to set up the metadata. Just connect your wallet right now, as we’ll go through the steps shortly.
Create an account on Pinata (you can use their “free” plan if you have less than 100 images in your collection).
Got all those items done? Great! Let’s get into the good stuff.
Customizing images for your membership NFTs
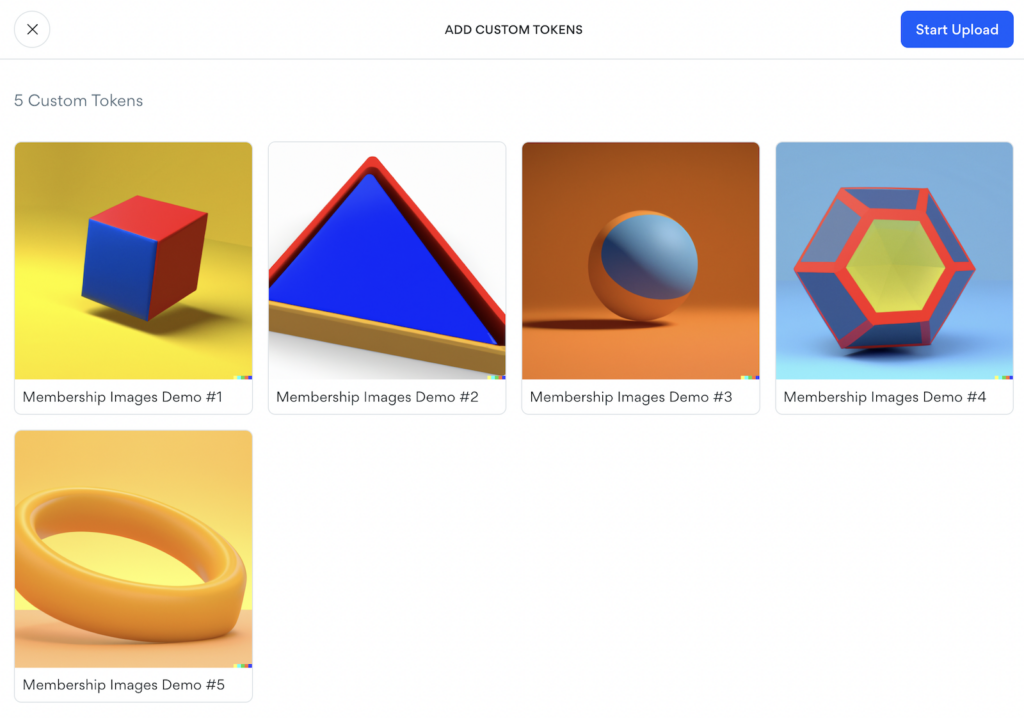
For this example, I created a collection with five images in it, and have named these images 1.png, 2.png, 3.png, 4.png, and 5.png. They are currently in a folder on my computer.
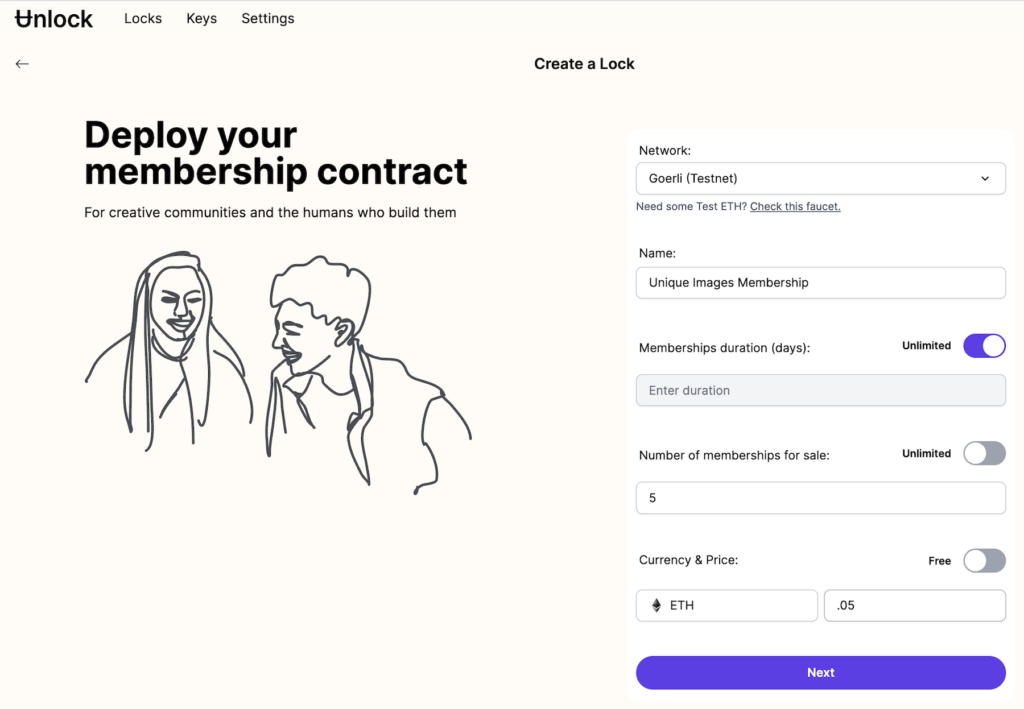
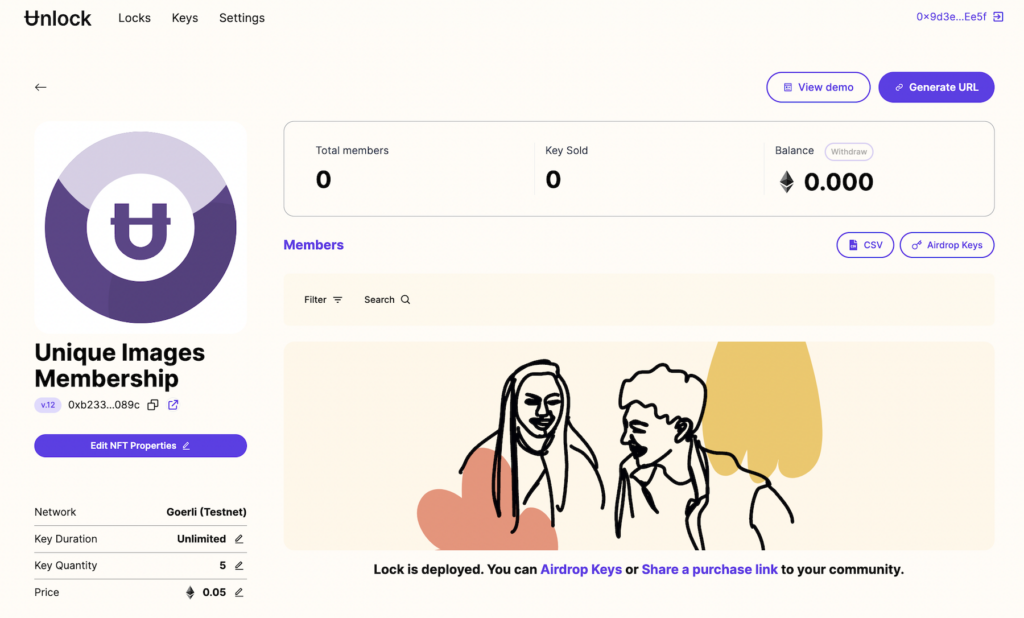
I’ve created and deployed my membership contract as well. For this example, I created it on the Goerli test network. For production applications, you’d want to create it on a production network such as Polygon, Arbitrum, Ethereum mainnet, or one of the other production networks.
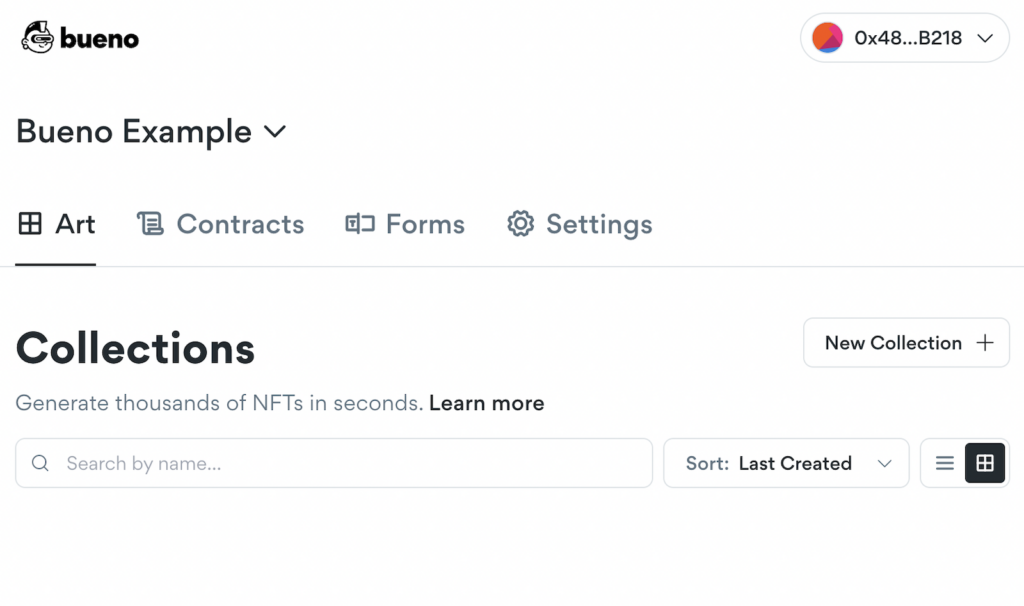
Ok, ready? Go over to Bueno. You should be on a screen that looks like this.
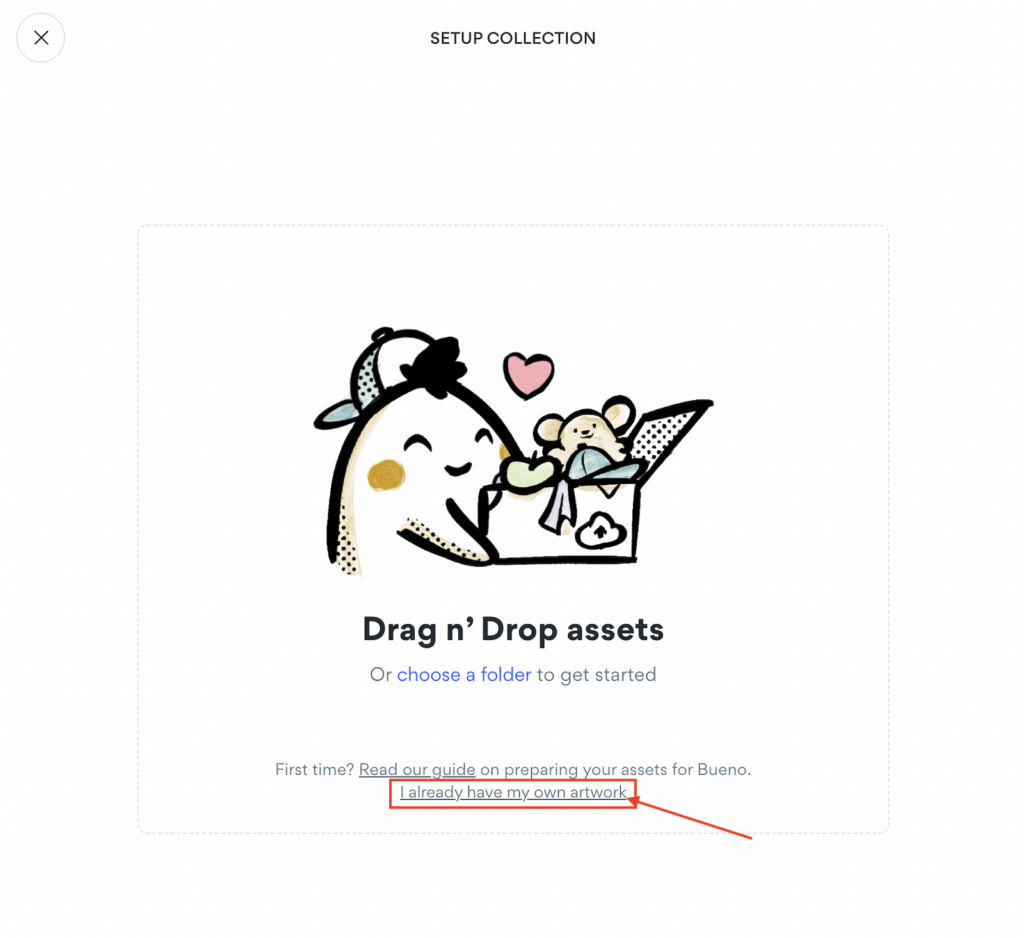
Click on `New Collection`. You should now see a screen that looks like this.
This bit is especially important. Click on `I already have my own artwork`. (Since you already have your own artwork on your machine that you set up earlier.)
Name and create your collection. Name it something descriptive and click `Create Collection`.
Ok! It’s time to upload your images. Click the `Upload Files` button.
Drag your images from your computer into Bueno and upload them.
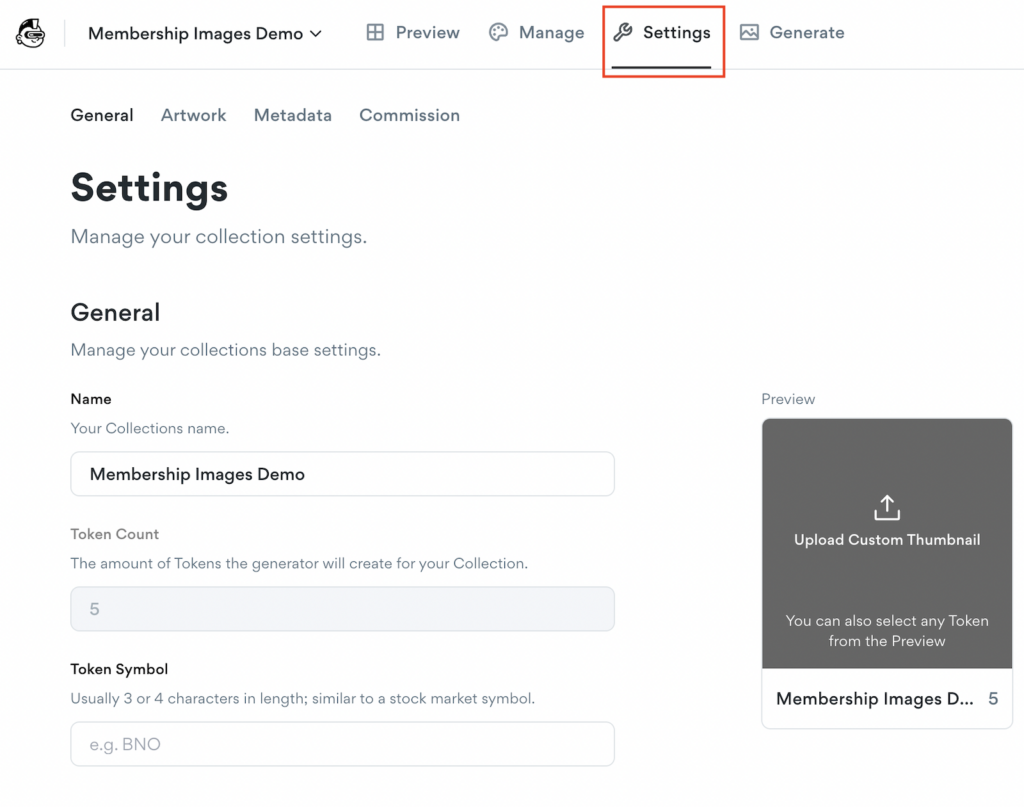
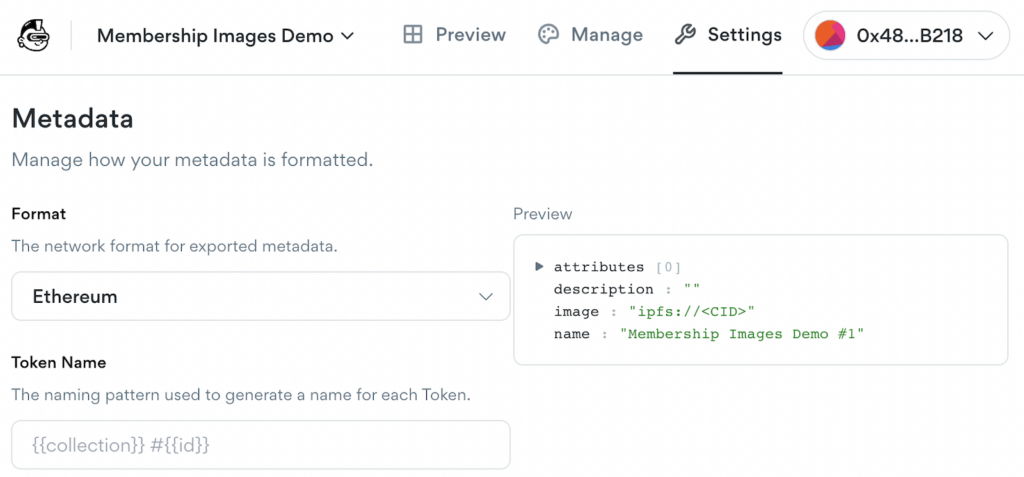
Huzzah! So far, so good. Now, we’ll need to dig a bit deeper and get things wired up. Click on `Settings` at the top of the Bueno screen.
You should be able to leave the defaults for the things on this Settings page, but you can fill in updated information such as the description and the like if you want to customize those. The most important thing, however, is to leave the format set to `Ethereum`. Don’t change that.
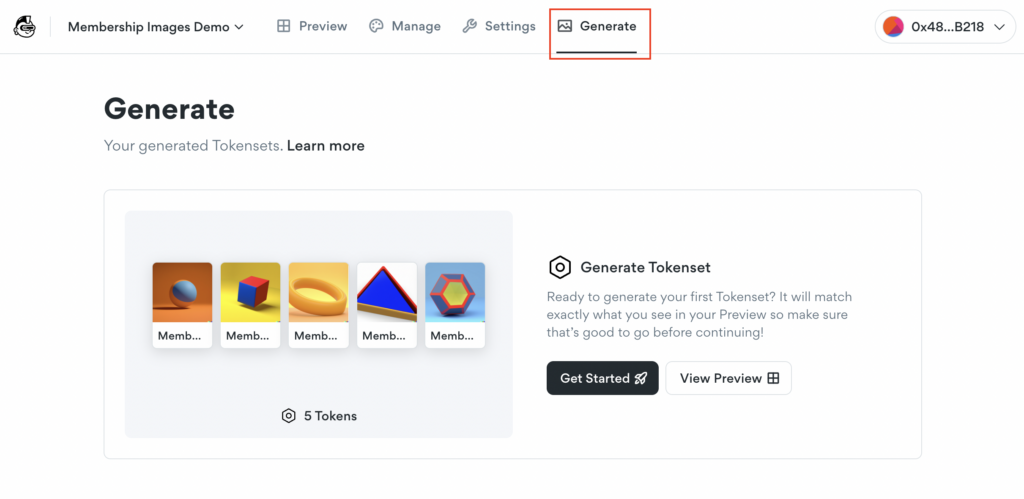
Now, click `Generate`, then `Get Started`.
Go through the next steps of Bueno’s wizard. You should be able to take the default choices in most cases. Go through the screens, and click `Generate`.
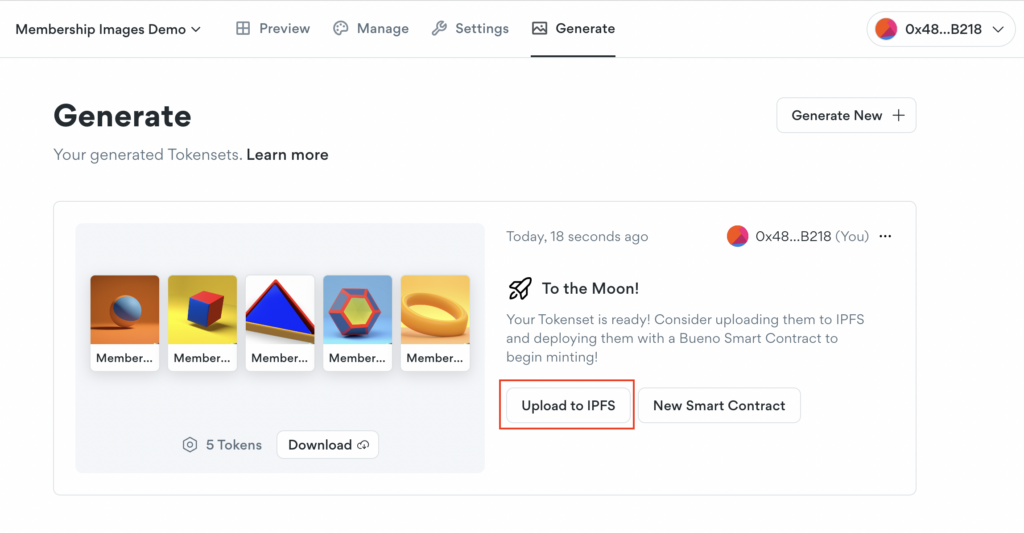
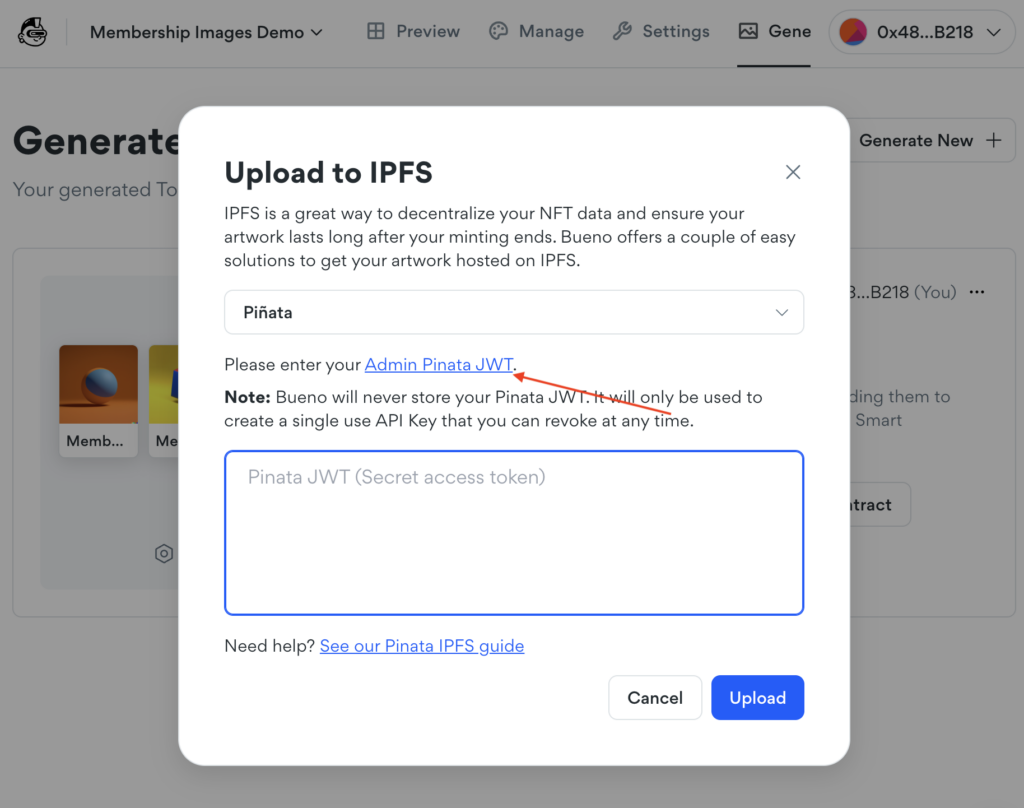
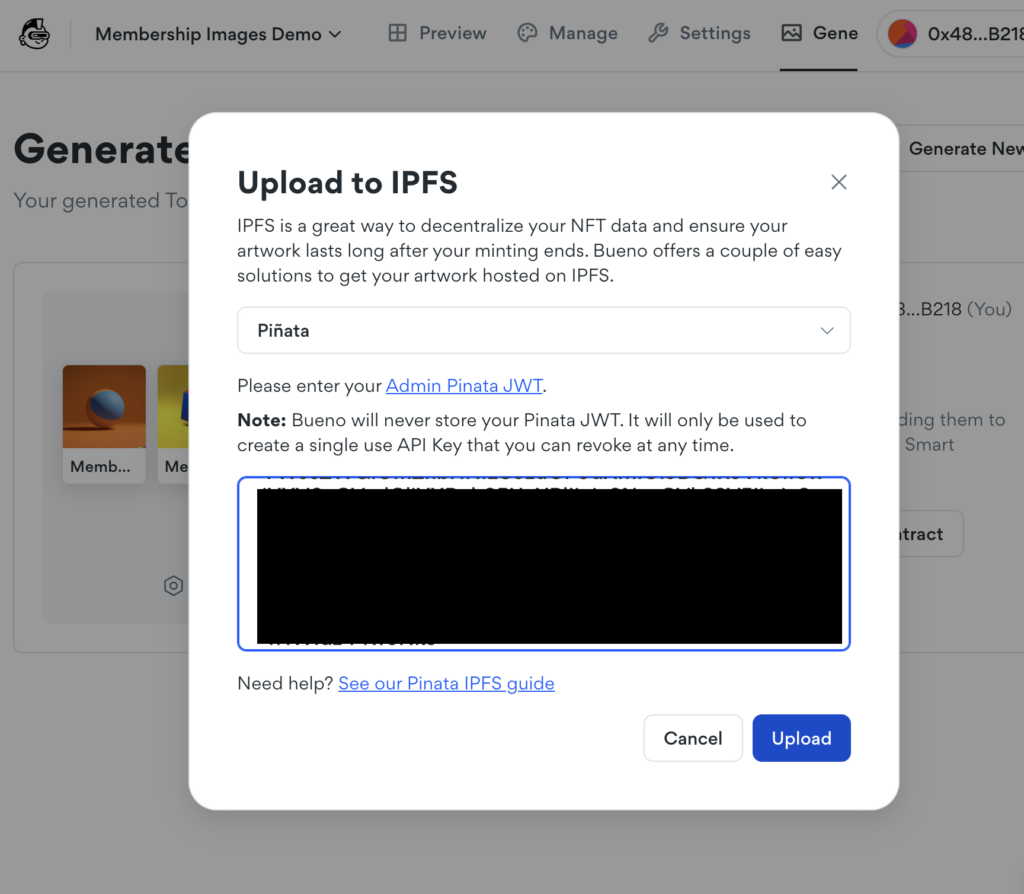
What Bueno has done at this point is prepared the metadata for your images. Now, those images themselves need to be stored somewhere online. We’re going to use IPFS, a distributed file storage system that is accessible from anywhere. We’ll use Pinata to help manage getting those images stored onto IPFS. Click the `Upload to IPFS` button in Bueno.
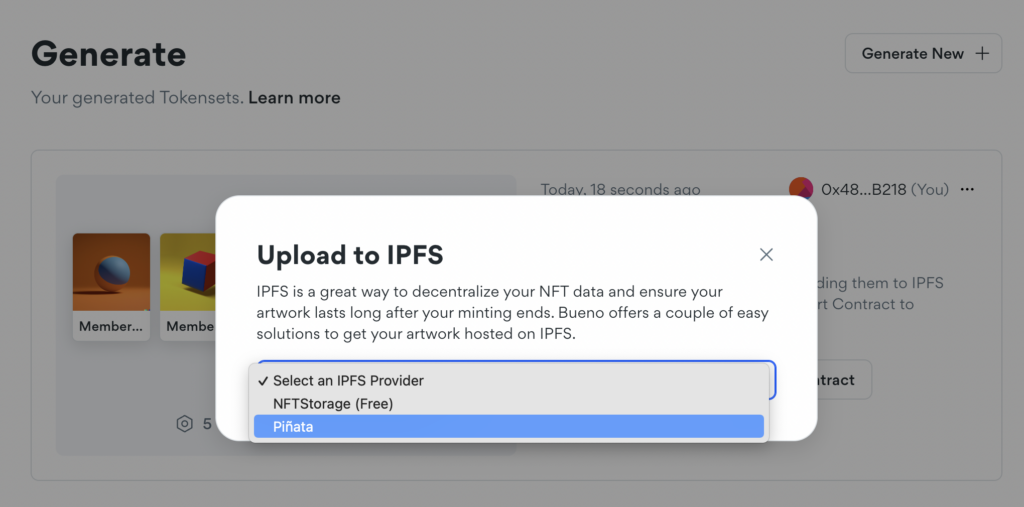
Note: You will need to use the paid option to upload your images to IPFS with Pinata.
Choose `Pinata` from the dropdown.
We now need to connect Bueno and Pinata, so Pinata can manage the upload of the images to IPFS for us. Click the `Admin Pinata JWT` link in Bueno.
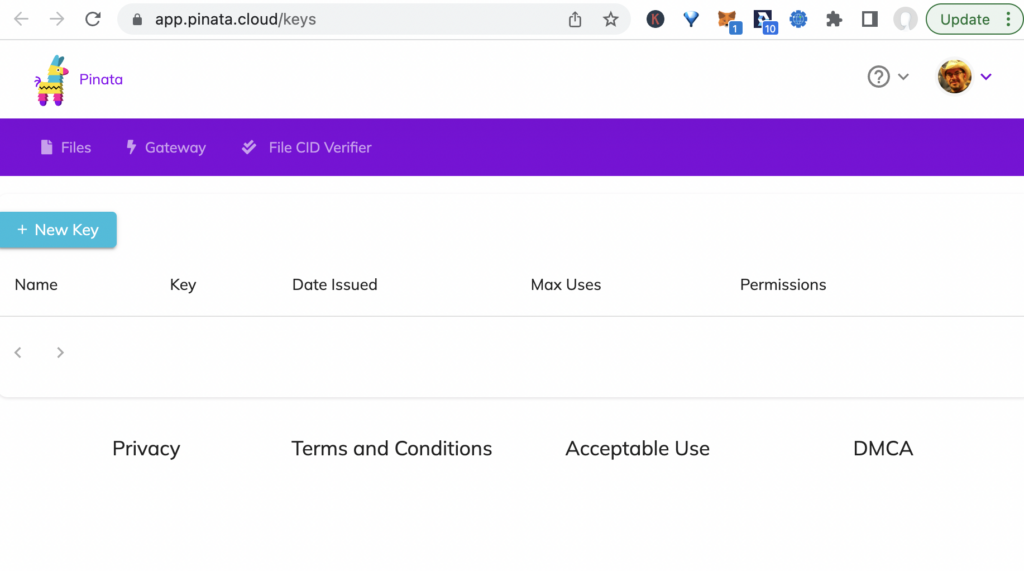
This will open up Pinata’s integration settings window. After clicking that link in Bueno, a Pinata window should open and you should be on a screen that looks like this in Pinata.
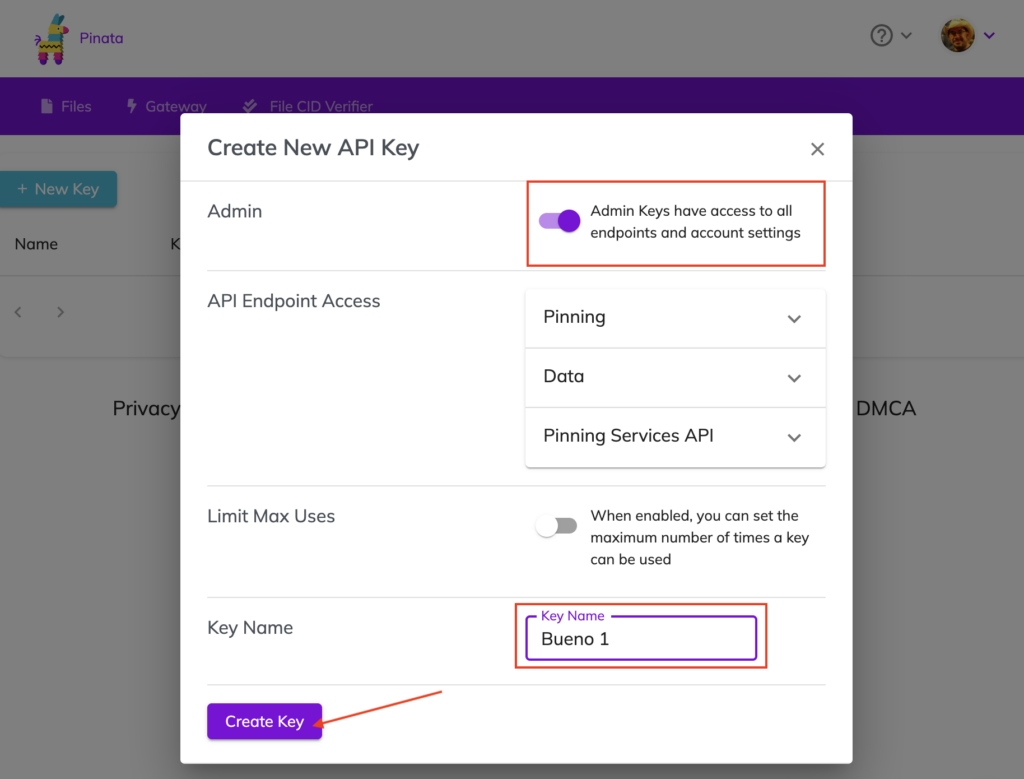
Click the `New Key` button in Pinata. It will open up a new window. Turn on the `Admin` setting, and give the key a name (it can be called anything). Then click `Create Key` in Pinata.
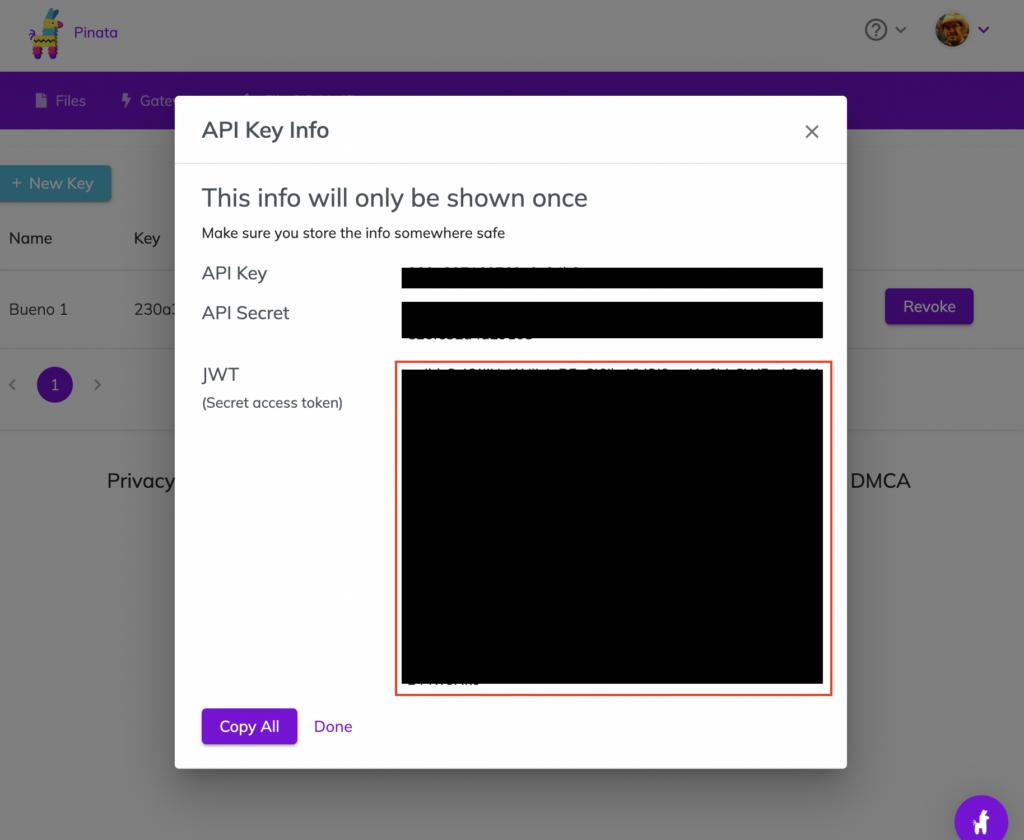
Pinata will create an API key and other information that you’ll need to copy and paste into Bueno to connect the two systems. Select all the information in the `JWT` section (it’ll be a long string of letters and numbers). In the example here, it’s all the string in the red box below. You don’t need the other information on the page and do not click `Copy All` — just select and copy that long string in the JWT window.
Once you’ve selected and copied that JWT string from Pinata, head back over and paste it into the box on Bueno. Then, click `Upload` on the Bueno popup below where you just pasted the JWT string.
Bueno will then connect to Pinata, which will manage the upload to IPFS for you. At this point, you should see a screen like the screen below. We’re almost there!
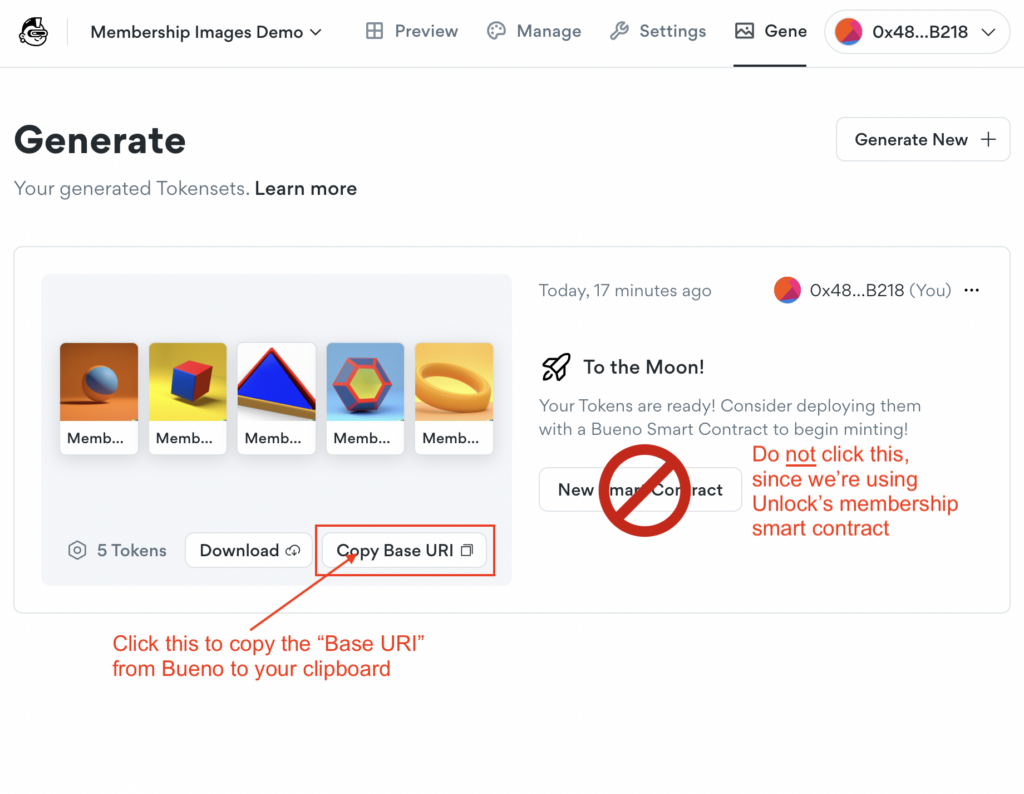
Now, we need to take one more bit of information from Bueno, and connect it back to the Unlock membership smart contract. This piece of information is a link to the metadata that Bueno created for us that will tell the Unlock smart contract where to find the images on IPFS. This link to the metadata is called the `Base URI`. You can think of it as the URL where the smart contract can find the metadata it needs to go grab your image files.
Click the `Copy Base URI` button in Bueno to copy that Base URI to your clipboard or save it in a safe place. (It’ll look something like `ipfs://longstringoflettersandnumbers/` and make sure you have both the `ipfs://` at the beginning and the trailing slash at the end.)
Important: Do not click the `New Smart Contract` button in Bueno, since we’re using the Unlock smart contract to manage our memberships.
Connecting things back to your membership smart contract
Ok. We’ve made it to the last step — connecting that `Base URI` back to your Unlock smart contract. This step will take about two minutes.
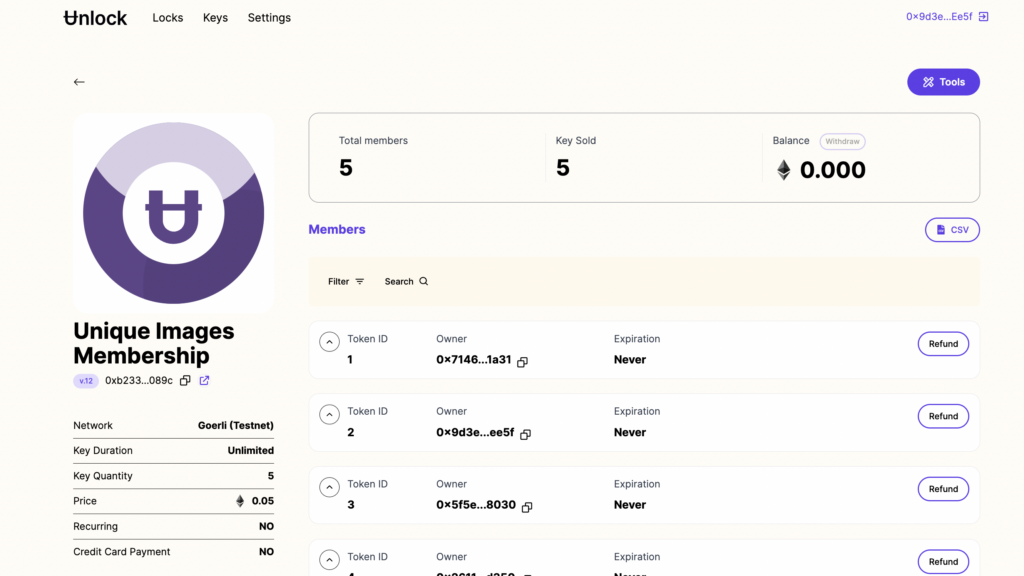
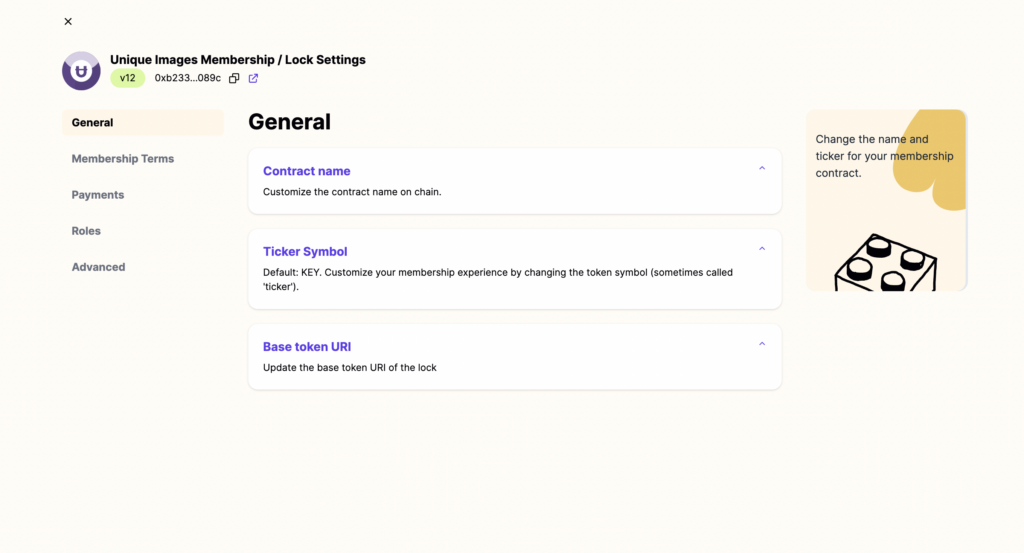
Head back over to your Unlock Dashboard and get into the details of your lock.
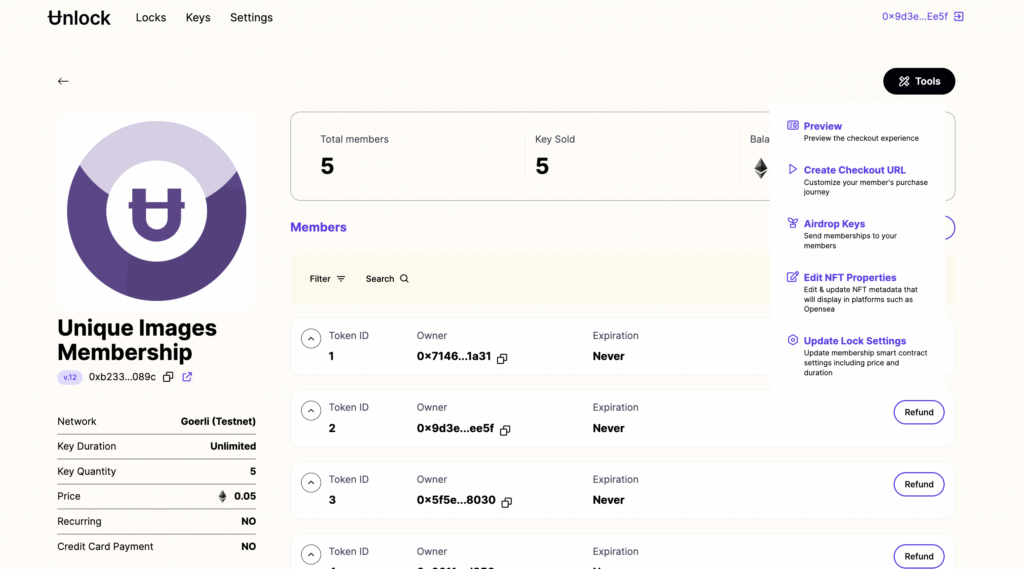
Click on the `Tools` in the upper right.
Click on `Update Lock Settings`.
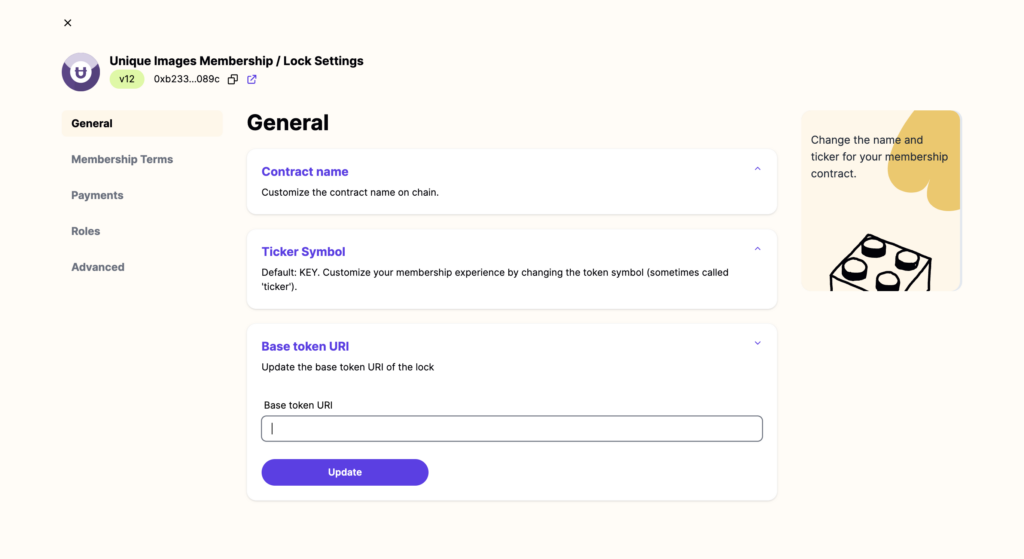
Click on `Base token URI`.
Type in the the `Base URI` you’d saved from earlier. Make sure the leading `ipfs://` and trailing slash are included. Then click `Update` and confirm the transaction.
Here’s what it looks like in video form.
At this point, everything should be wired up. Congrats!
Seeing the results of our work on OpenSea and elsewhere
If everything above worked, things should be all set up! You…
Uploaded your images to Bueno
Connected Bueno to Pinata, which uploaded the images to IPFS for us
Got your link to the metadata URI from Bueno
Updated your smart contract to point to that metadata URI (which informs OpenSea and other systems where to find the unique images for each NFT you create)
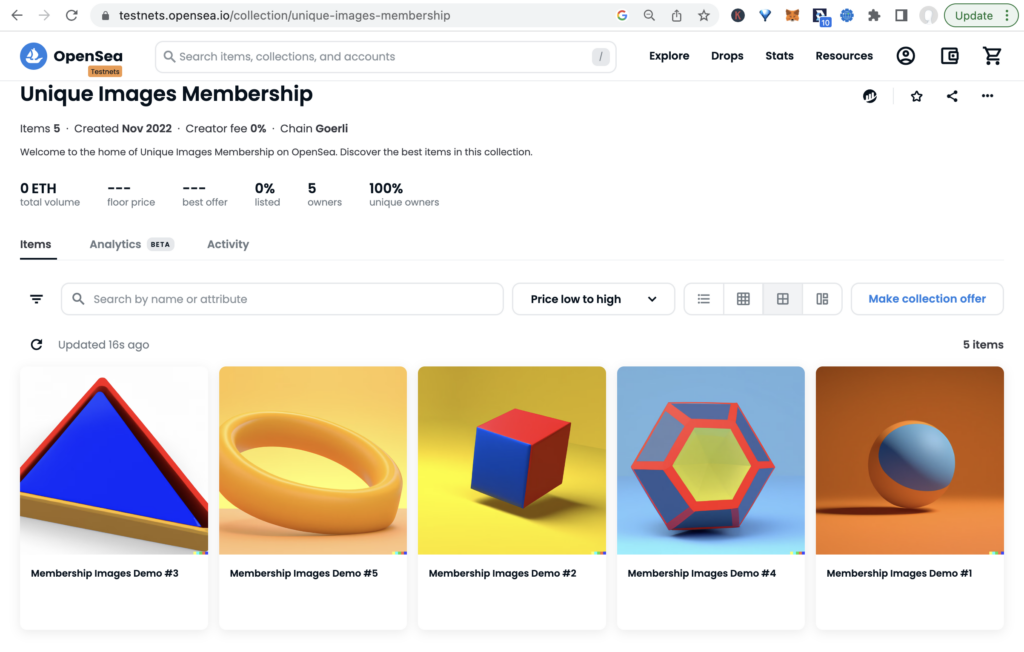
In our example here, if I look at OpenSea, I can indeed see that the five tokens for the demo Lock do show different images for each individual NFT.
Note: OpenSea only shows images for NFTs that have been minted. If your NFTs have not been distributed or minted yet, they will not yet show up on OpenSea. They should show up within moments, however, once the NFTs have been minted, airdropped, or claimed by your members.
Congrats again! If you have any questions, please visit our Discord and the Unlock Locksmith community will be happy to help!