
Collecting Metadata for a Purchase
Lock owners can require information from key purchasers before the transaction is initiated.
Meeting the Needs of Our Users
Over the course of the past year, Unlock has powered membership opportunities like newsletter subscriptions, event tickets, and ad-free experiences. One thing we've heard from creators who own locks is that in some cases they need to gather information from key purchasers before they buy a key.
For example, a newsletter publisher may want to email updates to subscribers. We offered a way for newsletter publishers in particular to gather some information through our newsletter subscription app, but there were some limitations to that approach. For starters, publishers could not host this experience within their own site. Further, they couldn't specify which information could be collected. For anyone who needed to collect more than just an email address (or ran something other than a newsletter), we needed another solution.
Broader Availability of Metadata Collection
Today we're proud to announce an extension to our embeddable Paywall application which allows creators to specify a number of form fields which should be presented to the purchaser before the purchase transaction begins. The technology behind this is our metadata system which we've already used behind-the-scenes in a few places. If you're already familiar with our Paywall, you can learn how to add metadata to your existing configuration here. For everyone else, the remainder of this post is a worked example.
Collecting Information From Purchasers
The Scenario
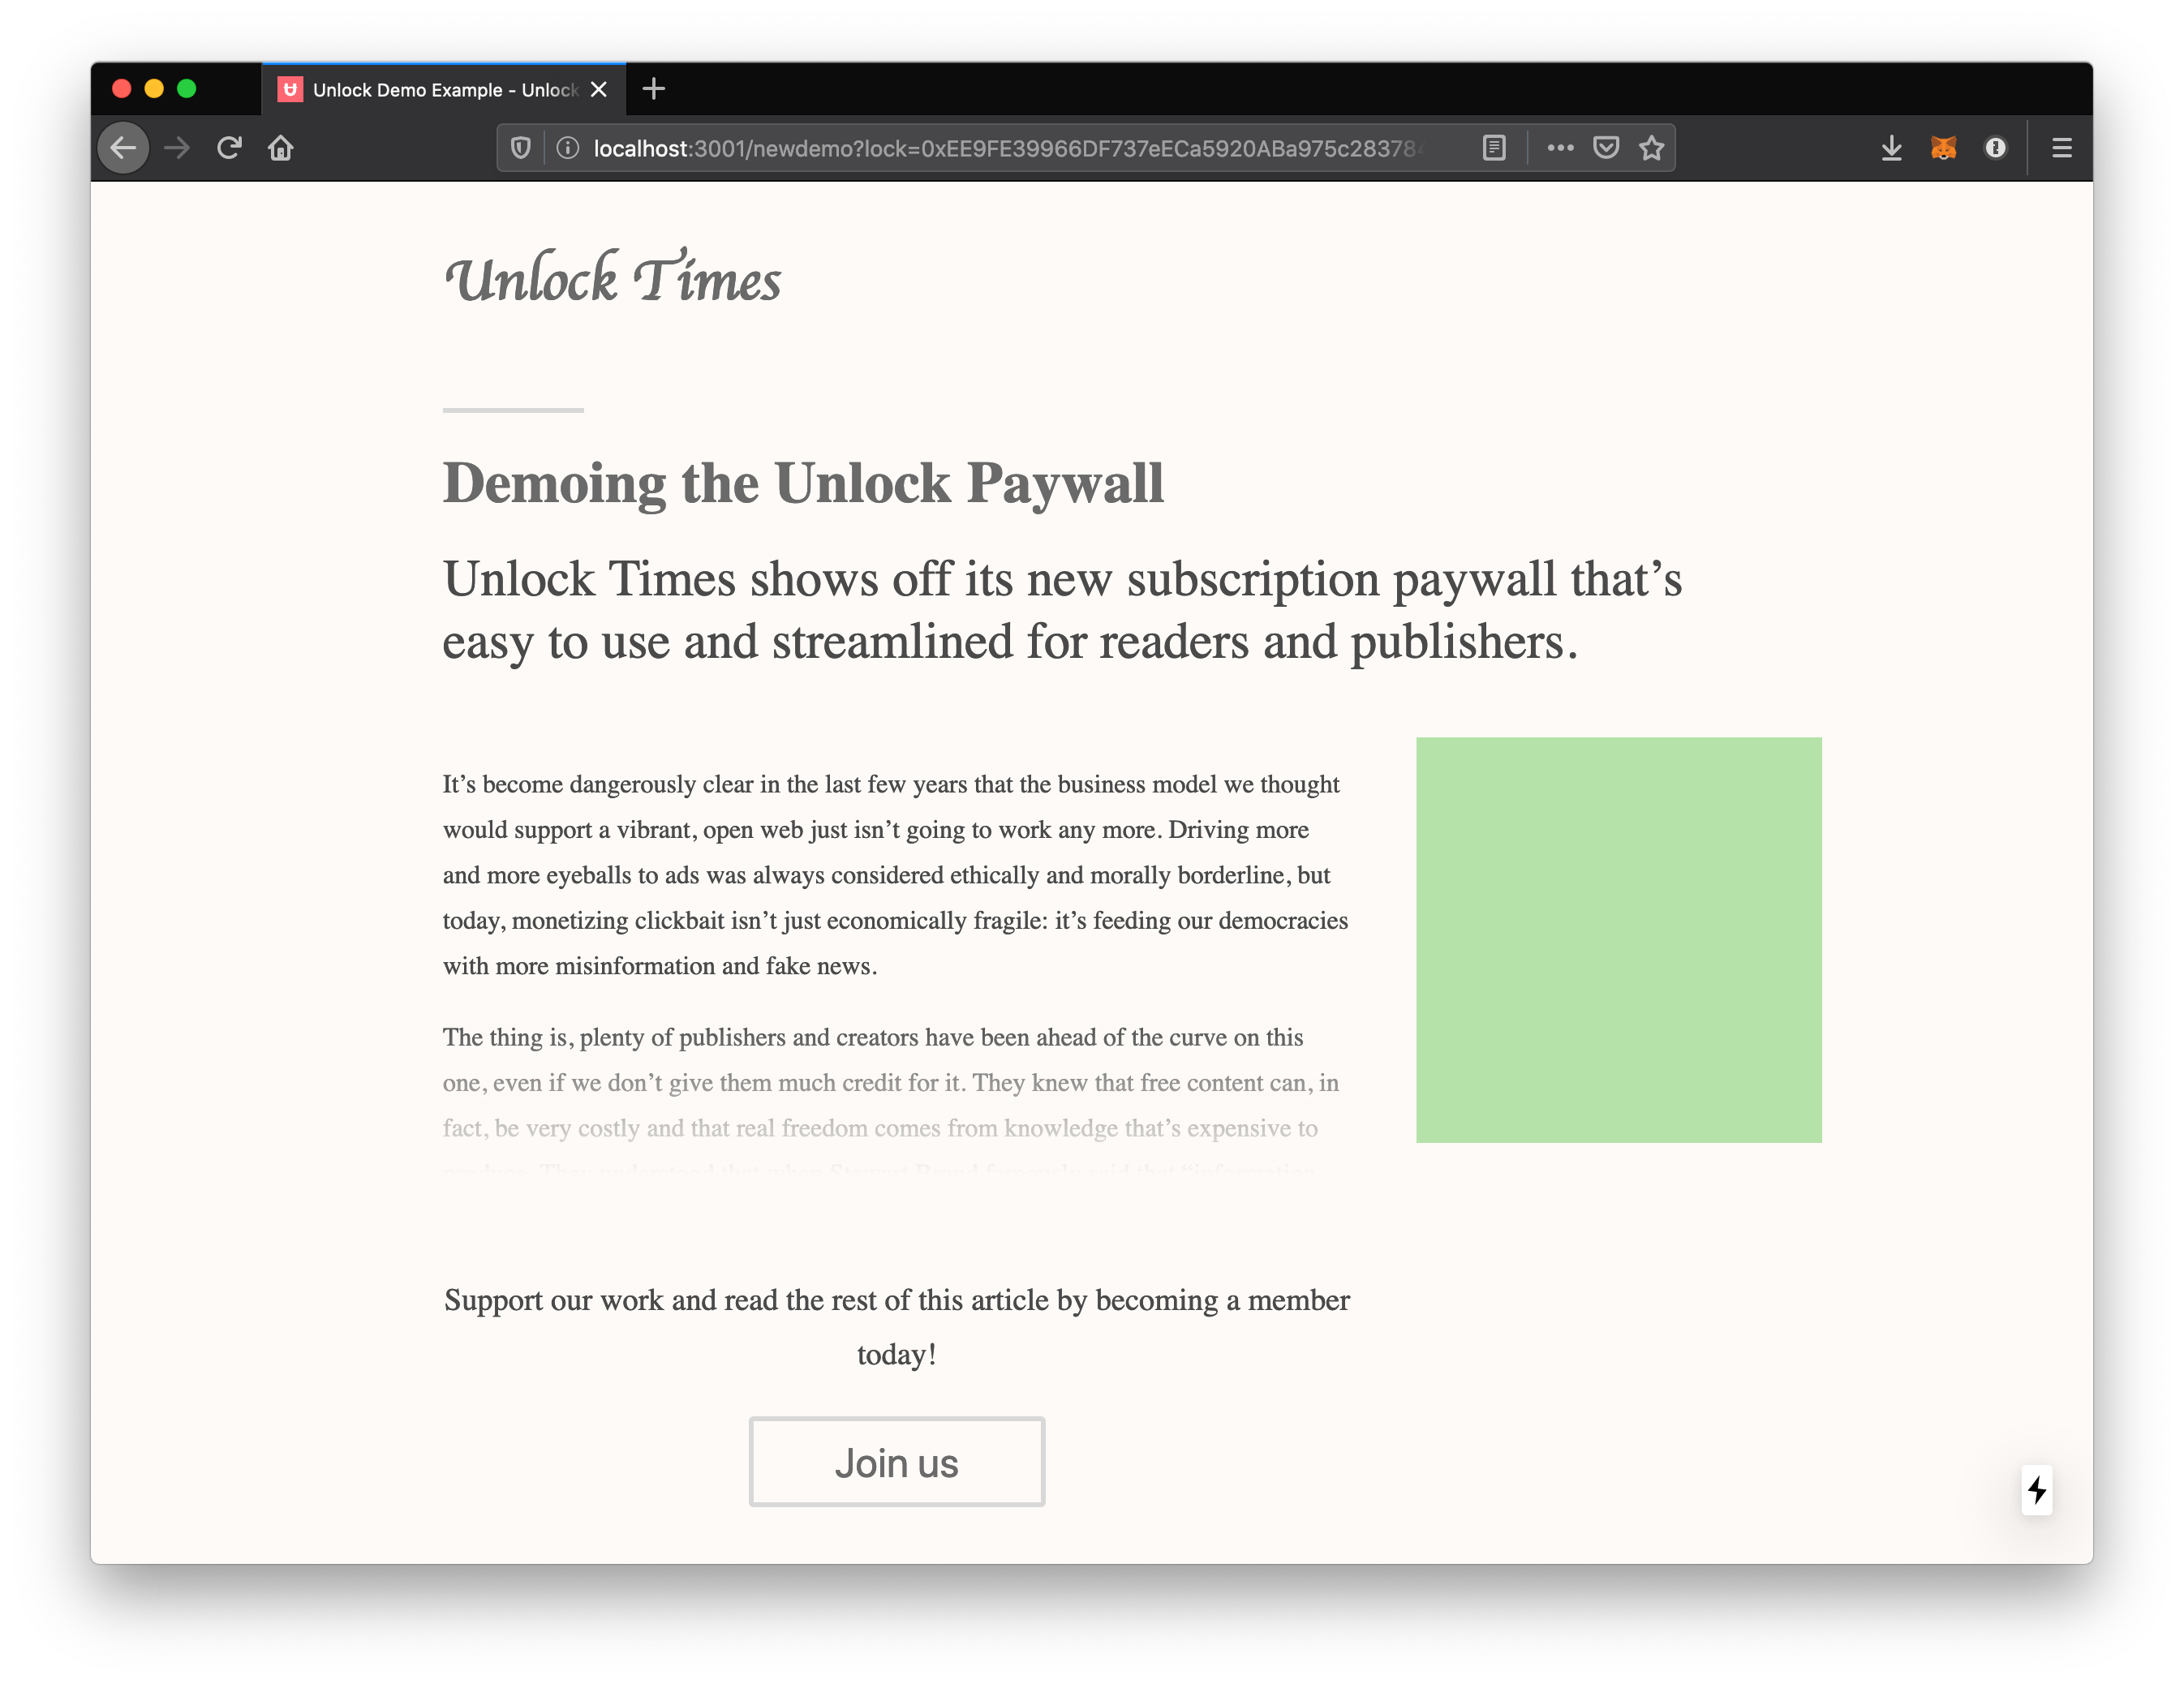
Consider a blog that allows anyone to read published articles, but offers a perk for paying members: they get early access to articles before they are published in the open. One way to implement this is to collect an email address from paying members, which will be used to notify them of a new article and link them to a private page.
The Setup
We'll start with the recommended setup from our getting started guide with one addition: an array of metadata fields we'd like to collect.
var unlockProtocolConfig = {
  locks: {
    '0xEE9FE39966DF737eECa5920ABa975c283784Faf8: {
      name: 'A Lock'
    },
  },
  icon: 'https://staging-app.unlock-protocol.com/images/svg/default.svg',
  callToAction: {
    default: 'This content is locked. Pay with cryptocurrency to access it!',
    expired: 'This is what is shown when the user had a key which is now expired',
    pending: 'This is the message shown when the user sent a transaction to purchase a key which has not be confirmed yet',
    confirmed: 'This is the message shown when the user has a confirmed key',
    noWallet: 'This is the message shown when the user does not have a crypto wallet which is required...',
  },
  // This is the addition to the config!
  metadataInputs: [
    {
        name: 'First Name',
        type: 'text',
        required: true,
        public: true,
    },
    {
        name: 'Last Name',
        type: 'text',
        required: false,
    },
    {
        name: 'Email Address',
        type: 'email',
        required: true,
    },
  ],
}
As you can see, we're going to collect 3 pieces of information: a first name (required, public), a last name (optional, protected), and an email address (required, protected).
The Checkout
Let's walk through the flow. Here's the page when first visited. The full content of the page is behind a lock (because this article isn't available to the public yet).
When a user clicks the "Join us" button, they first see the normal list of key purchase buttons.
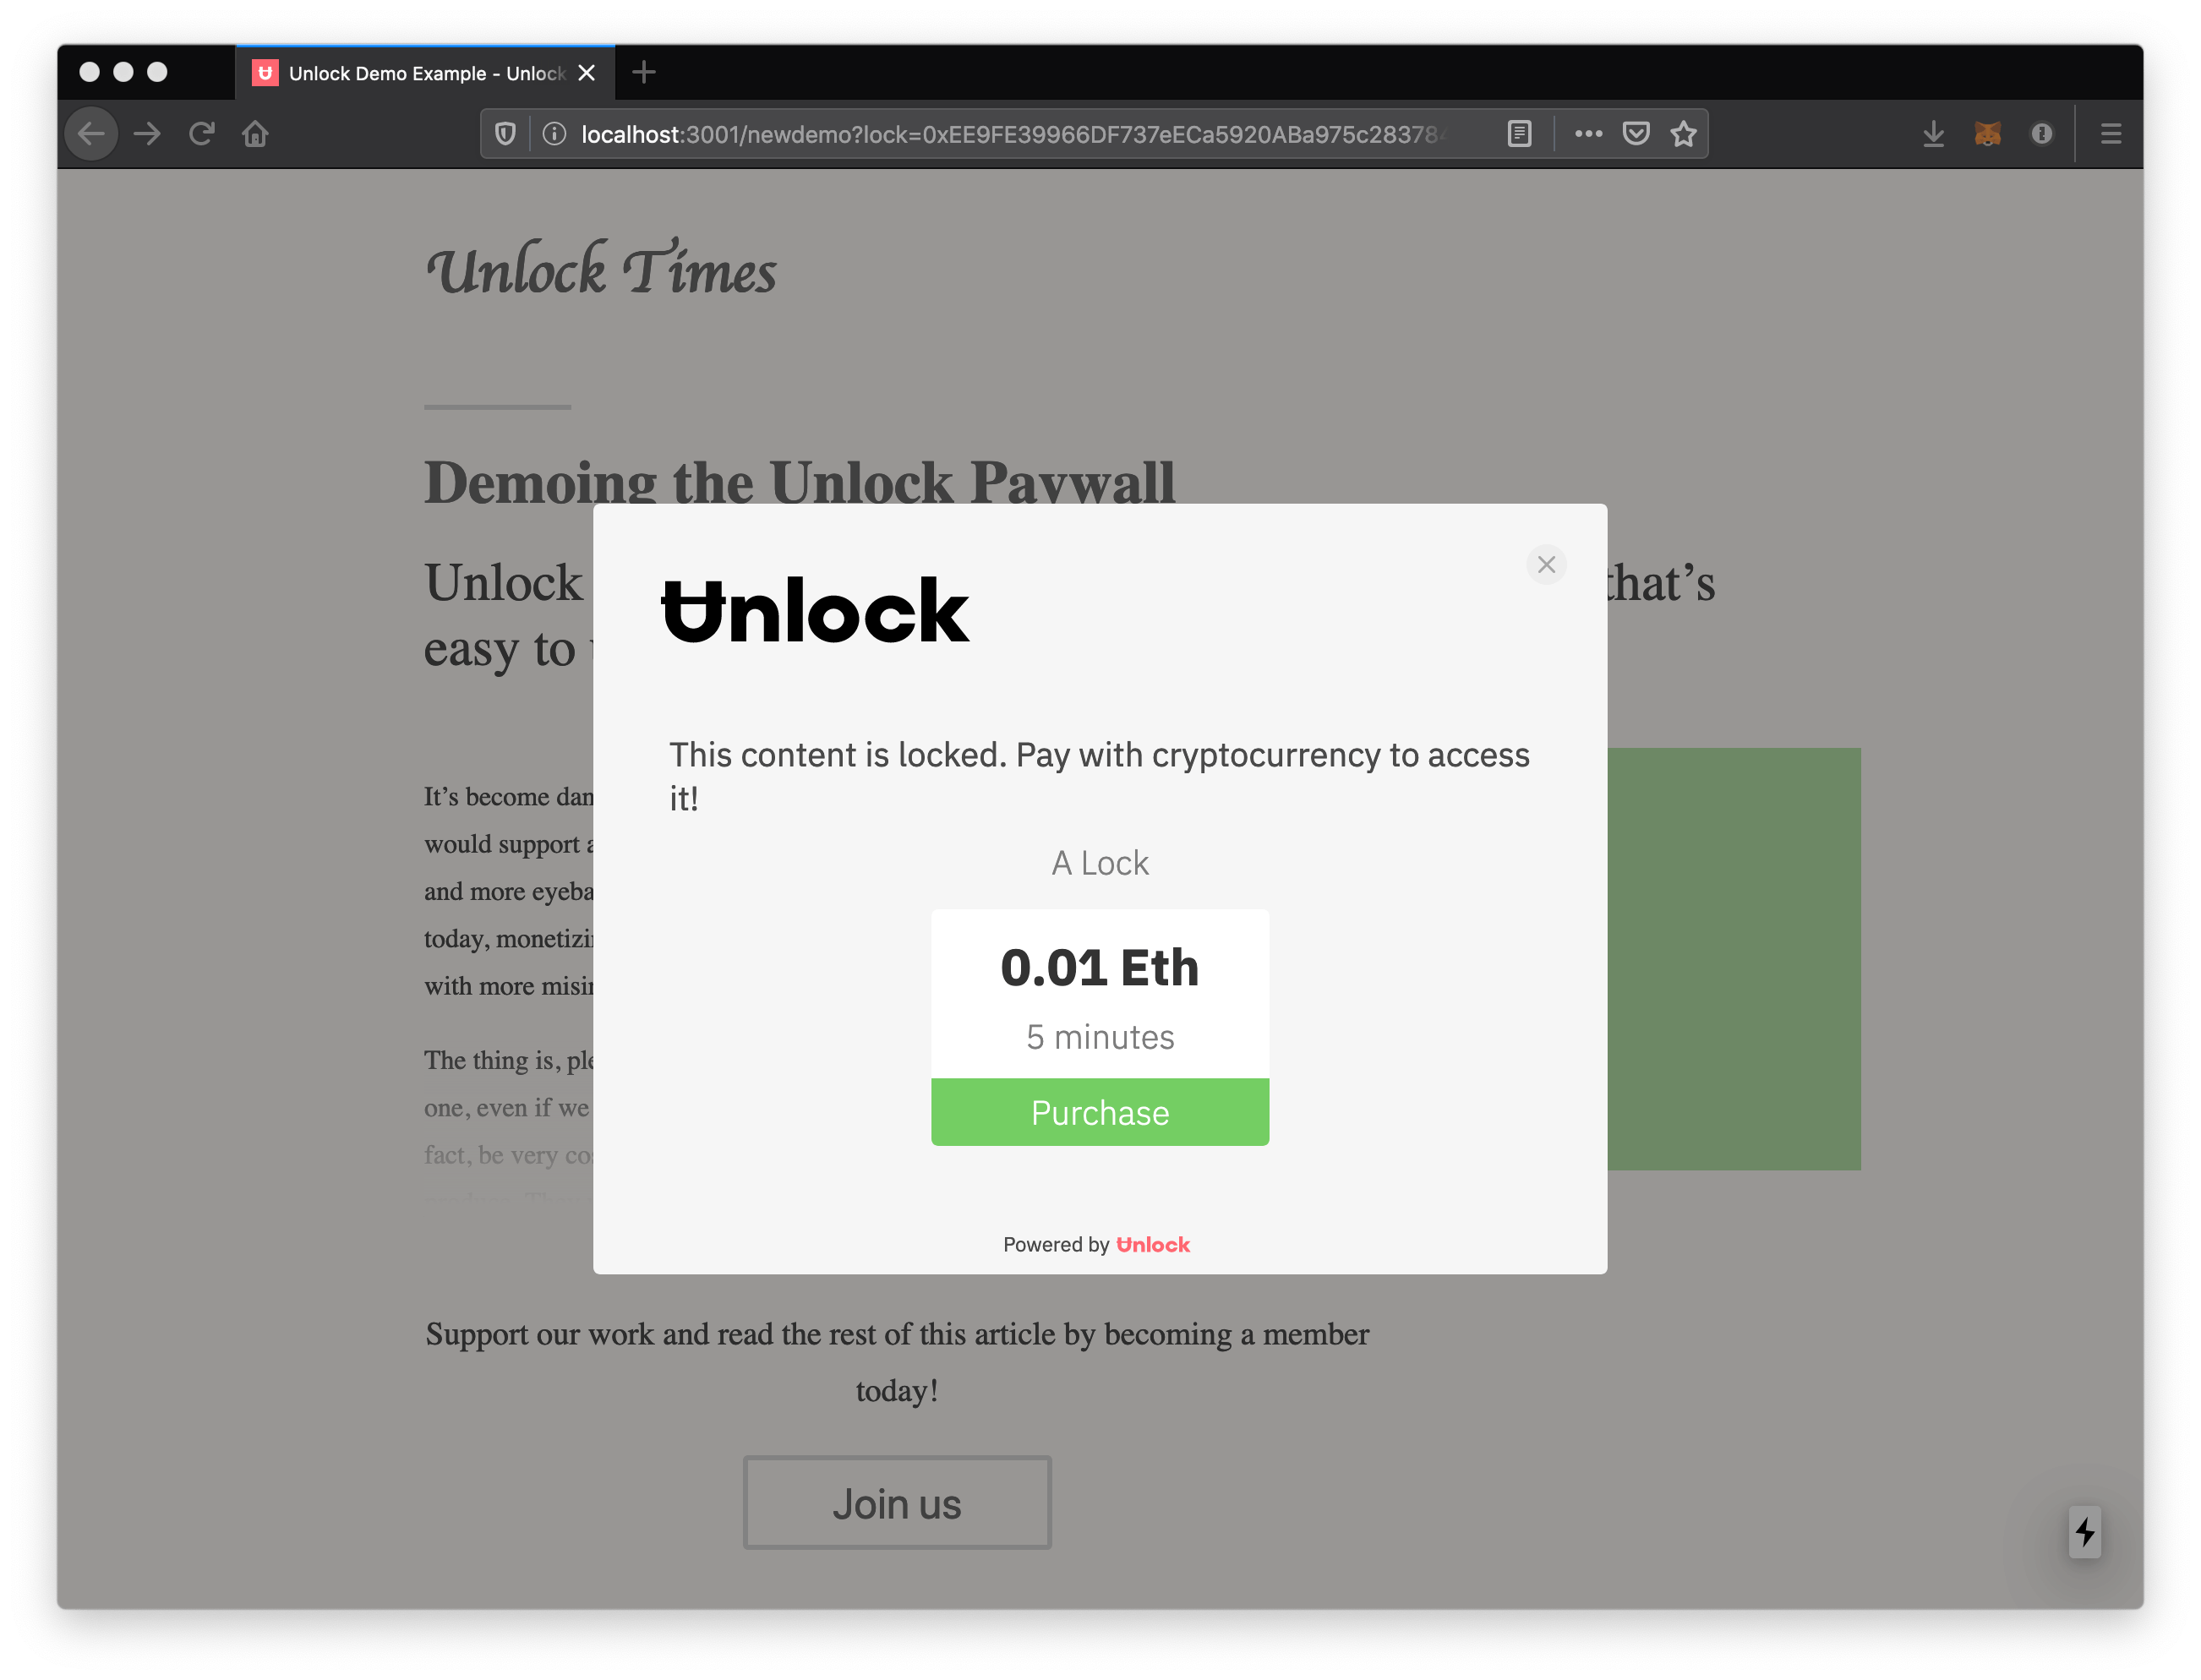
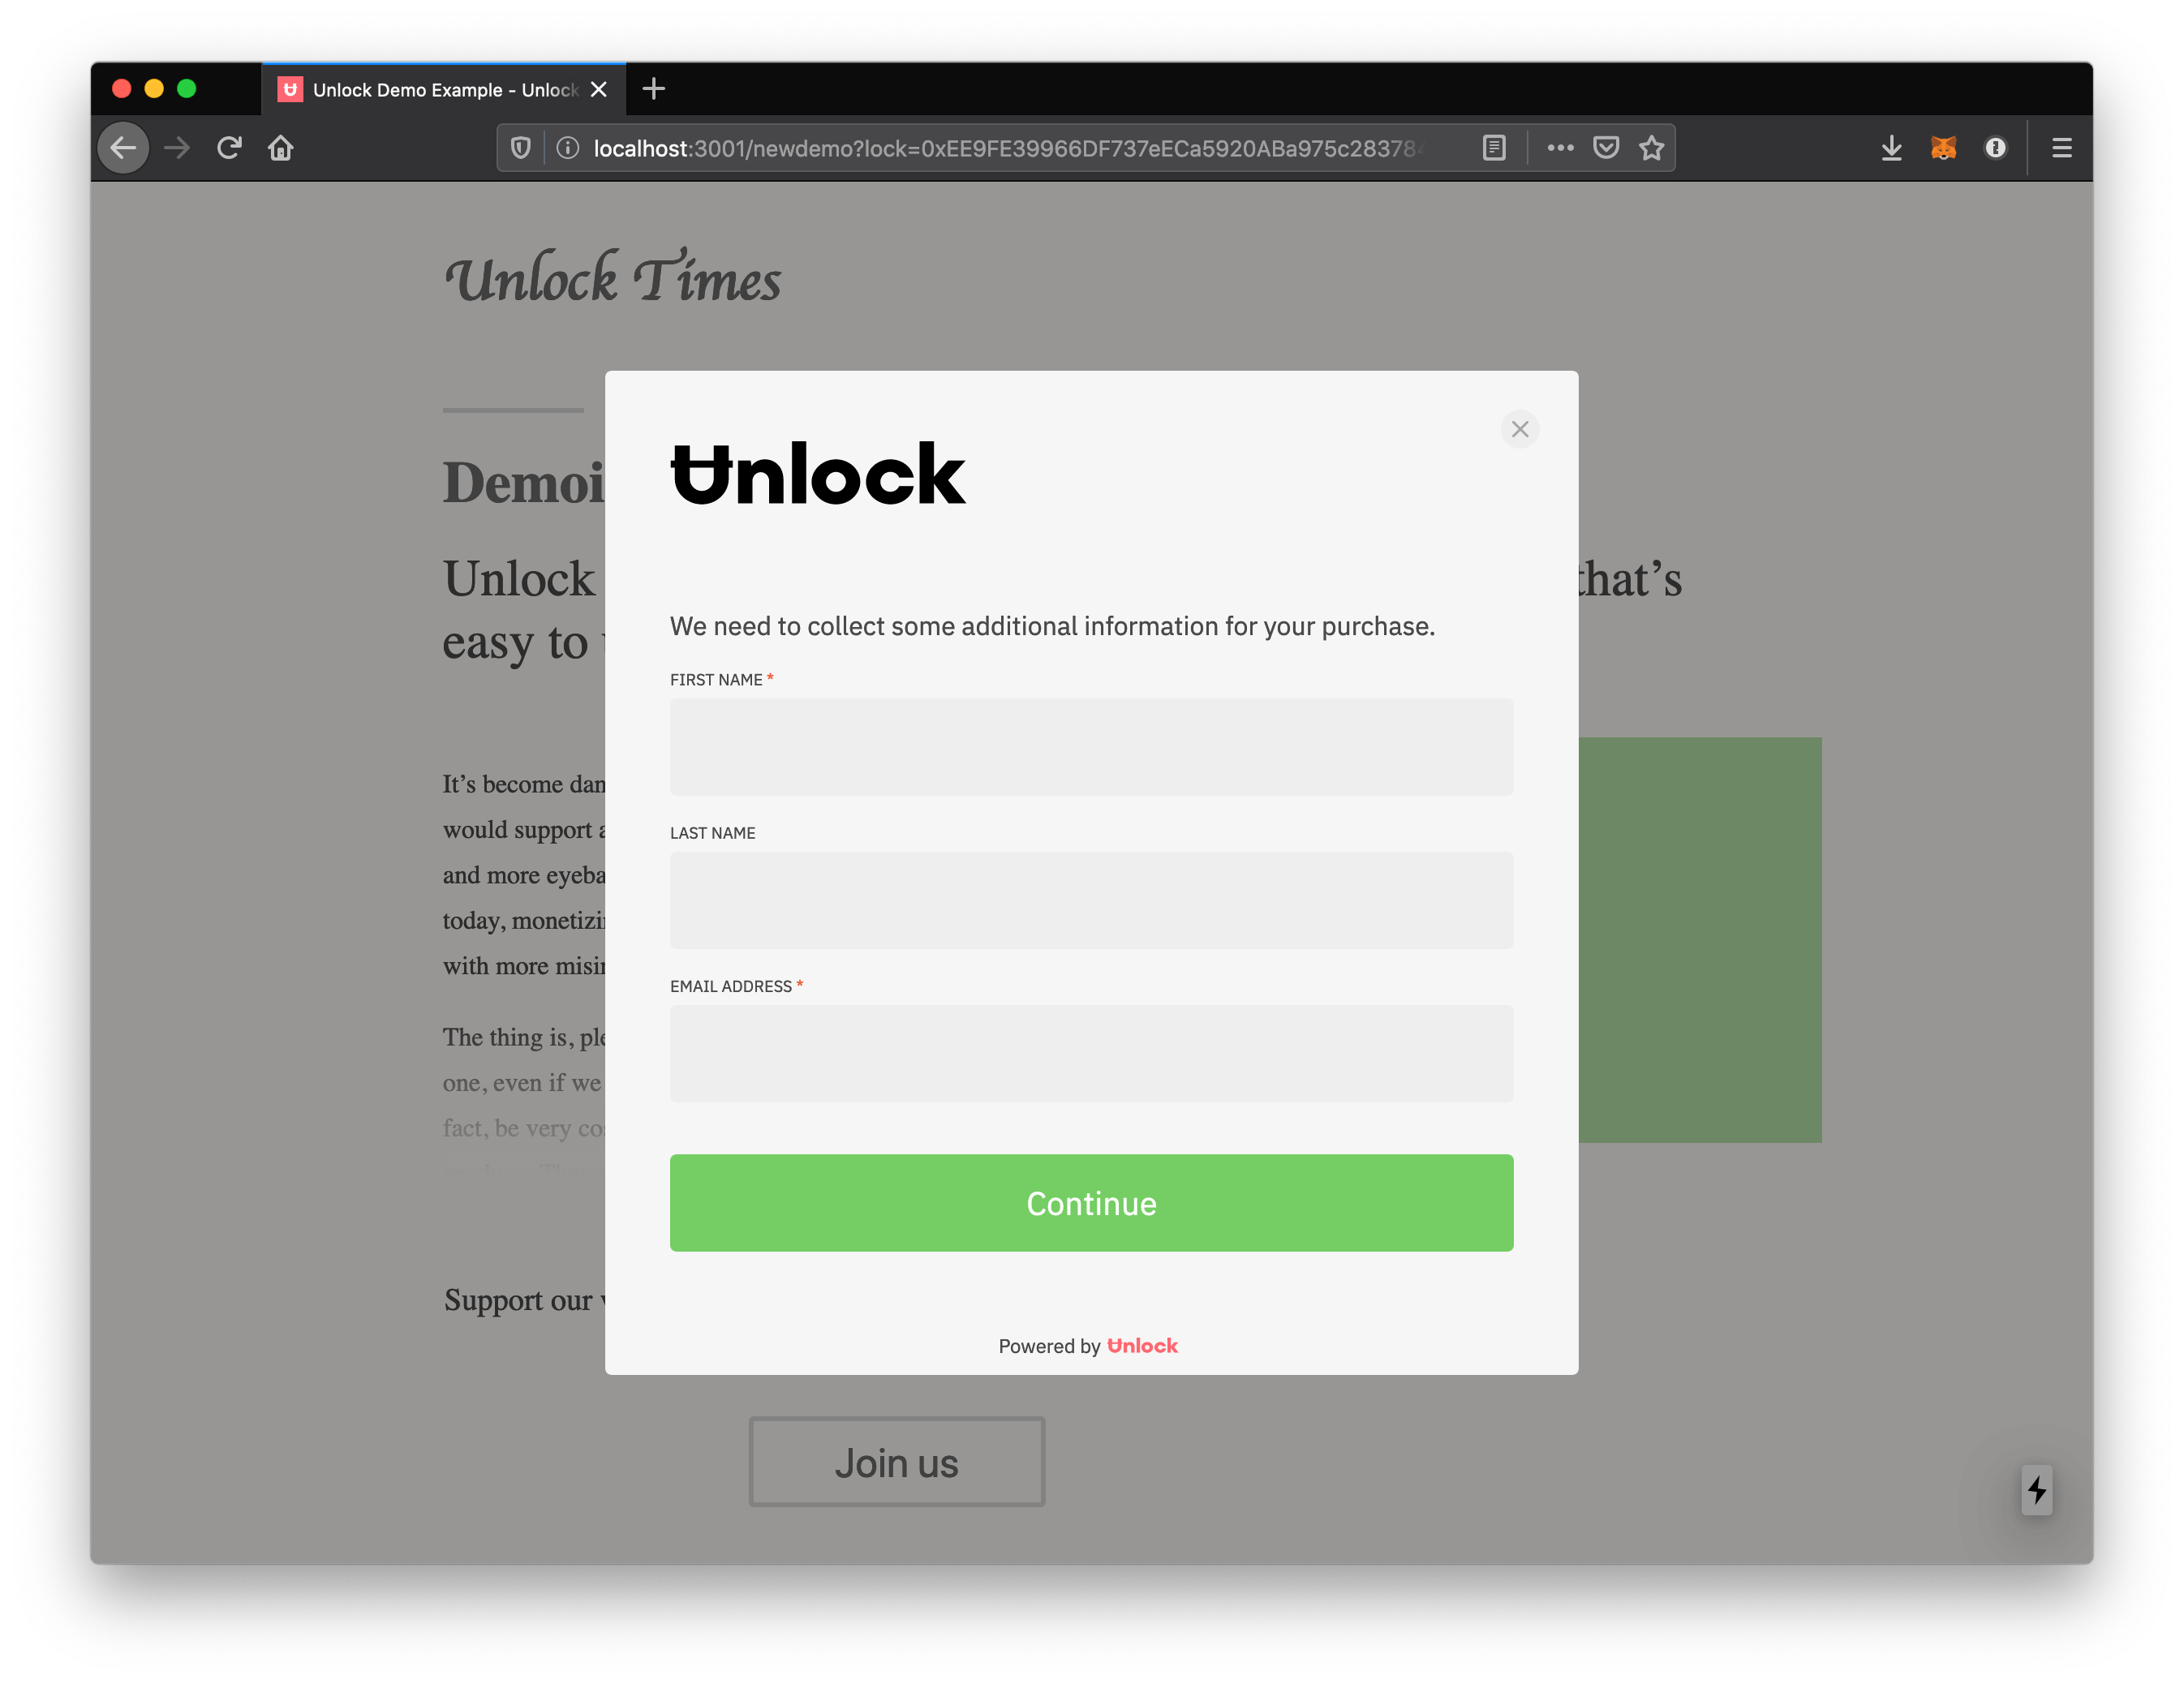
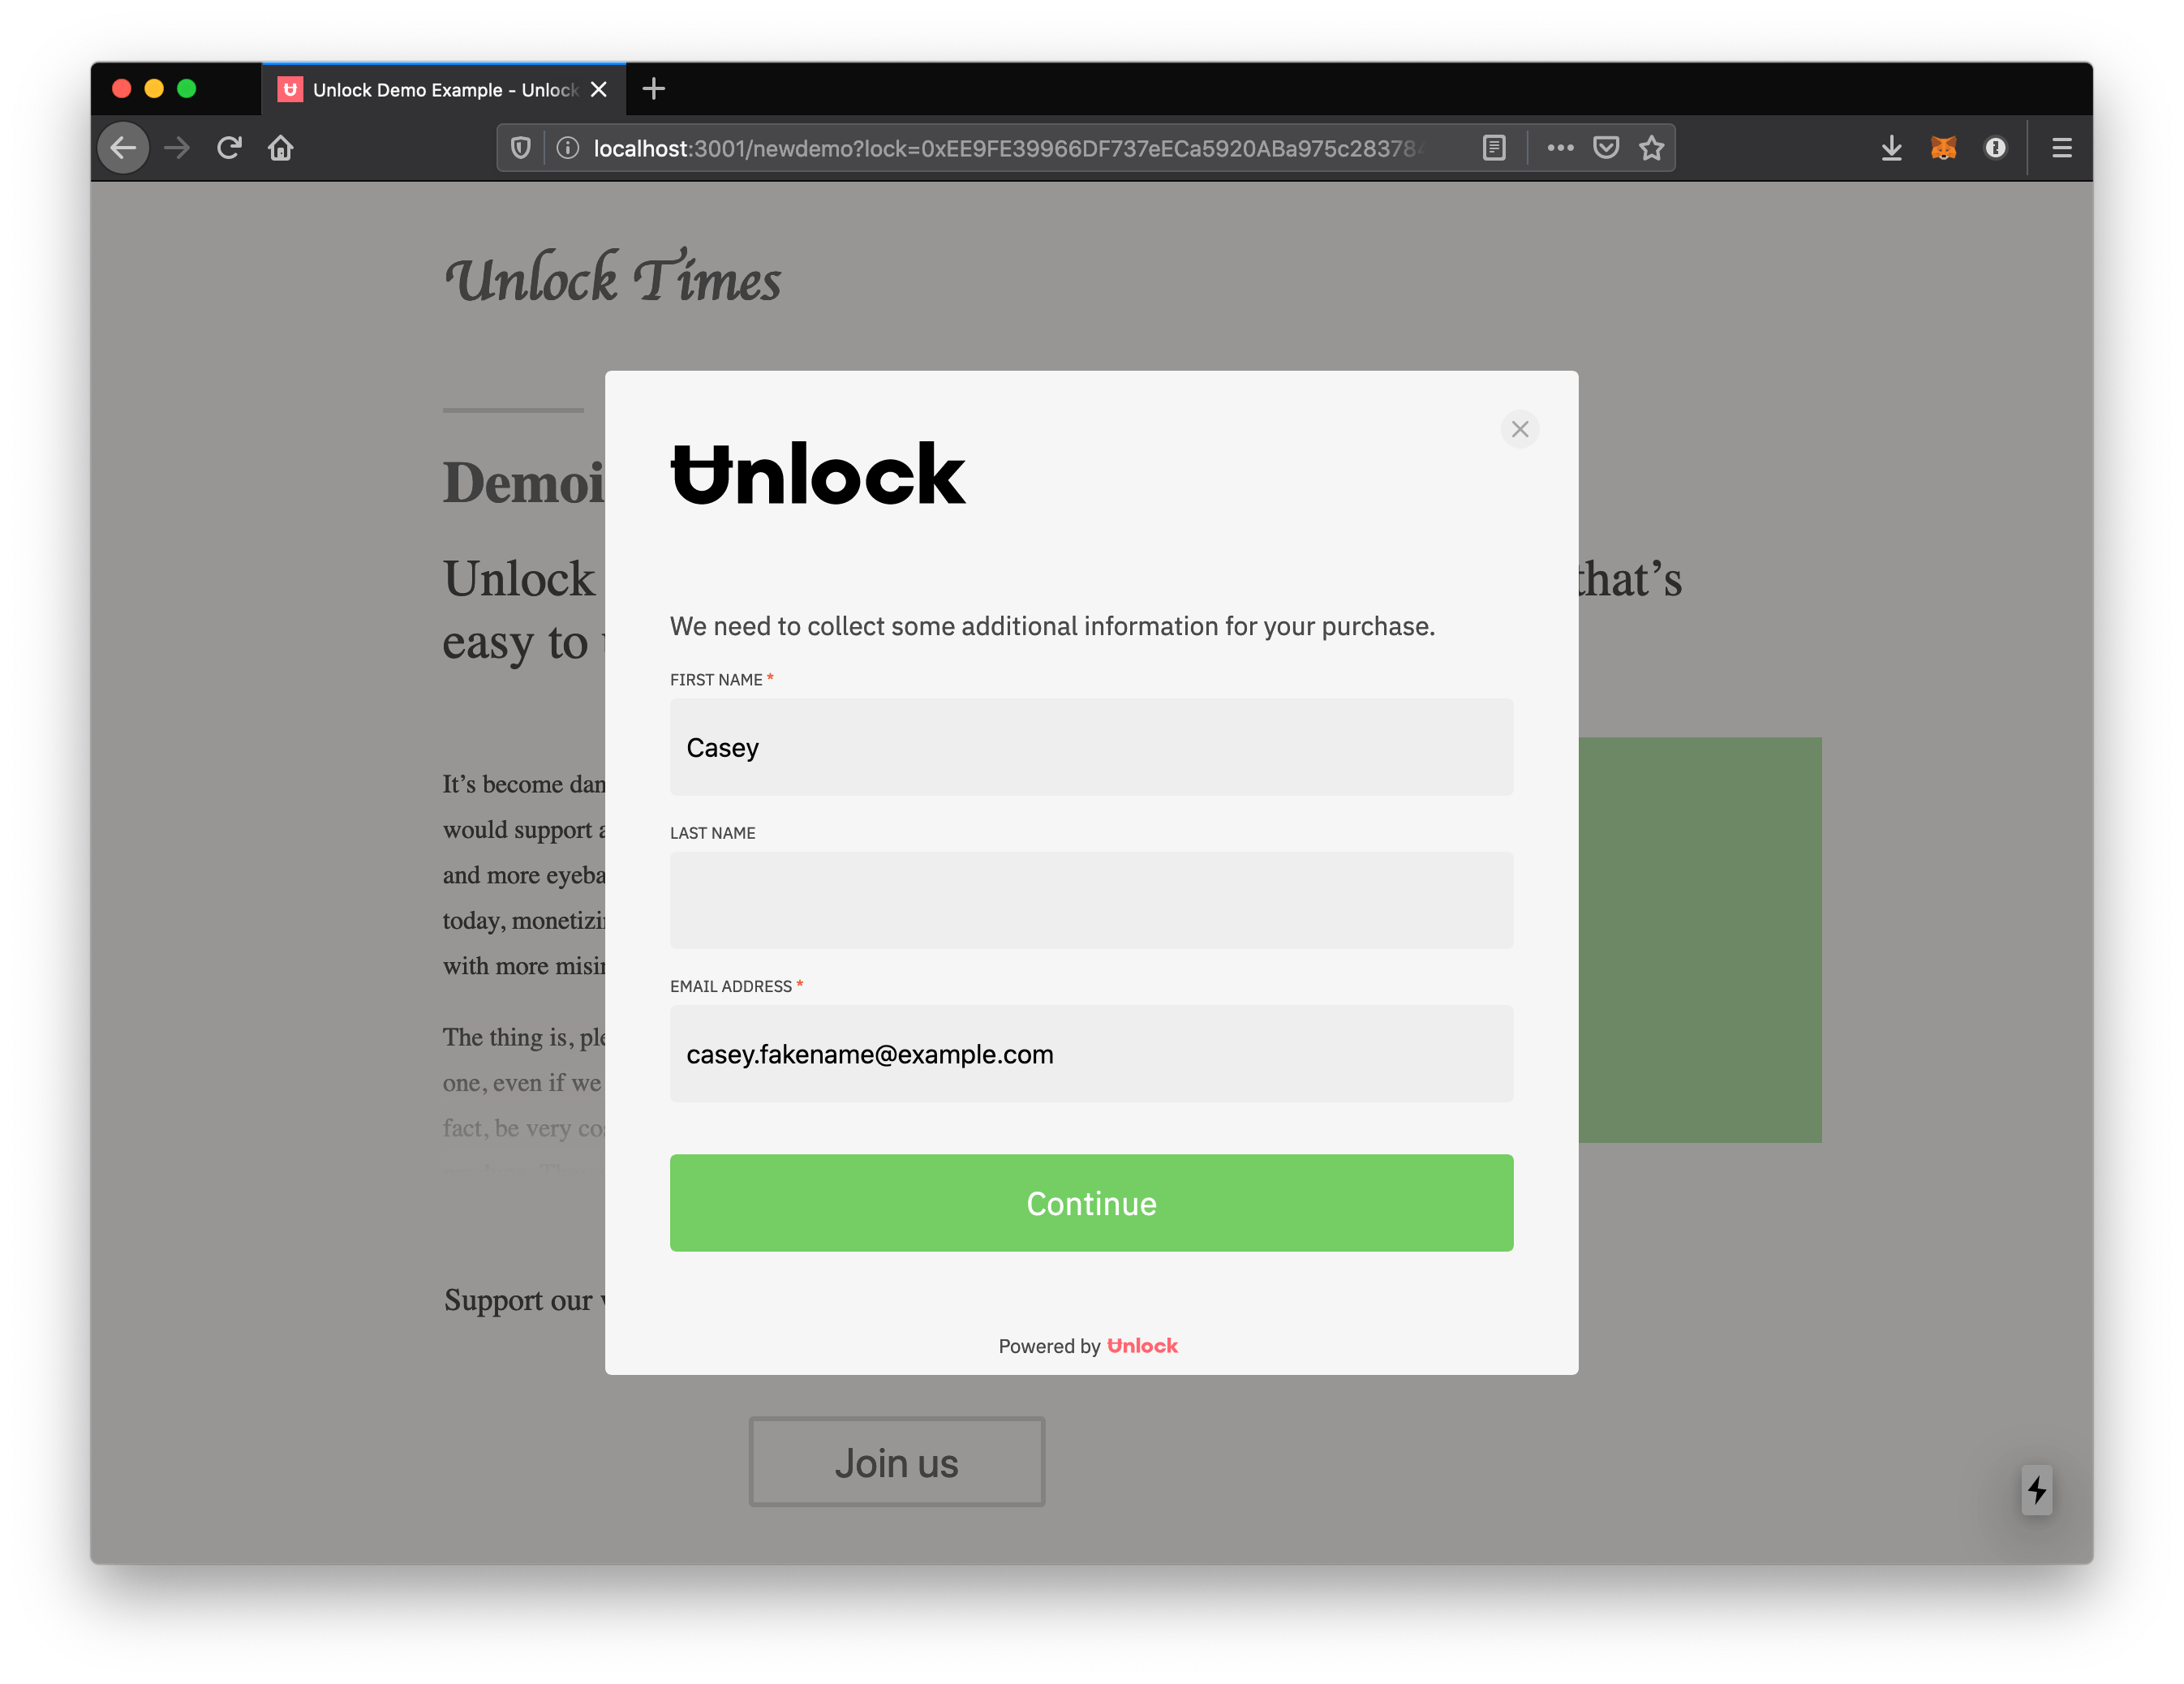
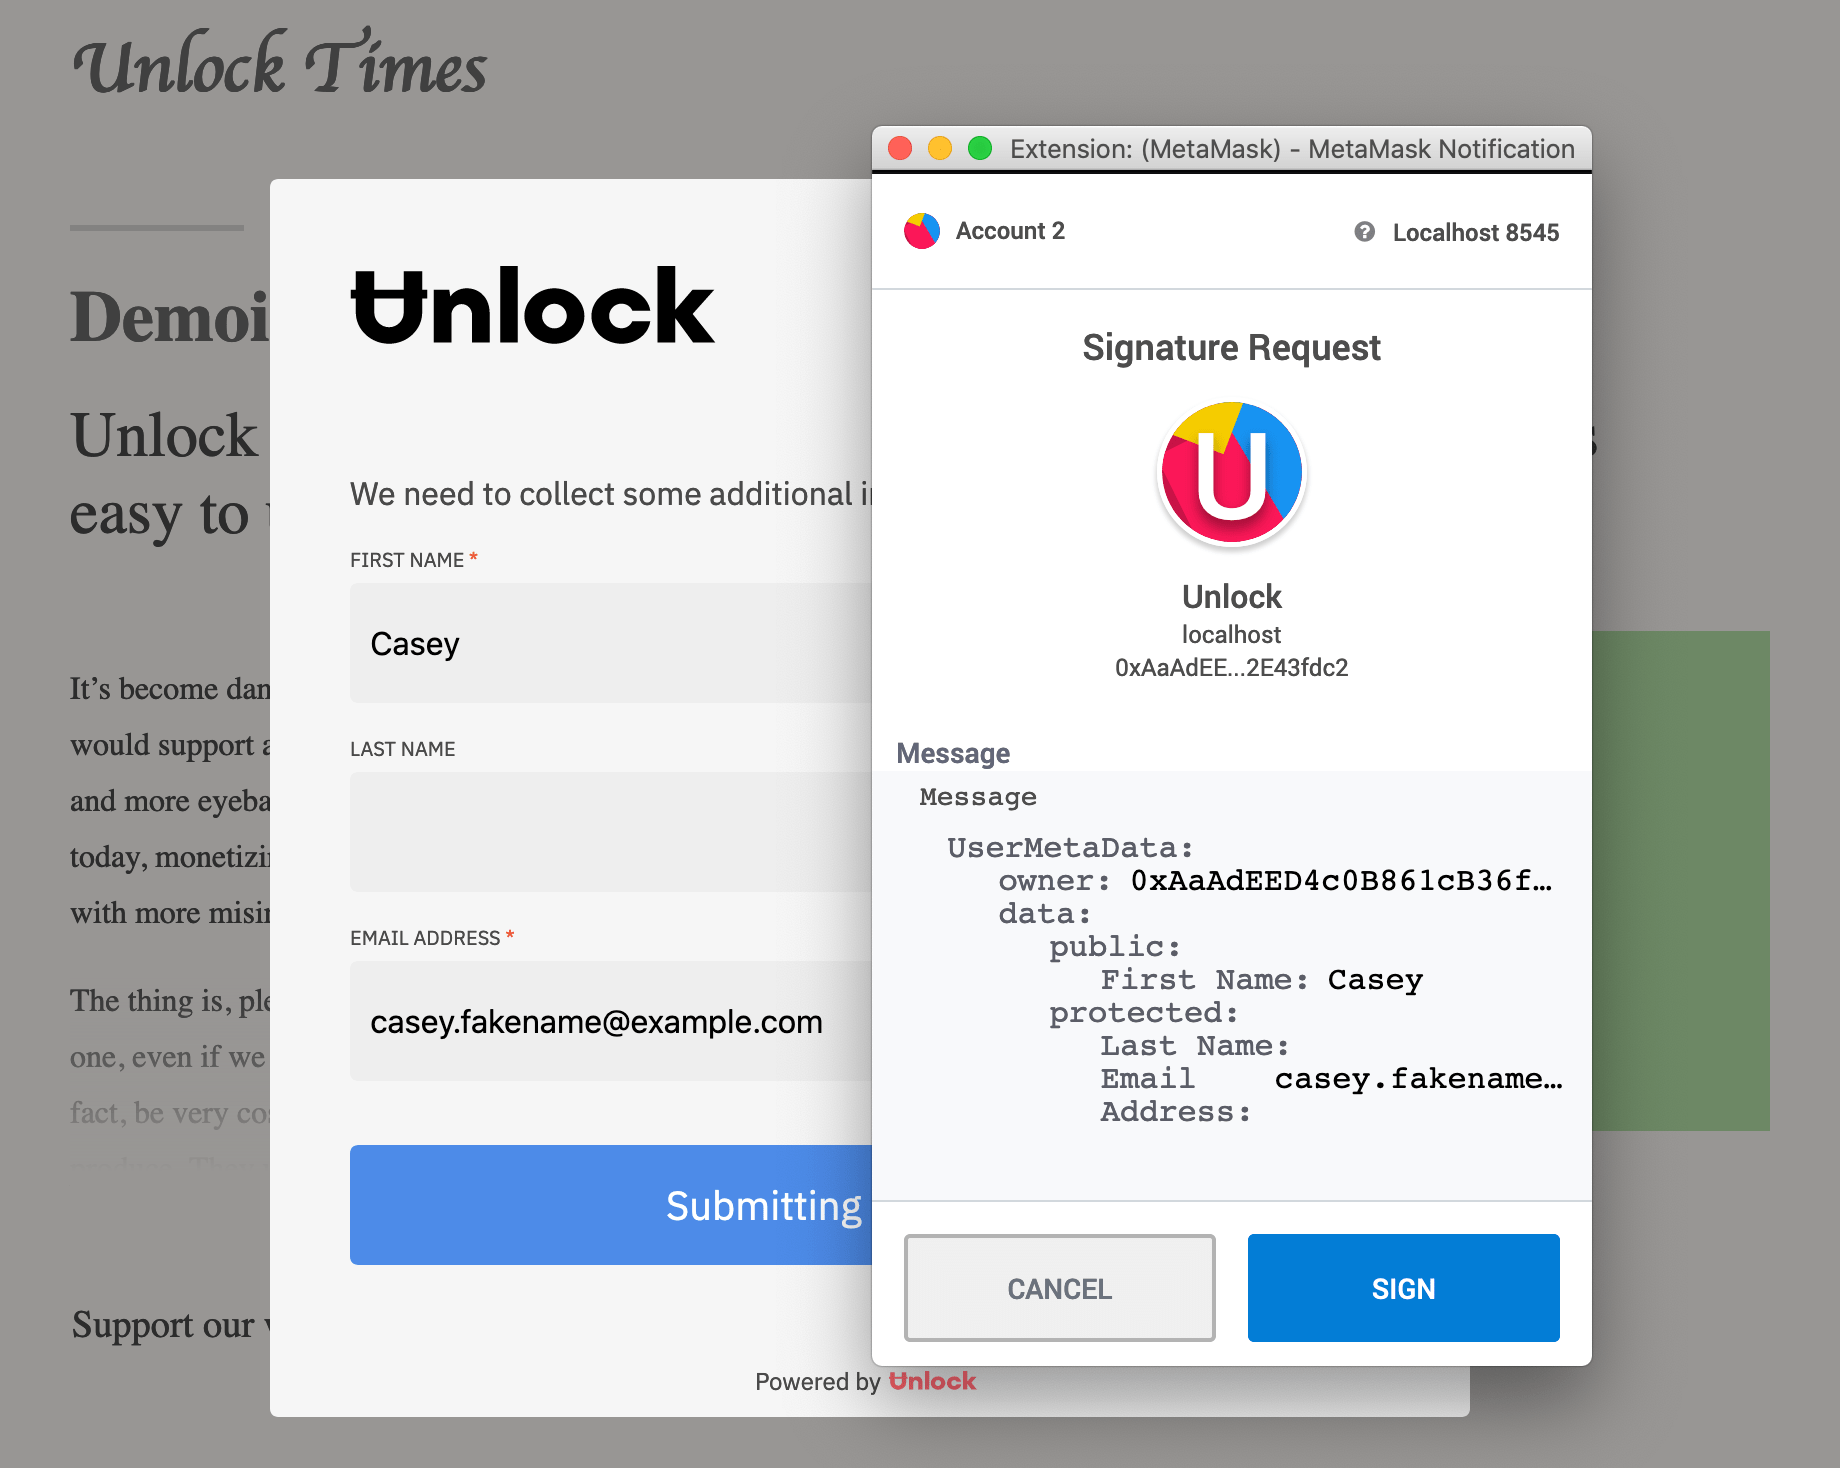
Then when they click the purchase button, they see the metadata fields we specified in the config. Note that the required fields have an asterisk next to them, and the form will not submit until they are filled. The field type provided in the config also maps to the kind of <input> element, so the email address field will also undergo some validation before it is accepted.
After submitting the form, the user is prompted to sign a message. This way we can make sure that the only person who can save information for a given address is the person in charge of that address.
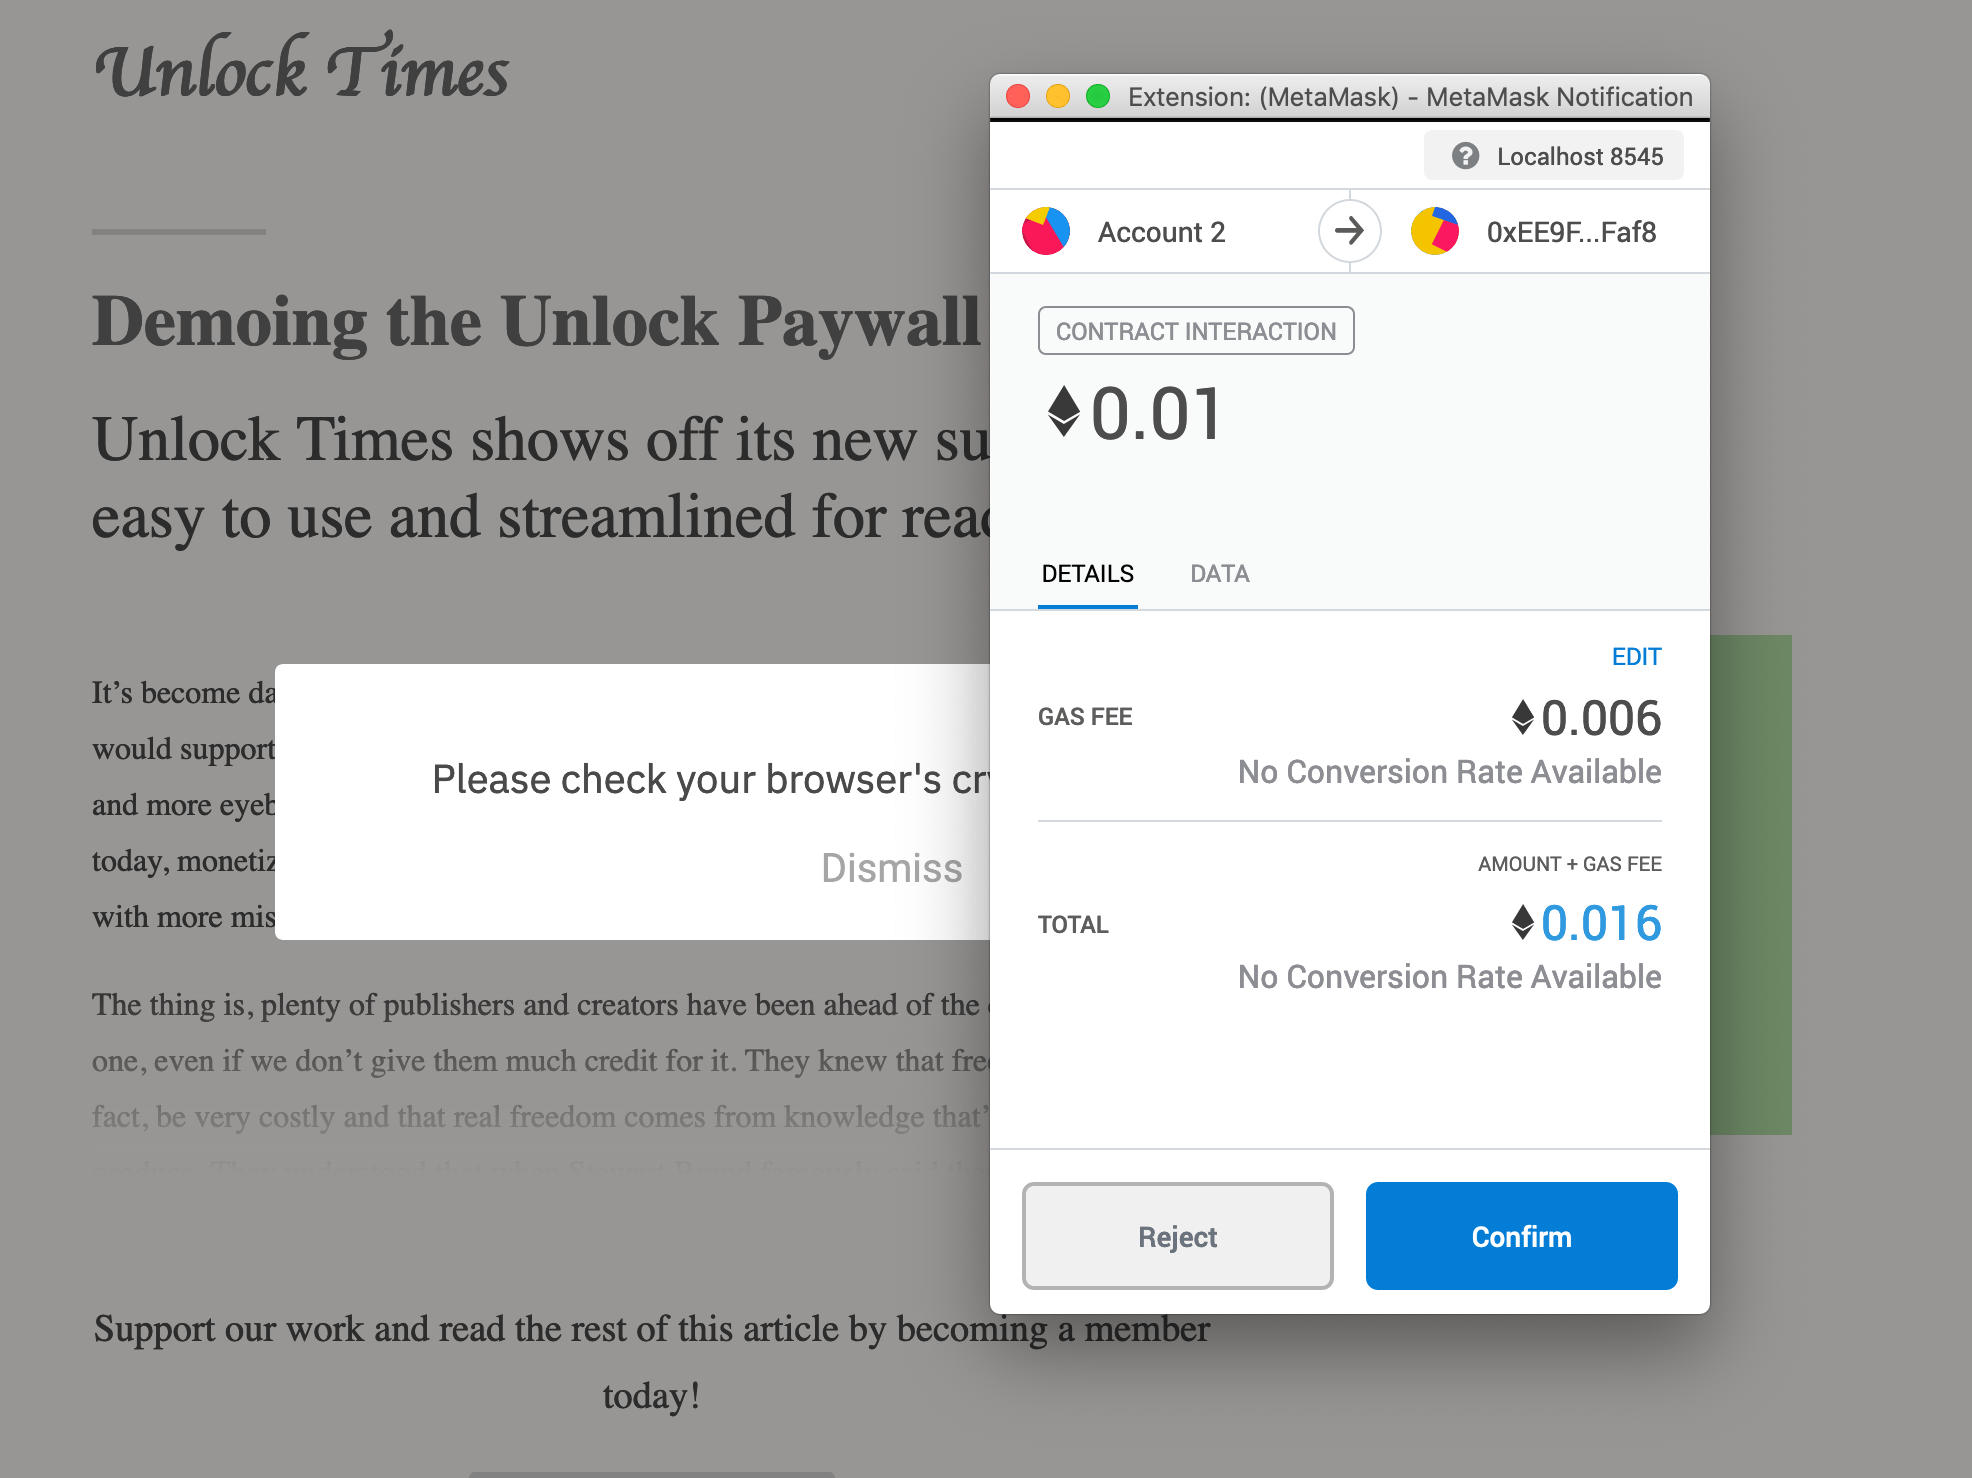
Once they sign the message, the normal checkout flow continues and the user is asked to authorize the purchase transaction.
Now they have a key and have access to the article.
But Wait, There's More
The other side of this process is from the creator's perspective. Our user has a key, and as part of the purchase they submitted information we can use to notify them of new articles.
From the Unlock dashboard, we can click the "Members" button on our lock, and that will take us to the following page:
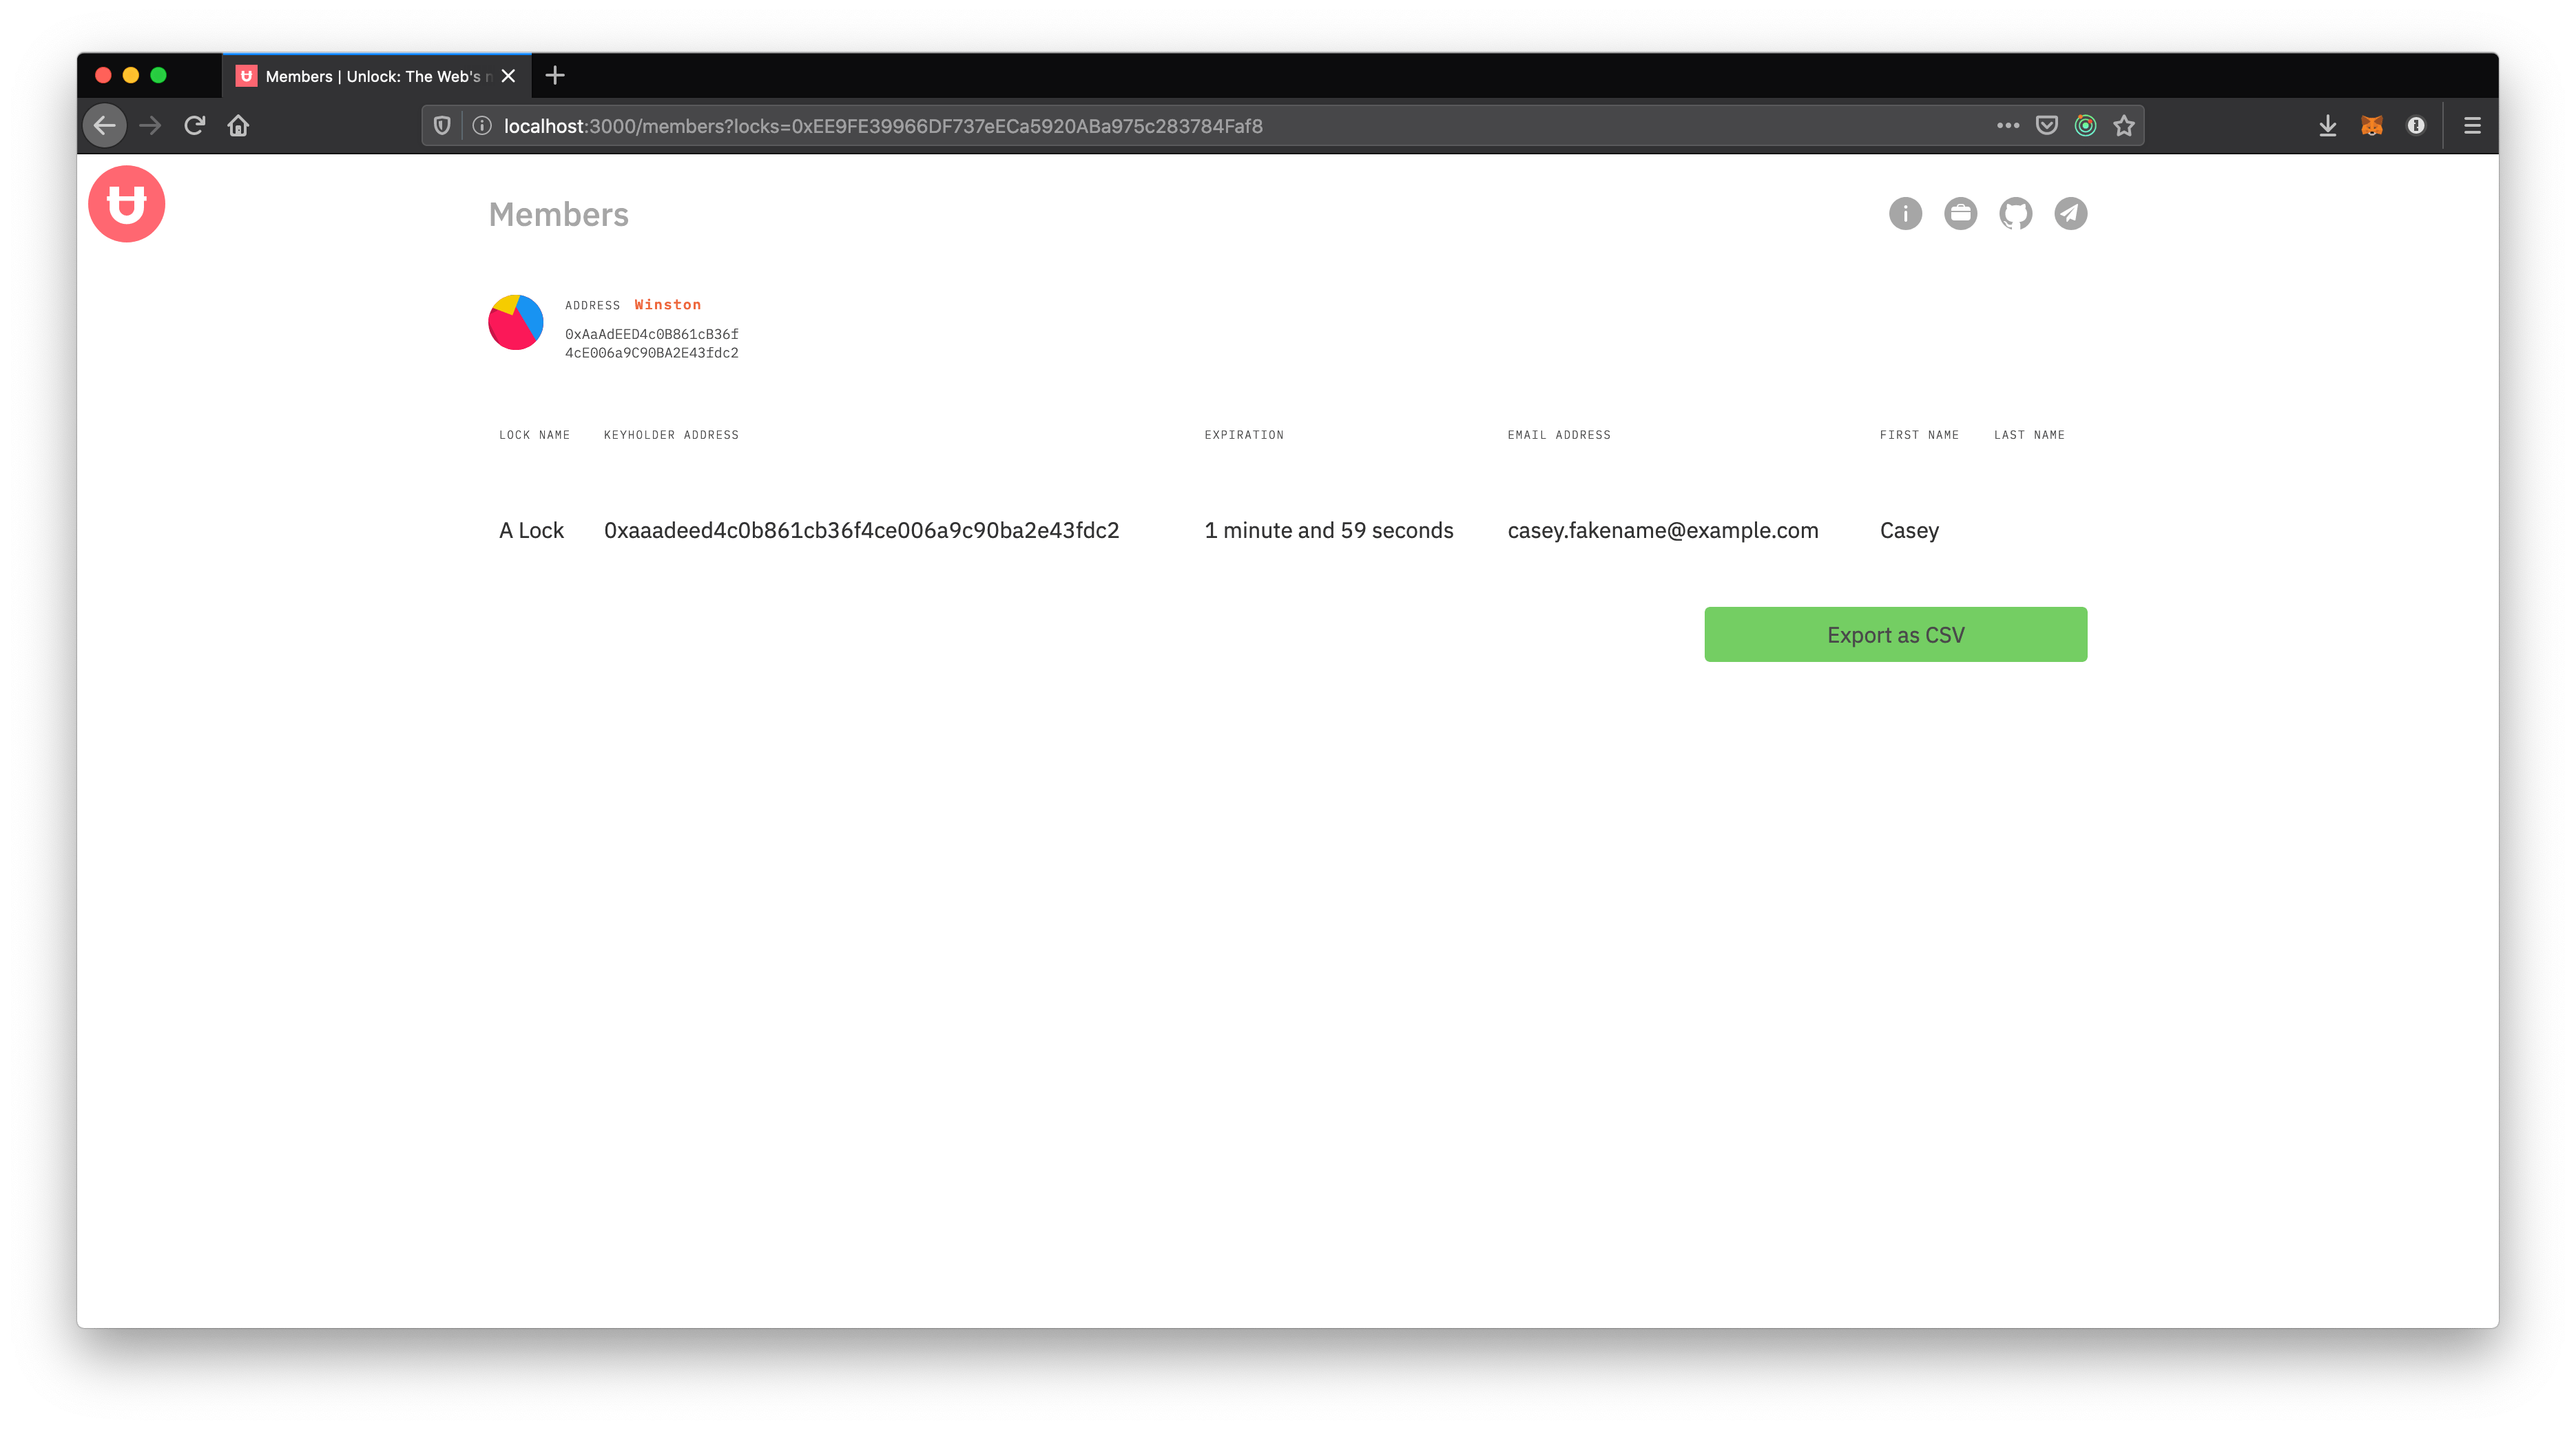
As you can see, it contains a list of all key holders on this lock, how long their key is valid for, and what metadata we have about them. In this case, we have a first name and an email address which are exactly the pieces we need for a mailing list. We only have one key holder right now, but in practice there may be many so the Members page provides a CSV export of the metadata for easier automated processing.