ETHDenver is the largest and longest-running Ethereum event in the world. There will be over 25,000 of us in Denver this year. It’s going to be awesome!
This also means that as members of the broader Ethereum community, we each have the responsibility to walk-the-walk and actually use the tools and solutions we are BUIDLing and telling others they should be using. Here’s how to do it.
ETHDenver is the largest and longest-running Ethereum event in the world. There will be over 25,000 of us in Denver this year. It’s going to be awesome!
This also means that as members of the broader Ethereum community, we each have the responsibility to walk-the-walk and actually use the tools and solutions we are BUIDLing and telling others they should be using. Otherwise, what’s the point?
There are going to be hundreds of side events at ETHDenver, and all of them need tickets. In years past, using a “default” ticketing approach like Luma or Eventbrite was what most organizers did.
Don’t do that.
First, you’re better than that. Furthermore, you want to space to succeed, and to make it succeed at scale, you need to help show practical use cases. So, you’re going to use on-chain ticketing for your event.
Here’s how to do it. Let’s walk through setting up on-chain tickets for your ETHDenver event using Unlock Protocol.
Time required: 5-10 minutes
Cost: Free
ETHDenver Event Ticketing with Unlock Protocol
To begin, you’ll need to set up the smart contract for your tickets. This smart contract will mint the tickets for your attendees, handle payments (if any), and is the blockchain mission-control center for your event. The EVENTS by Unlock Labs app provides the easiest interface to deploy your NFT ticketing smart contract, or “lock.” But before we do that, let’s get the things we need all in place.
Gathering all your event details
There are a few considerations in setting up your smart contract (which we call a “lock”). They are:
What’s the name of your event?
How many tickets do you want to make available? For example, if this is for a physical event, what’s the maximum capacity of the venue?
If you’re selling tickets, at what price, and in which currency? Note: You can make them free, too.
Do you want your tickets to be transferrable after they are minted, or do you want them to be non-transferrable (e.g. “soulbound”)?
Last but not least, is your ticket visual? That is, does your ticket have artwork or a design that you want attendees to see? If so, have that artwork file available.
Looking at the checklist above, here’s what we will be setting up in this example.
Name of the event: ETHDenver 2024 Happy Hour
How many tickets will be available: 100
Ticket price: Free
Are they transferrable? Yes
Great! We also have some sweet art for the ticket as well.
That’s some sweet art.
Setting up the smart contract for the event
We have those items answered! Now, let’s walk through the setup of a smart contract and NFT ticketing experience for the event. It takes about five minutes.
Here it is.
Setting up the checkout experience for ticketing
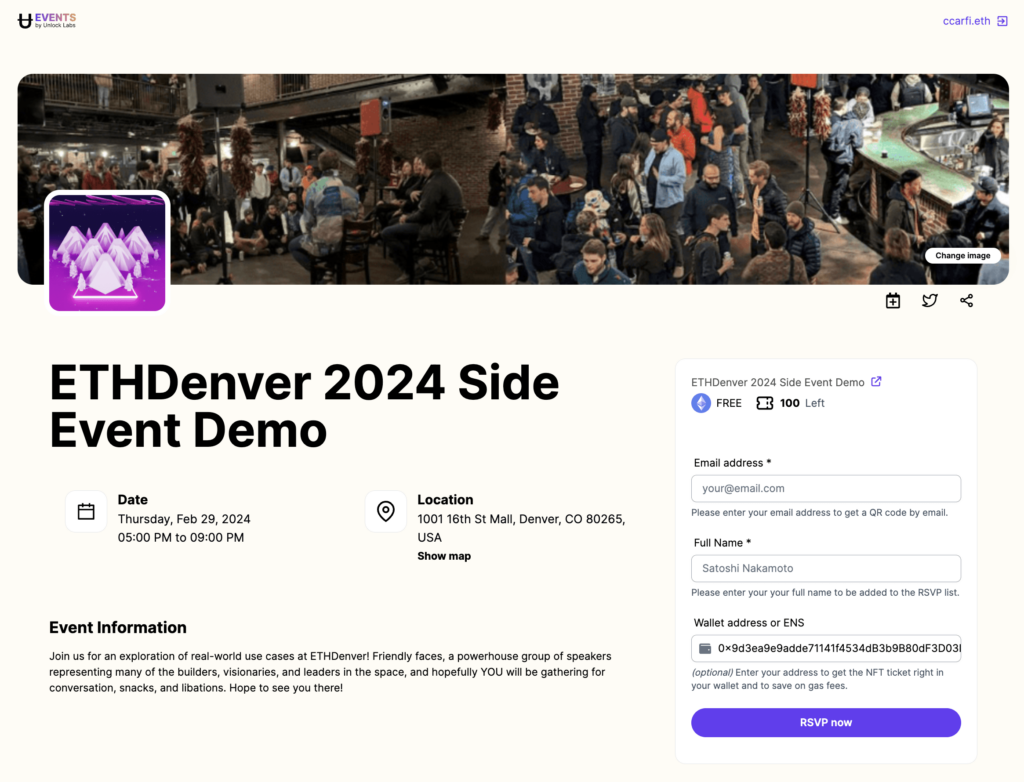
Using the Unlock event landing page
EVENTS by Unlock Labs creates a landing page for your event as part of the event setup process, as shown in the video above. In most cases, all you’ll need to do is share the URL for your landing page with your prospective attendees. They’ll be able to register for your event directly from the event landing page.
Embedding a checkout for tickets on your own website
Alternatively, you can set up your own checkout experience that you can link to from your own website. In this case, you’ll need to get things set up so folks can mint or purchase their tickets and embed that checkout link in your site. The most straightforward way to add a checkout experience where folks can purchase or claim the tickets for your event is with Unlock’s Checkout Builder.
The Checkout Builder creates a link to a checkout flow that is very similar to what you’d see on any typical online checkout experience.
The Checkout Builder configures a URL for you that you can send directly to prospective attendees in a newsletter, or you can copy the URL from the Checkout Builder and attach it as the link on a button on your website.
If you want to collect the email address of your attendees during checkout, you can do that, too.
Go through the Checkout Builder and set up the checkout URL for your tickets.
Airdropping tickets
The checkout experience above is best used if you want folks to signup and claim or purchase their own tickets for your event and you have a need to do it directly from your own website. You can also airdrop tickets directly to attendees if you know their wallet address or ENS address and send them an email copy of the ticket as well.
You can use the Airdrop feature on the Tools menu on the Dashboard to drop individual tickets into individual wallets, or you can airdrop them in bulk to up to 50 recipients at a time.
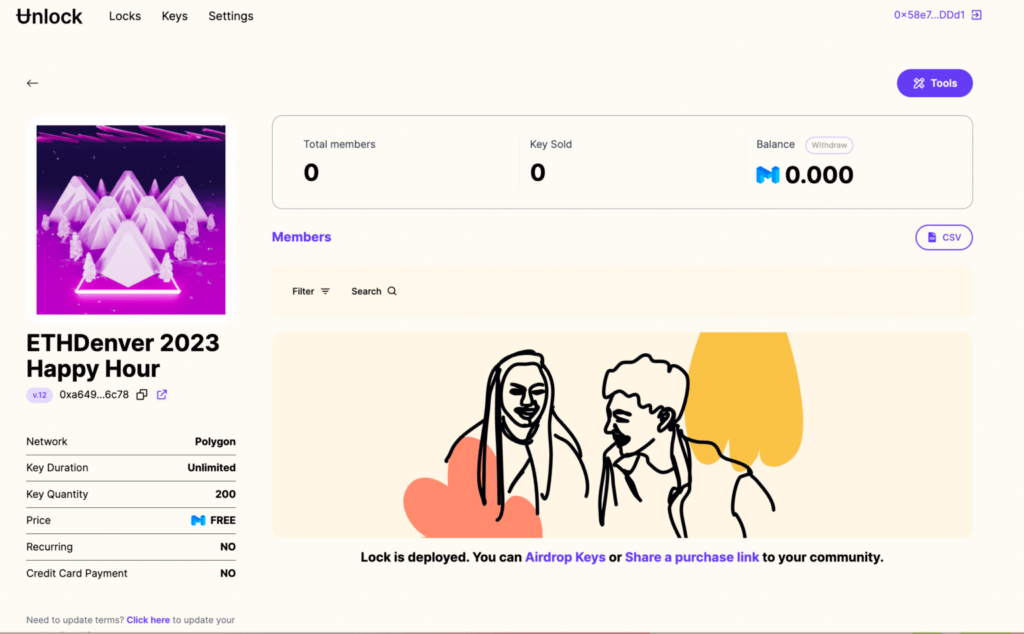
Getting your attendee list so you can check folks in at the venue
You will be able to list all of the key owners (attendees who have RSVP’d) as well as the information that you have collected right from the Dashboard.
You can export the attendee list as a CSV from that page; the easiest way to check folks in is to print off that list and check folks in at the door. (And, if you have an exclusive event where you want to check folks in digitally using smartphones, you can do that too.)
The attendee experience: Tickets in their wallet
Method 1: Show a ticket via a QR code from an email
Attendees will be emailed a ticket to your event, and they can show the QR code from the email at the door.
Method 2: Show a ticket in a mobile wallet
Since everything is on-chain, your attendees will be able to instantly see their tickets in their wallets, either after they claim/purchase them, or after you airdrop a ticket to them. They can see their tickets in their collections on marketplaces like OpenSea as well.
Attendees can go to https://app.unlock-protocol.com/keychain from their mobile wallet’s browser, scroll to their ticket, and tap the QR code button on the screen. This will bring up a QR code of the ticket, which can be scanned by any smartphone camera.
Of course, you may choose to just check people in from a printed list from the CSV file as well, and that’ll totally work in almost all cases.
That's it!
So, those are the basics for you to set up ticketing for your ETHDenver event. Let us know how it goes! If you have other questions, hit up the Unlock Discord and the Locksmith community will help you out!